This is the decorative origami paper envelope is a perfect craft that really helps you bring back the art of sending cards. "Snail mail," as it is called, is a lost art, but a beautiful idea like this makes it easy to really update a card or note with something beautiful that can be added to a gift box or sent out in special mail. It is simple to make, looks beautiful, and creates a special gift to send to someone. These envelopes are made using a simple origami technique that is sure to bring a smile to any face!
Jump to:
Origami Paper Envelope Craft
If you've been like me and avoided trying origami out of fear of failure, don't! This easy little envelope idea is a super way to start your paper-folding experiments. While I have tried many different origami-style crafts in the past, this is now my favorite and, by far, the easiest I have made.
A lot of people want to do origami but can’t think what they will do with it after they have made it. With this origami envelope, you have a lovely gift to give someone. These envelopes can be added inside of a gift bag when you give presents, or even hand to that friend or family member directly. I absolutely love that they are so beautiful and elegant, but take almost no time at all to create!
What Paper Should I Use for Homemade Envelopes?
You can use just about any paper for these homemade envelopes. Anything from recycled book pages to printer paper or special stationery can be used to create these gorgeous envelopes.
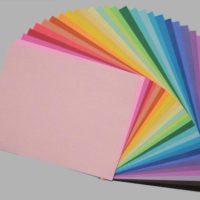
While I often recommend using cardstock for projects, I find it a bit too heavy for origami folding. The thinner and lighter paper works best for the intricate folds and is much easier to handle. So, avoid cardstock, and instead reach for colored craft paper.
If this envelope is for display reasons or if it is to go inside of a gift, you will want to decide which type of paper will be best. The weight, or heaviness, of the paper that should be used, will vary depending on what you are doing with the envelope.
Can These Be Mailed?
These origami envelopes are beautiful to send to friends and family. However, they can not be mailed on their own. You will want to use these envelopes inside of a package. They would not work to mail a letter but will be something people would love to receive in their package.
If you want to send just the card, you can use this as an inside envelope and slide the entire card inside a cushioned mailer. I, however, prefer to hand-deliver them or add them to gifts.
Note: If you choose to mail this, be mindful that the folds may get damaged by folding or having other mail stacked against it. If you want to preserve the beauty of origami, I highly recommend placing it in a box or stiff envelope. You will also need to make sure it is weighed and proper postage added so it doesn't have postage due or returned to the sender.
If you are like me and make several of one project at once, you may need somewhere to store them until time to use. That's why I love this easy upcycled cardboard organizer box. Super easy to make, and perfect for stacking envelopes and cards in for future use.
Variations to Decorate Envelopes
While these are absolutely stunning as they are, I know that we sometimes like to personalize or decorate things a bit more. For this envelope, the folding is a decoration in itself, but I'm no stranger to adding embellishments. Below are a few ideas and ways to make your envelopes just a bit brighter or more special.
- Add glitter along the edges of the folds
- Use a stamp with a special pattern or initials to stamp the paper before folding
- Glue or stick colorful or patterned stickers onto the envelope.
- Use two or three different colors of paper glued together to create the envelope
- Dip into watercolor to create a fun dyed look
- Address the envelope with brush lettering or calligraphy
- Glue on small feathers or tiny flowers as embellishments
- Attach a strip of ribbon along edges
- Use patterned scrapbook paper, glitter paper, or even tie-dyed paper instead
Supplies Needed
Optional: I use glue to seal the edges on some of these envelopes, but that is not required.
How do You Make an Origami Envelope?
Start by folding your paper over to create a triangle leaving the lower half of the paper unfolded as shown.
Now, you will fold up one corner of the bottom so that it is even with the bottom of the triangular flap.
Next, you will fold that section of paper over at the edge of the bottom fold as shown.
Now, fold over the other end so that it creates a smaller rectangle envelope shape with a bit of extra overlapping paper.
Now, unfold the paper and flip it over, leaving one corner folded over as shown.
Now, you will fold over the opposite corner.
Once folded, you will then start folding that piece back and forth, starting at the edge close to you and folding in accordion style until the small point is left and folded in the center.
Now, you will fold this entire piece in half vertically to create the envelope shape as shown.
Fold the flap over with the folded origami piece as the envelope flap as shown.
Tape or glue in place as desired before use.
If you like working with paper crafts, don't worry - I have tons to choose from! No need to be bored when you have these easy paper flowers, old book page flowers, paper flower wreaths, and this paper flower photo card. For those who like paper folding, check out this easy origami book page wreath. It's so simple but super fun to make!
Crafter's Tip
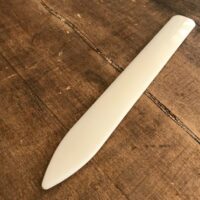
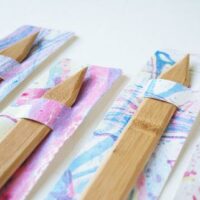
One of the best investments I ever made for my craft room was a paper folder. No, not a fancy machine, but a simple knife-like piece of plastic or wood that works well to fold the paper in even lines. I love my bamboo paper folder I got on Etsy.
Decorative Origami Paper Envelope Craft
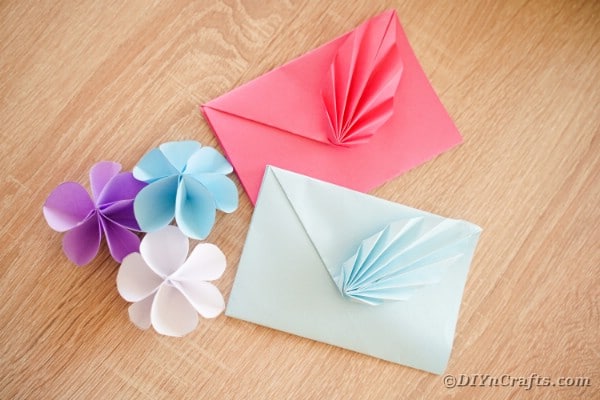
Simple folding techniques turn basic paper into this decorative origami paper envelope craft that is a beautiful way to present a gift or card to friends and family!
Materials
Tools
Instructions
- Fold a piece of paper over itself to create a triangle;
- On the open bottom of the paper, fold one corner over;
- Then, fold that corner over again at the crease;
- Now, you will fold the opposite side of the paper toward you to create the smaller rectangle shape of an envelope;
- Unfold the paper leaving one corner folded, and flip over;
- Now, you will fold over the side not folded and create a triangular flap;
- Begin folding that corner over itself in an accordion-style until the small tip is folded in the middle;
- Now, fold the other sides back together in half to form an envelope turning the accordion into a fan shape;
- Tape or glue in place as desired.
Notes
Have fun using different colors and patterns of paper with this process to fit different themes for birthdays.
Recommended Products
As an Amazon Associate and member of other affiliate programs, I earn from qualifying purchases.




Vivian
I am very interested in creating this beautiful fold to enhance my cards. Can you please let me know the dimension of the paper stock that I would be starting with and what size card it will fit. Thankyou. Lovely idea!
Layson Lavina
What size is the paper dimensions?
Vanessa Beaty
Simple a4 size