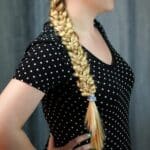
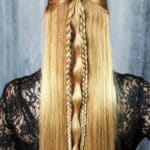
Isn't this half up side braids hairstyle absolutely gorgeous? I absolutely love this idea and know you will as well. The tutorial video makes it simple for anyone, and the style itself is super versatile. This works well for most hair textures and lengths. Plus, it looks great for work and parties and is great for those lazy weekend days at home.
Jump to:
Easy Half Up Side Braids Hairstyle
This style is really a combination of two simple French braids at the top of your head. It helps pull some of your hair away from your face while still allowing the bulk of your hair to flow freely down your back. I really love this for those days when my hair just can't be tamed. The simple braids make it easy to keep out of my face while I work but are still feminine and pretty.
For those who love braiding their hair, this list of waterfall braids is a great place to find more inspiration. I also love this gorgeous mermaid half braid hairstyle. So beautiful! You may also love this braided updo princess hairstyle.
Can You Add Accents or Ribbon to This Braid?
You can definitely add a simple ribbon or accent pin to these braids. I love the idea of adding a decorative ribbon to one or both of the braids. You can easily weave it in while you braid or use a Topsy Tail after the braid is secured.
An easier option would be to add a small beaded comb or beaded pin to the braids to add just a bit of sparkle on the sides. Both options work well and add just a bit more unique flair to the style. I especially love these little gemstone bobby pins. So pretty and simple.
Tools I Use
Other hair tools I love:
I also like to use one of these homemade hair masks at least once per month to really add some moisture back to my scalp and help with split ends on my hair. If you have shorter hair, you might like to check out these tips to help your hair grow faster.
How to Create an Easy Half Up Side Braids Hairstyle
To begin, you will want to come and detangle your hair. For these smaller braids, I also recommend grabbing a parting comb to make sure your lines are nice and clean, as this is a tighter braid.
Step 1
Begin by sectioning off your hair. You will want to part your hair on the side, then part again horizontally midway back, pull the back section back and tie or clip out of the way.
Step 2
Now, you will divide that front section into two sections, with the top area being larger than the bottom as shown. Clip that top area back with a separate clip.
Step 3
Begin braiding that smaller front section of hair by dividing the hair into three small sections. You will French braid this section, so start at the very front with three sections and continue moving over and downward.
As you move downward, stay close to the hairline and pull this braid tight.
Step 4
As you near the ear, you will move the sections of hair away from the head and simply braid a single plait down to the bottom.
Secure this braid with a small hair tie.
Step 5
Now, you will move on to the top section that was clipped back earlier.
You will begin braiding just as you did with the first braid, slowly French braiding tightly against the scalp.
Step 6
Continue braiding against the scalp at a curve toward the side until halfway between the hairline and ear. At this point, you will begin making a single plait downward apart from the side of your head.
Once your braid is complete, you will tie it off with a hair tie.
Step 7
Now, you will grab a small section of hair from underneath the back section.
Bring this hair up to meet with the two braids, and tie all three together with a hair tie. This will keep your braids underneath the rest of your hair and secure against your head.
Lastly, you will just comb the rest of your hair out and loosey lift the back and top sections over to cover the back section of the braids.
Now, you have a beautiful braided hairstyle.


Leave a Reply