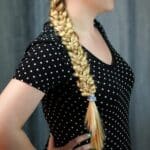
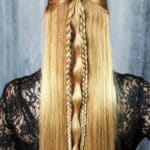
Who knew you could turn a simple braid into such an elegant style? This braided side low ponytail reminds me of the styles worn in the Hunger Games movies. Simple, functional, but oh, so beautiful! I love this idea for a fun take on a basic ponytail or braid. It can be functional for every day or take a basic style to an evening event with ease!
Jump to:
Elegant Braided Side Low Ponytail
There is nothing I love more than an easy hairstyle that looks absolutely stunning. It makes me happy when I can create a look in just a few minutes but walk out the door feeling like a rock star because it looks so good. This side ponytail is a great take on two of my favorite styles. The combination of a ponytail and a braid is always a hit, but the side pony really makes it look elegant.
If you have shorter hair, this style will be a little more difficult to manage. I think it works best for medium to long hair. For shorter hair, you will likely need more bobby pins to hold it in place.
I love ponytails and have gathered a list of the best easy ponytail ideas for you already. I'll have to update it with this addition, as it is fast becoming a favorite on a regular basis. Another fun way to style your hair with braids is some of these great waterfall braid ideas. Another of my recent favorite styles is this half up half down hairstyle that has a fun little twist for a little something extra.
Do I Need to Curl My Hair for This Style?
If your hair is naturally wavy, it will likely look more like our model. For those of us with straight hair, you may need to curl it if you want the loose waves as shown. My hair is very straight, so I like to use the hack for curling your hair with paper towels. It really makes it easy to add some waves. You may also prefer this tutorial for making loose waves in your hair instead.
If you prefer, you can simply let the straight hair hang without waves. It will still look beautiful!
Tools I Use
Other hair tools I love:
How to Create a Braided Side Low Ponytail
Before you begin braiding your hair, I recommend using a comb or detangling brush and combing to remove any tangles and smooth the hair. For this braided style, I like to add a bit of mouse to my hair to help keep it secure and styled for longer.
Step 1
Start on the front side of your head and begin braiding.
You will braid along the side of your head in a French braid style, pulling more hair into the sections with each braid.
Continue braiding until you reach the nape of your neck, adding hair in as you go and pulling tight.
Step 2
As you reach the nape of your neck, continue this braiding process moving the braid toward the side, rather than straight down.
Step 3
When you reach the nape of your neck, move the braid over slightly toward the back.
Instead of continuing the braid around the side of your head, you will now braid straight down with just the sections gathered so far and secure with a hair tie.
Step 4
Now, you will leave that braid hanging while you gather the rest of your hair together and bring it into a low ponytail on the opposite side of your head.
Step 5
Pull the braid over to the section you just gathered, and secure them together on the side with a hair tie. Once this is secure, if your braid is longer and showing through below the hair tie, you can remove the bottom tie on it and loosen the ends so that it is unbraided. You really only want the braid on the section moving around your head and above the hair tie.
Step 6
Now, you will take a small section of the unbraided hair and wrap it around the hair tie to disguise it and bring the look together.
You can easily add a little beaded accent or ribbon if desired.
If your hair is naturally straight, you can use a curling wand to add a few waves to the loose ends if desired.


Leave a Reply