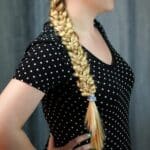
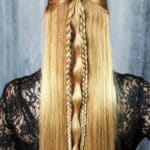
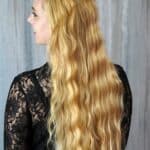
If you have long hair, then you will love this simple half up half down hairstyle. This tutorial is a bit more than your usual half-up style, as this has a cute twist and added embellishment.
This works not only for casual days at work but also for any event that is not formal but a little bit dressy.
Jump to:
Half Up Half Down Hairstyle
I find this hairstyle works best for wavy hair or hair that has been curled. Straight hair can create the same style, but the waves add a bit more sophistication to this otherwise simple hairstyle.
While it is shown on longer hair, it can work on shorter styles, just remember that some short styles will need more bobby pins or barrettes to hold the style in place.
If you are tired of a basic ponytail but don't want your hair hanging down in your face all day, this is a great idea! For those who have straight hair but want the waves as shown, check out this fun way to curl your hair using only paper towels!
Have curly hair and get frustrated trying to style it? Check out this video for how to style curly hair easily!
What Are The Best Tools to Hold This Hairstyle in Place?
For this style, longer hair will work fine with just 1-2 bobby pins or a small barrette to hold it in place. If you have a shorter or short layered hairstyle, you will definitely need a few extra pins to hold the sides in place when twisted.
Some of my favorite options are the classic Goody bobby pin in a color close to my own natural hair color. This blends in well and isn't as conspicuous when using multiple pins to hold your hair in place properly.
If you want or need to have something a bit stronger to hold your hair in place, I highly recommend investing in snap clips. They aren't as easy to hide but work great for holding your hair more securely.
Does My Hair Need to Be Clean or Dirty?
Personally, I find that my hair tends to fall out of barrettes and pins when it is freshly washed. I have very fine hair, and that means that it doesn't always stay in place easily.
So, if I am 1-2 days after a wash, then this style will stay in place longer and look better. This also applies to when I am curling my hair or styling with anything I want to hold a wave or style for very long.
If you find your hair feels in need of a boost, check out this list of amazing homemade hair masks. These are excellent for restoring tired tresses.
ProTip: If you want to go longer between washing, I absolutely love the OGX Dry Shampoo. There are several options for different hair types and needs. This brand isn't a "one size fits all" product.
Having tried several types in the past, this is the only one I like. It doesn't create a heavy build-up on my hair or discolor it when used.
Tools Needed for This Hairstyle
- Wide tooth comb or detangling brush
- Bobby pins
- Small barrette
- Beaded accent comb, barrette, or beaded vine
How to Create the Half Up Half Down Hairstyle
Step 1
Begin by combing or brushing your hair to remove any tangles. This will create a clean and ready base for the next steps.
Step 2
To begin, you will gather a section of hair at the forehead that is around 2" wide and pull it toward the back.
While you pull this back, you will slowly twist the hair. As you twist, you will begin rolling it inward toward your scalp as you go.
If your hair is especially thick, you can pick up more hair as you move backward to make a thicker twist.
Step 3
Once you have that side twisted back to the middle of the back of your head, you will use a bobby pin to secure against the scalp.
Step 4
Repeat this process on the second side, securing in the back when twisted.
Step 5
Now, take both sides and twist them around each other; then, you will secure them in the center with a bobby pin.
Step 6
When both sides have been twisted and pulled back in a half up half down hairstyle, it is time to secure with a small barrette, snap clip, or additional bobby pins. If your hair is fine or you have flyaways, you can also spritz a bit of hairspray at this time to help hold it in place.
Step 7
At this point, you can twist or braid the hair a little more to secure it or leave it as is before adding your final touches.
Step 8
The final step in creating this hairstyle is to add an embellishment to your hair. A simple clip or comb with beads or flowers can be slipped into the sides of the twist.
Add this against your scalp, leaving the twist showing, but the additional flowers add a bit of life and extra beauty to the style. If wanted, you can use a curling wand to add a bit of curl along the sides.
Now that you've tried this easy but beautiful style make sure to comment and let us know what other styles you want to see!


Leave a Reply