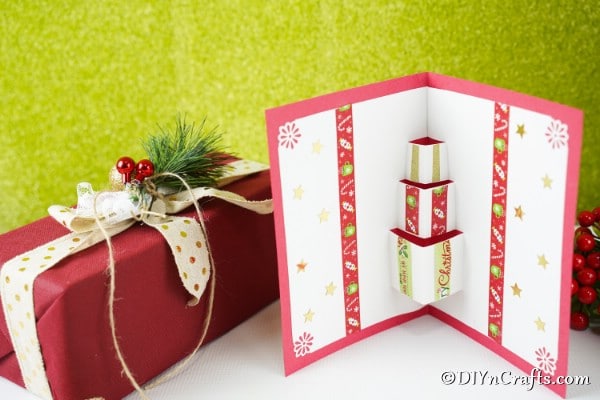
These gift box 3D Christmas cards will blow your mind! They are so easy to make and look so incredible. You will feel like a true artist when creating these cards to display or share with friends and family this year.
This idea is easy to customize with your holiday color themes and is perfect for sharing at holiday card exchanges.
If you missed it, check out these 3D Christmas tree cards we recently made. I love learning about how to make elements in my 3D crafts this year.
It is so cute and fun to make and customize for your friends and family this year because who wants to send a generic card for the holidays? Not me!
Jump to:
Gift Box 3D Christmas Cards
I love receiving beautiful cards in the mail. During the holiday season, I tend to get the most, and I always look forward to opening my mail for another pretty card to add to my mantle.
This year, I am excited to share this tutorial for making your own homemade 3D Christmas cards to send to your friends and family.
There is something magical about this card. Opening it up, you see the beautiful design, but then you are wowed by the way the boxes magically appear in 3D! I love how fun it is to give to others.
If you like this idea for a 3D craft, then make sure you check out how I made these 3D paper snowflakes for decorating during the winter months. My 3D stars are another fun craft that adds whimsy to the holiday decorations.
What Can I Use to Make My Card Unique?
Decorating this 3D Christmas card is the best part! I used some simple stickers and washi tape, but you could use whatever you want for this craft.
Below are some fun ways you could decorate your card before gifting that will add your own personality to the project.
- Washi tape in solid colors or a variety of holiday themes.
- Stamps and ink pads are in fun holiday colors, adding things like stars, angels, snowflakes, and reindeer to the front of the card.
- Use stencils to paint a monogram on the front.
- Add fabric pieces to the "boxes" for more depth.
- Attach mini bows to the gifts to make them stand out more when opened.
- Use a gold leaf or gold paint to make the card look "richer."
Add this miniature Christmas tree out of cardstock strips to your holiday decorations. It's perfect to match your cards with custom colors and patterns! I love making paper cards, trees, and ornaments, and this is one of my favorites.
Can My Kids Make This 3D Card?
Definitely! Unlike some cards and decorations, this is the one the kids can easily help you make. Younger kids may not be great at folding and cutting, but it's ideal for teaching them, and it's something older kids can help them learn.
I would let them help make these if they want, but sometimes, more intricate crafts are harder for the younger kids. I like to have an option they can handle easily. Of course, the kids love these color your own ornaments printables, so they can customize their own while I work on mine.
What is the Best Way to Mail These 3D Christmas Cards?
Since this card is a bit thicker than a traditional holiday card, you will need a bigger envelope, as well as more postage. I recommend making your own paper envelope or using a larger manilla envelope to send this via USPS.
One of my favorite things to do is to grab this printable Christmas advent calendar for ideas on who to send this card. You can hand-deliver these cards as suggested on the list. I love the idea of paying it forward with my advent rather than opening a gift for myself. How about you?
Supplies Needed
- Red and white cardstock
- Washi tape
- Decorative stickers or stamps
- Pencil
- Ruler
- Paper cutter
- Scissors
- Paper glue
- Corner punch
- Folding Knife
How to Make Gift Box 3D Christmas Cards
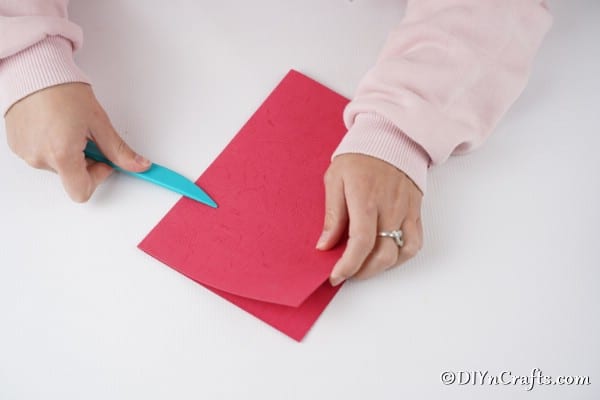
To begin making this card, you will start by choosing the color of paper you want on the outside. I chose red. You will fold this in half as shown. To keep the folds nice and even, I use a folding knife. You can also use any flat surface, like a book edge, credit card, etc., to keep the folds even.
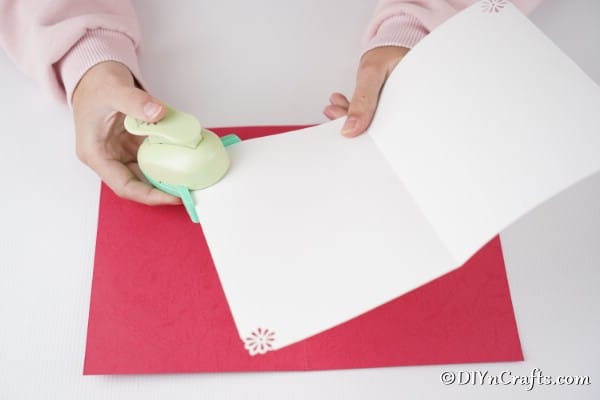
Next, you will cut your alternate color (I used white) and cut it about ½" shorter around all sides than your main paper color. At this time, you can use a hole punch in a fun design for the holidays and punch out the corners of the paper, as shown below.
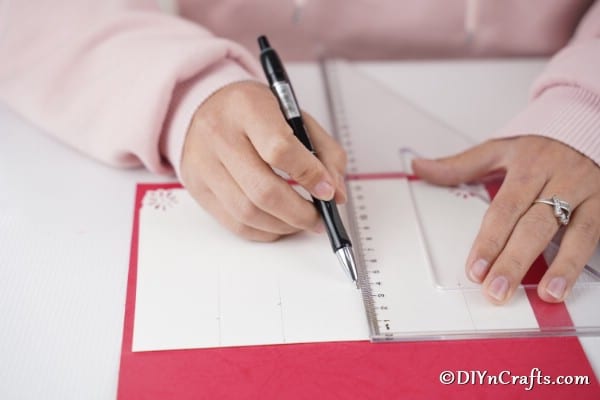
Next, you will fold the white paper in half, and then on the folded part of the paper, you will draw some lines that you will then cut to create your boxes. I decided I wanted my boxes to start about 1" from the bottom of the white paper, so I drew a line there, then another line about 1" above that was shorter, and the same for the top lines that are also shorter. The idea is to make them evenly spaced and smaller as they go up.
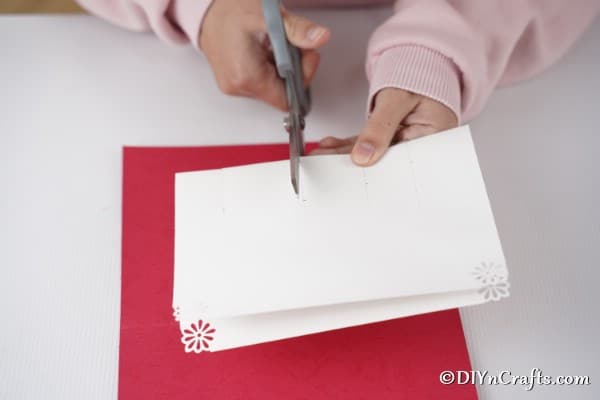
Cut through these lines just to the end of the line you drew.
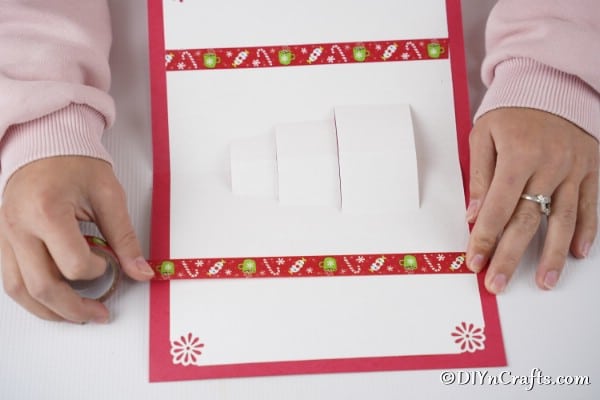
Now, it is time to push those cuts outwards so they are on the front side of the paper and look a little like boxes. Then, you will glue the white paper to your red paper, as shown, with the boxes loose on the outside.
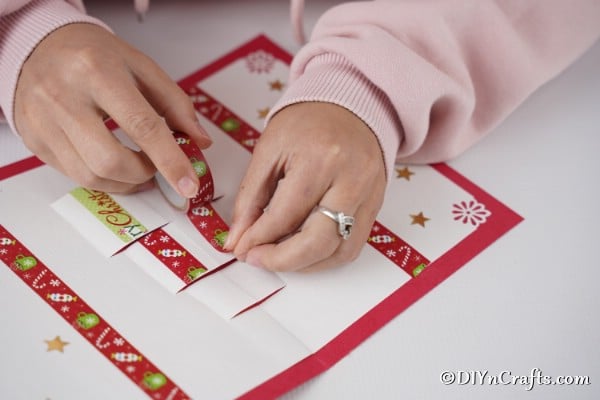
Add washi tape, stickers, stamps, or marker drawings to decorate your boxes and card.
Now it is time to display your card or add a greeting and mail it to your friends!
Video Tutorial:
Printable Step-by-Step Photo Tutorial:
Magical Gift Box 3D Christmas Cards
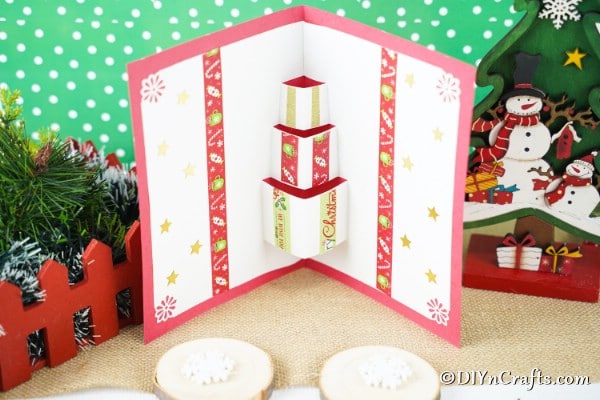
I am in love with how easy it is to make this fun 3D Christmas card! In just 5-minutes you can create a truly beautiful and unique card to display or give to friends this year!
Materials
- Red and white cardstock
- Washi tape
- Decorative stickers or stamps
- Pencil
Tools
- Ruler
- Paper cutter
- Scissors
- Paper glue
- Corner punch
- Folding Knife
Instructions
- To make your 3D card, you will begin with 2 different colors of paper. I chose red for the outer paper and white for the inside paper;
- Fold our larger outside paper in half and set aside;
- Next, you will cut your alternate color for the inside. You will need to cut this about ½" smaller around all sides than your main paper;
- Once you have this cut to size, you will use a hole punch to cut different fun holiday patterns on each corner. I used a flower hole punch;
- Now, you will use your ruler to draw lines on the outside of the white paper around 1" apart with the first starting 1" from the bottom of the page. This is going to be used to cut your "boxes". Make the bottom the largest or longest line, and each line will be shorter so the boxes are tiered with largest on the bottom and smallest on top;
- Once you have the lines in place, you will cut each line and then pop the paper through so it looks like a box on the inside of the fold;
- Glue the white paper to the red paper as shown, and begin adding decorations;
- I added washi tape and stickers to decorate the boxes and inside of the card;
- Once you have decorated it, you can display or sign to mail to your friends and family.
Notes
Use glitter or foam board to create a different look for your card. You can also add glitter, paint with a custom design, or hand monogram your cards to make easy one be unique.






Leave a Reply