Basic paper turns into beauty with this paper strip mini Christmas tree decoration idea! I love that my stash of craft paper can easily turn into a beautiful Christmas tree to add to my mantle. Even better when I can customize this so easy to fit the holiday decoration theme this year!
Obviously, I love this idea because I already made this adorable mini Christmas tree out of cardstock strips, so why not make it even better with this idea?!
Jump to:
Paper Strip Mini Christmas Tree
Paper crafts are some of my favorites. Why? Because they are so easy to make when you have a small budget or are short on time. This little tree idea is one of my favorites because I could use some of these gorgeous patterns of craft paper!
I firmly believe this is the year of all the trees for me! Of course, I have my classic holiday tree up and showing off my favorite family ornaments, but these miniature trees just make me happy. I already made this cute pasta Christmas tree earlier this month with the kids.
Every year, I turn an old book into a mini Christmas tree. Adding this paper strip mini tree to the list was a must! Plus, it looks amazing next to this pinecone Christmas tree idea!
What is the Best Paper for This Tree?
Any paper you want to use because this is your tree and should be custom to you! Truly, this craft can be made with any type of paper you have on hand. I prefer using a heavier cardstock or craft paper as it holds the "folds" best. You can use anything, including a simple printed piece of copy paper.
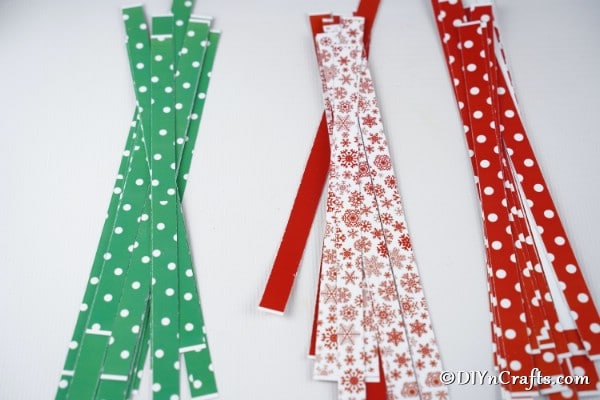
One tip for this is to use a paper that has color on both sides so the inside of your folds and ribbons show color as well as the outside. In the picture below, you will note that most of the paper I use has the coordinating color on the inside. This gives a better visual and adds to the depth of the tree so it looks more traditional.
If you like this idea, then you will love my list of easy miniature Christmas tree ideas and this huge list of Christmas tree ideas that aren't actually trees.
So many fun ideas for adding a "tree" to your decor! If the paper isn't your thing - learn how to turn a napkin into a Christmas tree instead so you still have a fun holiday project.
Also, have the kids get involved by making this felt Christmas tree or this pallet Christmas tree.
Supplies Needed
- Craft paper in 2-4 patterns
- White craft paper
- Snowflake embellishments or other small ornament stickers
- Paper cutter
- Ruler
- Pencil
- Tape
- Stapler and staples
- Craft glue
- Scissors
How to Make a Paper Strip Mini Christmas Tree
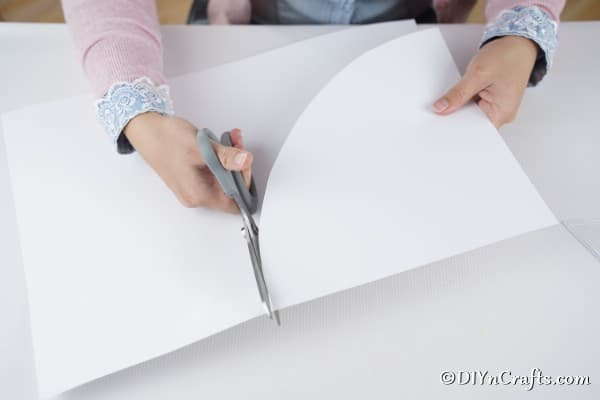
To begin making your mini Christmas tree, you will make your core for the tree. I used solid white craft paper to cut an arc out of and then roll and staple into a cone shape.
I used a ruler and protracter to get my arc even and straight, but you can also use a large bowl and trace around the bottom.
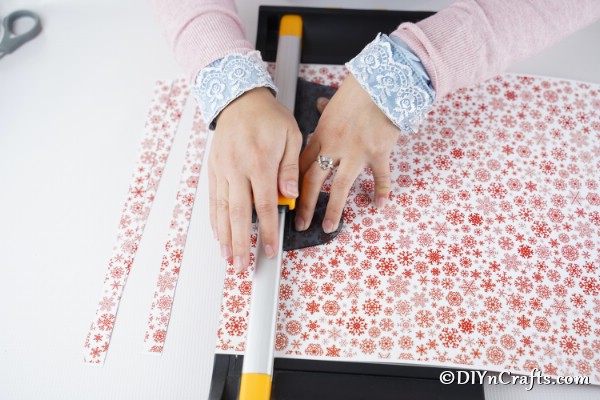
Next, you will need to measure out the size you want each of your tree "loops" to be, and then cut all of your paper into those strips.
I found a 1" width to be the perfect size for this tree.
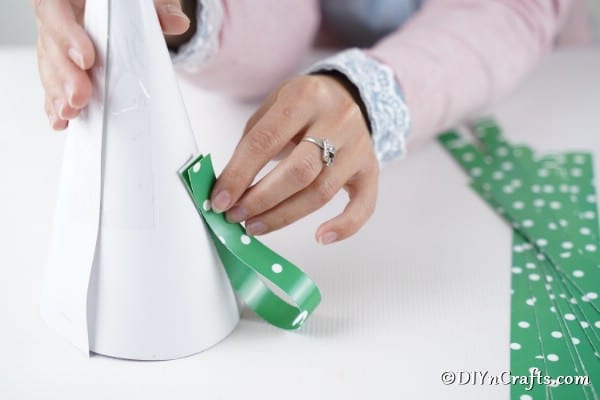
Now it is time to attach your loops of paper to the tree. Fold the paper into a loop with the printed side outside, and glue to the cone starting at the bottom and working your way upwards.
You will want to cut the paper down to size, and this will vary depending upon the size of tree you make.
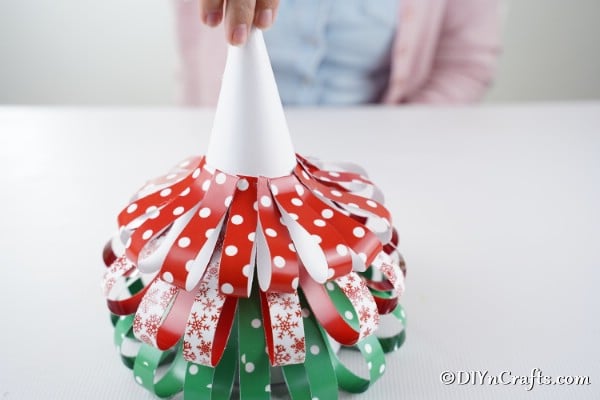
Continue this process going around 1-2 times with each color, then moving to the next pattern or color, and so on.
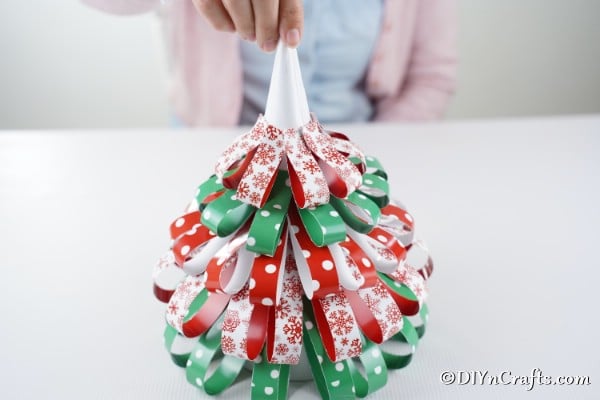
As you move upwards on your Christmas tree, you will begin making each layer of paper loops smaller for a tiered look.
Once you reach the top, you will make a small star to attach as the tree topper. I did this with basic white paper.
The last step before you display your tree is to add small embellishments like shimmery snowflakes or stars around the paper to make it sparkle.
Once you have it decorated, you will then place it on your mantle or table and display your new Christmas tree!
Video Tutorial:
Printable Step-by-Step Tutorial:
Festive Paper Strip Mini Christmas Tree Decoration
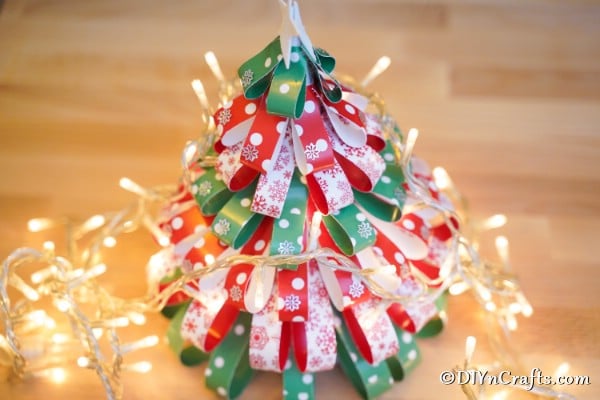
Turn colorful craft paper into a beautiful miniature Christmas tree decoration in just a few minute's time with our easy to follow tutorial!
Materials
- Craft paper in 2-4 patterns
- White craft paper
- Snowflake embellishments or other small ornament stickers
Tools
- Paper cutter
- Ruler
- Pencil
- Tape
- Stapler and staples
- Craft glue
- Scissors
Instructions
- To begin making your paper strip tree, you will need to make a large cone shape for gluing the other paper strips;
- Draw and then cut an arc using a ruler or tracing a bowl, and then roll and form into a cone shape that you will staple together;
- Next, you will begin measuring and cutting your colorful paper strips;
- I made mine around 1" wide;
- Now you will begin making loops and gluing them to the cone;
- Start on the bottom and work your way upwards.
- Alternate colors and designs as you move upwards creating your tree;
- You will need to trim these to smaller lengths as you work your way up to create that tiered look;
- Once you get to the top, you will make a small star shape as your tree topper and attach with glue;
- The final step before you display the tree is to add any sparkly embellishments like these little snowflakes;
- Once your tree is ready, display on your mantle or on a table.
Recommended Products
My favorite Etsy mini Christmas Trees (Affiliate links)
-
 French Beaded Christmas Tree from Christmas Collection by Lauren Harpster
 -
 Pine Cone Mini Christmas Tree
 -
 christmas table decoration Christmas tree knitted christmas tree holiday decoration
 -
 Spira MINI Christmas tree with complete decoration
 -
 Mini Christmas tree to add to a centerpiece
 -
 Mini Christmas tree Christmas decoration ornaments









Leave a Reply