I know you have seen those gorgeous solar chandeliers that you can hang on your deck or patio. If you’ve ever priced them, you also know that they’re not cheap. I saw one that cost more than $150, which is why I love this DIY version.
You can make your own DIY solar chandelier using an old chandelier and a few Dollar Store supplies!
Jump to:
What You Need For A DIY Solar Chandelier
To make this DIY solar light for the garden, you need an old chandelier. I found one really cheap at a local thrift store, so if you don’t have one on hand, I would check out Goodwill or other thrift stores in your area. I got mine for around $5.
You also need some cheap solar lights, and you can get these at the Dollar Store for just a few dollars for the set. Aside from that, just a few basic craft supplies, and you have everything you need to make your own solar chandelier for the garden!
How Does Your DIY Solar Chandelier Work?
Solar lights work with power from the sun, so once you have your solar chandelier put together, you just let the solar lights charge up in the sunlight, and the chandelier will light up your garden area well into the night.
This is the perfect repurposing project for summer! You’ll enjoy nights outside with light without worrying about running up your electric bill. And this chandelier is just gorgeous when it is finished.
How to Make a DIY Solar Chandelier
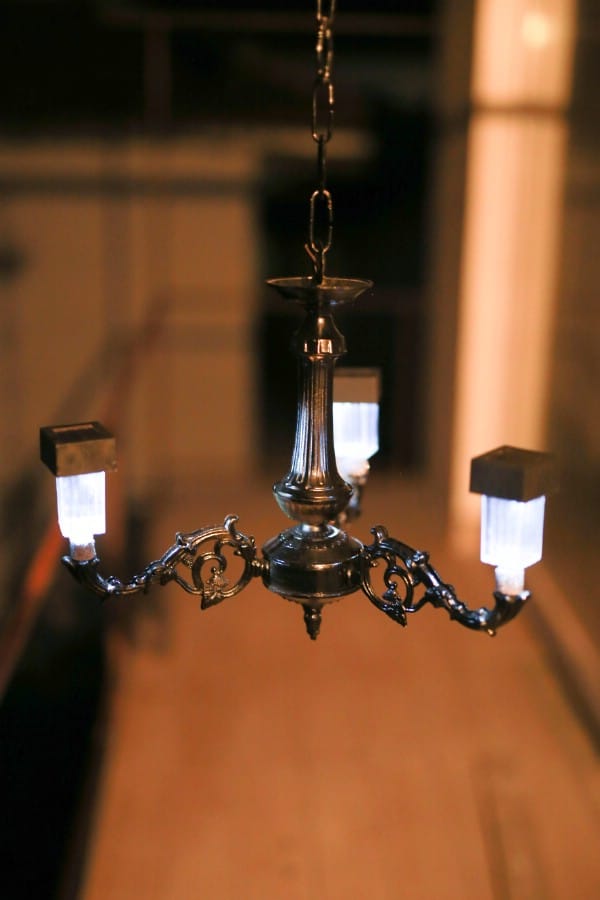
Learn how to make this gorgeous solar chandelier using repurposed items and things you can find at the Dollar Store. Follow the step-by-step tutorial to make this for your own garden.
Materials
- Old Chandelier
- Solar Lights – You need one solar light for each light space on the chandelier
- Super Glue
- Spray Paint
Instructions
- First, you need to clean up your chandelier. If it’s dusty, dust it really well and take out any glass sconces or plastic that was used for the lights.
- Basically, you are taking everything electrical out of the chandelier as you won’t need it for this project, including the wiring.
- Spray paint your chandelier in your chosen color. I’ve used black for this project, but you could do any color that you want, or you don’t have to paint it at all if you don’t want to – it’s all your preference.
- If you are painting the chandelier, make sure that you give it plenty of time for the paint to dry before proceeding with the remainder of the project.
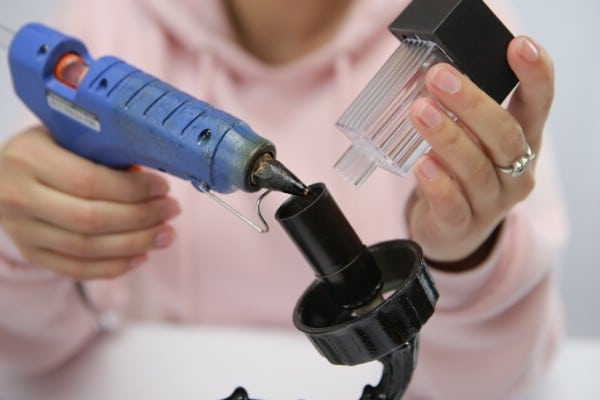
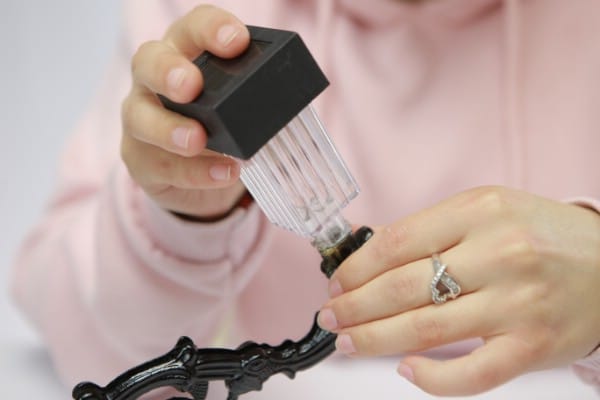
- Take your super glue and glue the solar lamps into the spots where the lights were before. Glue in one solar light for every light fixture on the chandelier.
- Note that you don’t want the long stakes that come with the solar lights on the chandelier. You are only gluing in the top solar lamp piece. Most solar lights will have removable stakes, so make sure that you purchase a set that does.
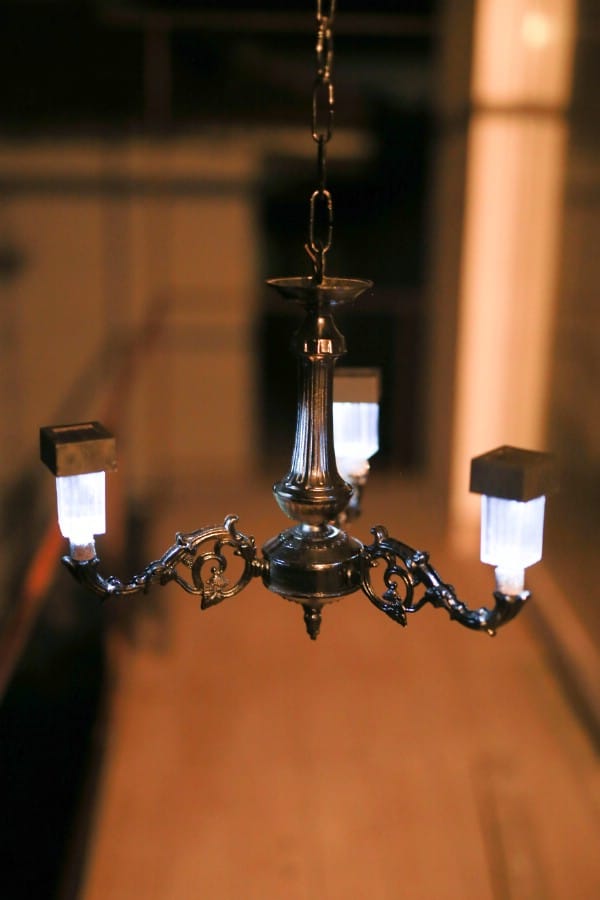
- When you get all of your solar lights glued in, you’re all done. Just hang your new solar chandelier anywhere that it can get sunlight and enjoy.
- Your DIY solar chandelier should resemble this one:
What Other DIY Solar Crafts Can You Make?
I love solar crafts. Not only are these pretty easy DIYs, but solar power is such a wonderful thing. I’ve shown you a few ways in the past to repurpose items into your own solar-powered crafts, like this DIY solar powered nightlight.
I’ve also got a list of solar light repurposing projects that are great, and these decorative garden treasure jars that use LED tealights, but you could totally add a solar light instead.
Pin this project:
What’s your favorite garden repurposing project?













Leave a Reply