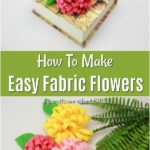
I have always loved flowers – real ones, felt ones, fabric ones – I don’t care what they’re made of, they’re all beautiful to me. When I saw this craft for making DIY fabric flowers, I knew that I had to try it.
Jump to:
What Kind Of Fabric Do You Need To Make Fabric Flowers?
To make these DIY fabric flowers, I used felt, which is really inexpensive and comes in so many gorgeous colors. You could also use denim or any other relatively thick fabric
if you prefer.
How To Use DIY Fabric Flowers
These DIY flowers are so easy to make, and when you get them finished, you can use them in so many ways. Some of my suggestions:
- Gift Toppers
- Spring/Summer Wreath Decorations
- Flowery Barrettes – Just glue these fabric flowers to a plain barrette or headband
- Home Décor
- DIY Fabric Flower Bouquet
These are just a few of the ways that you can use these gorgeous DIY fabric flowers!
How Difficult Is This DIY Fabric Flower Craft?
Guys, this is so easy! Honestly, I could sit and do this craft all day and end up with enough fabric flowers to decorate my entire home. The cutting takes the longest, but even that is really simple. You could also get the little ones to help you with cutting – with safety scissors, of course.
What Are Some Other DIY Flowers You Can Create?
Did I mention that I love flowers? So that means that I have tons of ways for you to create your own. I’ve shown you this lovely DIY paper flower wreath, and let’s not forget about these super easy DIY tissue paper flowers.
I also have a tutorial on how to make a flower decoration out of an old book and one of my favorites, how to make book paper roses. You could literally decorate your entire home with DIY flowers!
How To Make Easy Fabric Flowers
Video Tutorial:
These are honestly the easiest DIY flowers that you will ever make. And you can do so many things with these fabric flowers, from topping gifts to creating a beautiful centerpiece for the dinner table.
Yield: 1
Prep Time: 5 Minutes
Active Time: 5 Minutes
Total Time: 10 Minutes
Difficulty: Easy
Materials:
- Fabric scraps or Felt
- Scissors
- Hot Glue Gun
Instructions:
1. First, choose the fabric that you will be working with. The size of the material that you choose will determine the size of your flower. You can use a square of felt, which is what I did, and an 8X12 inch square will make a relatively large flower.
2. Choose your colors – there are so many possibilities, so select a few pieces of fabric or felt in different colors if you want to make a colorful bouquet.
3. Cut the fabric in half so that you end up with a long, narrow piece – about 4 inches by 12 inches if you are using an 8X12 inch sheet. Just literally cut it in half.
4. Fold your fabric in half so that you end up with a long, thick strip.
5. Start cutting lines from the two ends – not the fold. Be sure that you cut a little over halfway up toward the fold without actually cutting the fold.
6. Continue cutting your lines until the entire strip of fabric is done from end to end.
7. Add some hot glue in the middle of the unfolded strip and then refold to hold it together.
8. You will begin rolling the piece. Note that you can lay down a strip of hot glue and then roll. Do this until the entire strip is rolled and you see your flower.
9. Add a little hot glue to the end to keep the flower together.
10. Using green fabric or felt, create leaves. You do this by cutting out oval or leaf-like shapes and adding just a bit of hot glue to one end.
11. Pinch the ends together to form the leaf.
12. You now have a gorgeous fabric flower to use for your home décor, handmade headbands, gift toppers, etc.
13. Your finished flower should look something like this:
What are your favorite ways to use DIY fabric flowers?


Lorraine
Love the flowers you made just in time for Mother's gift decorations.