
We love DIY Easter wreath projects here on our site, and we have a very unique one for you today. This video tutorial will show you how you can create an Easter wreath shaped like an Easter Bunny.

This is a pretty simple and straightforward project, and only a few materials and tools are needed to bring it to fruition.
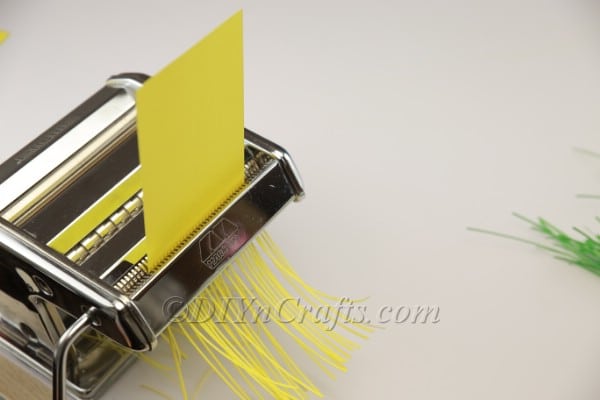
Obtaining one of these materials may be the most challenging part of the project if you do not have your own paper shredder. You are going to need yellow and green paper in very thin strips. If you do not have a shredder of your own, you will have to find paper that has already been shredded.
You could cut the paper manually, but this would be very hard using scissors. If you happen to have a paper cutter, however, it would be an easy alternative to using a shredder.
You can view the other materials and tools that you need for this project below. There is also a set of written instructions to go with the steps in the video.

Step-by-Step Video and Photo Tutorial
How to Make a Bunny Shaped Easter Wreath
Want to welcome guests to your home this Easter with a unique and adorable wreath? In this video tutorial, find out how you can create a wreath which looks exactly like an Easter bunny.
Materials
- Yellow and green sheets of construction paper (shredded)
- Artificial flowers
- Ribbon
- Any additional décor you want
Tools
- Hot glue and glue gun
- Scissors
- Ribbon
Instructions
- Begin by shredding your construction paper if you need to.
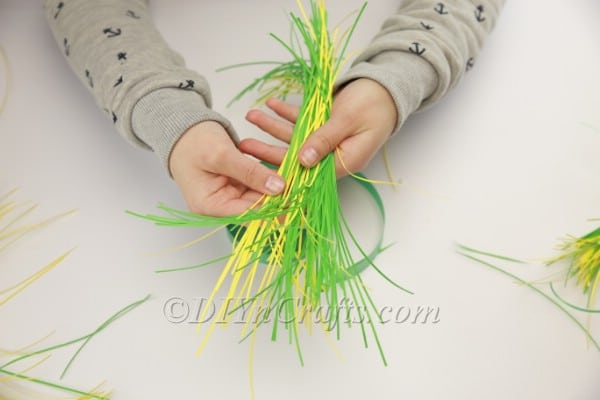
- Using some ribbon (or twine, or anything else you want to try), tie together a bundle of the shredded papers. Use both the green and yellow.
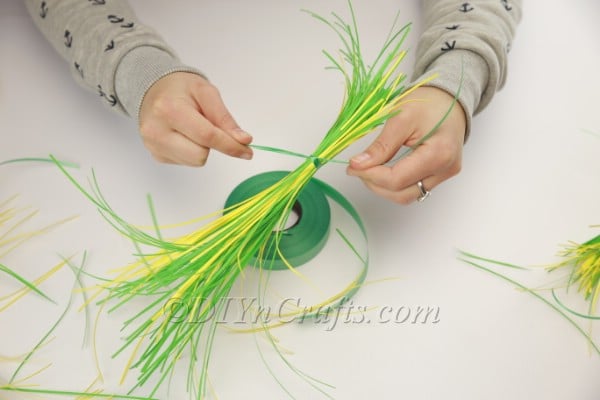
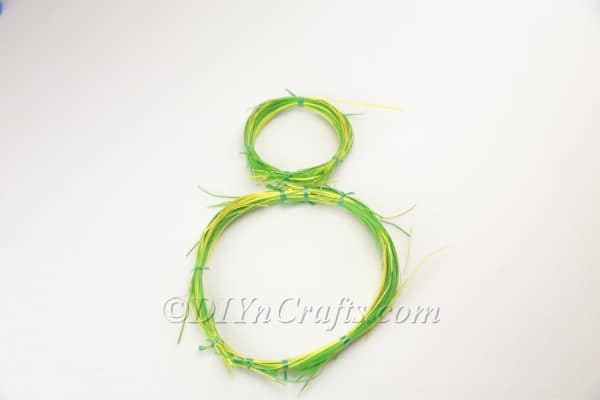
- Once you have that first bundle tied together, create a second bundle, and attach it to the first so that the ends overlap.Do this a few more times. Once the length you have is about the circumference that you want for the portion of the wreath which will be serving as the bunny's body, wrap around the ends around to meet, and tie them together to create a circle.
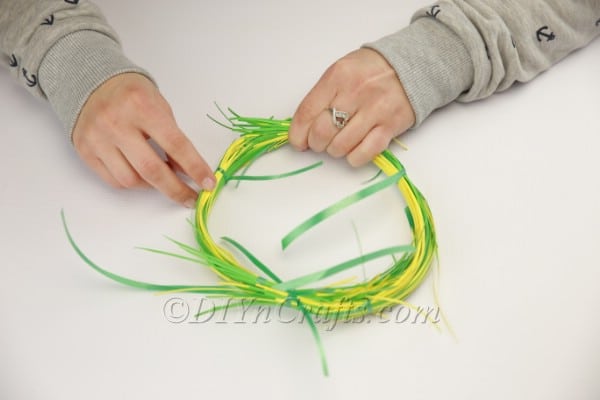
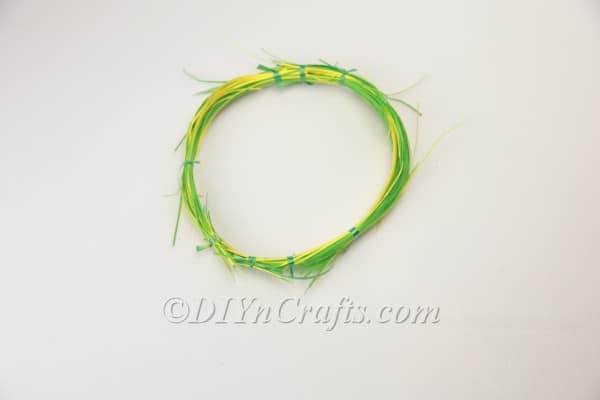
- To get a cleaner look, trim away some of the excess ends which are sticking out.
- Repeat the steps that you just did to create a second, smaller circle for the bunny's head.
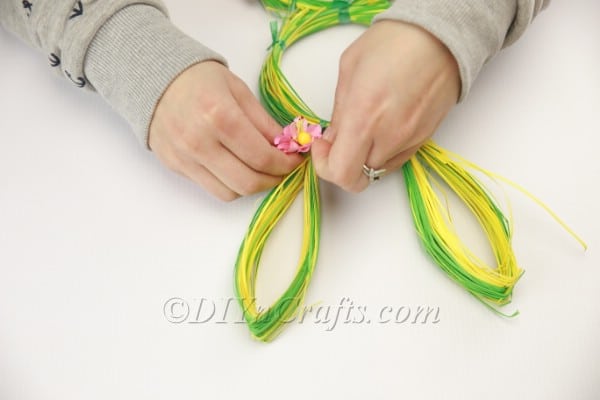
- Get a bundle of paper strips in your hand and make it into a loop, tying it off at the bottom. This will become one of the bunny's ears.
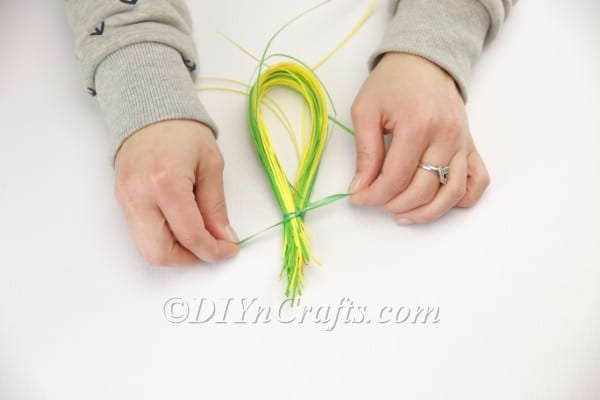
- Repeat the step above to get the second ear.

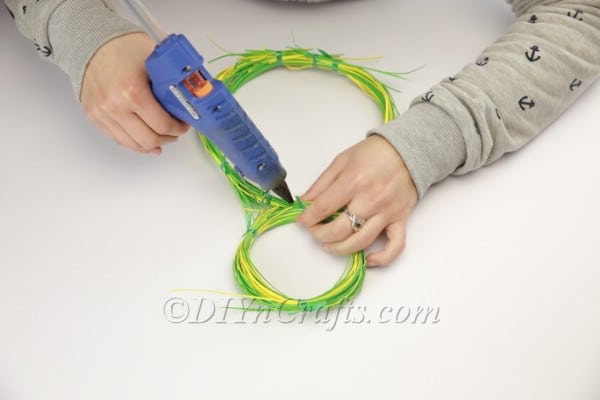
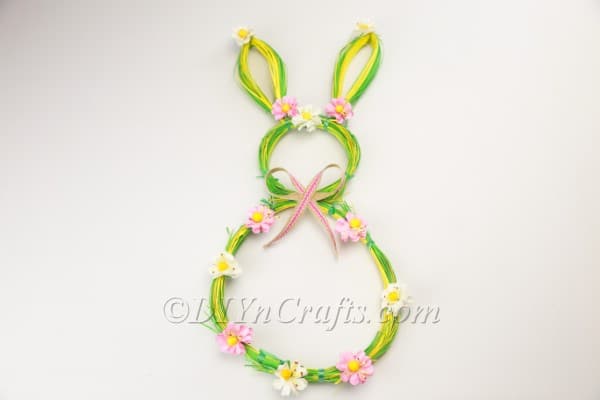
- Use hot glue to attach all of the components together. Now you have a completed bunny shape.
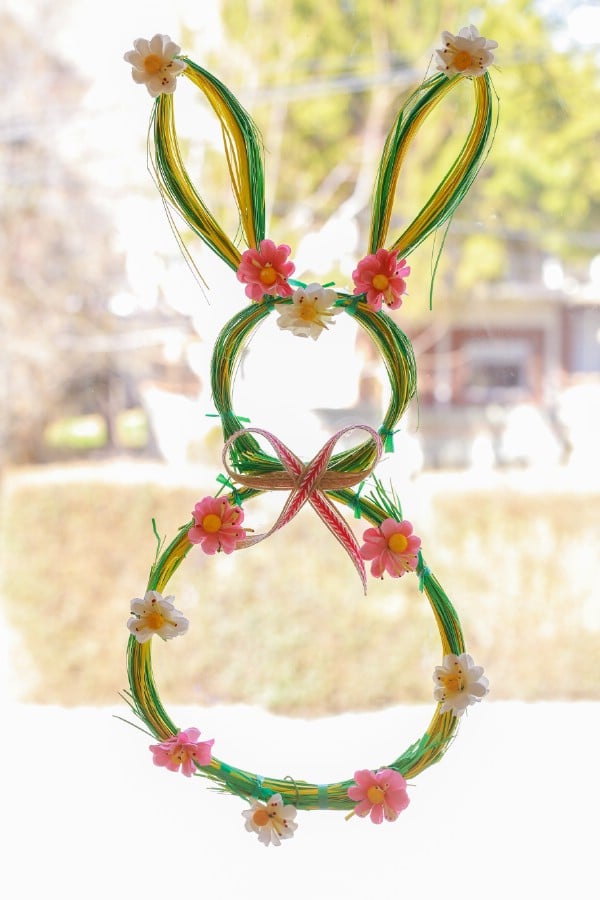
- Let’s embellish our bunny a bit. It is up to you how you want to decorate it, but I decided to attach some artificial flowers around the body and on top of the head, along with a bow at the neck.
- When it is done, it should look like this:
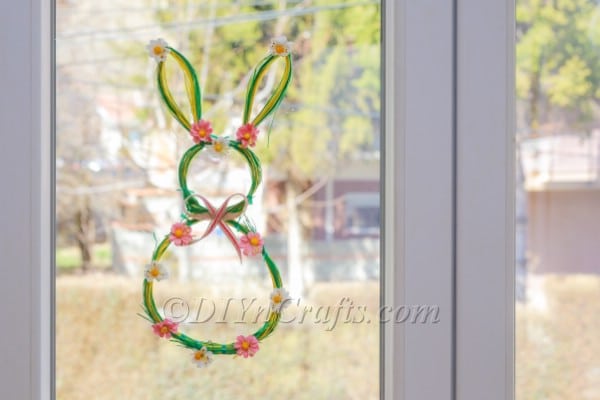
The result of this easy DIY project is so gorgeous that it is hard to believe that it is made out of construction paper! You've totally transformed it into something vibrant and beautiful.
It has a bit of a rustic look to it, too—in fact, if you wanted to run with that concept, you could try doing this same project with straw, reeds, or stems of some sort instead of paper. That might actually be an easier supply to come by if you don’t have a shredder. Your craft store might have something in this department.
Easter Projects
Having completed your Easter bunny wreath, don’t miss out on some of the other fun and easy projects on our site! Try making a DIY carrot-shaped container for Easter treats, or repurpose an ordinary plastic bottle into a lovely Easter basket. Love free printables? Here is an easy DIY project to make an Easter basket with a free template.


Leave a Reply