
Are you in search of a craft that you can make to celebrate the Easter holiday and your family at the same time? In this video tutorial, you can learn how to transform any photograph of your child into one that is perfect to display for Easter.

There are certain holidays we tend to have a lot of photographs for—Christmas, for example. But I realized while I was decorating for Easter that I don’t have many Easter photos of my kids.
Jump to:
While I was thinking about this, I got this cool idea. I could make any photo of one of my children into an Easter photo with just a few quick and easy adjustments to the frame!
Kids love dressing up as Easter bunnies. So why not dress up one of their pictures like an Easter bunny?
In the video below, I am going to show you how you can do this yourself! There are only a handful of materials and tools that you will need. I have written out instructions to go with the video.
Watch the tutorial, read along, and enjoy making this Easter craft. You can even get your kids to help you!
Step-by-Step Tutorial with Detailed Instructions:
Turn Any Photo of Your Child Into a Cute Easter Bunny
Don’t have any Easter photos to display of your kids? That’s okay, because with this simple video tutorial, you can turn any photo of your child into an Easter bunny photo. Watch now to learn how to make this fun, easy and personalized craft.
Materials
- Picture of child in picture frame
- White cardboard
- Pink foam sheet
- Cotton balls or pom poms
Tools
- Hot glue and glue gun
- Scissors
Instructions
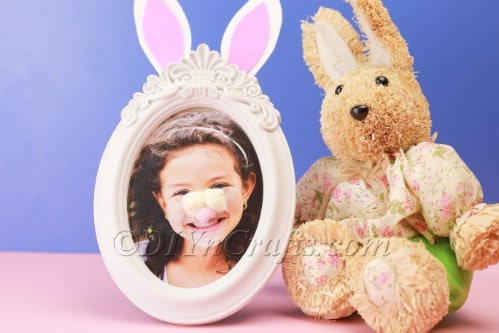
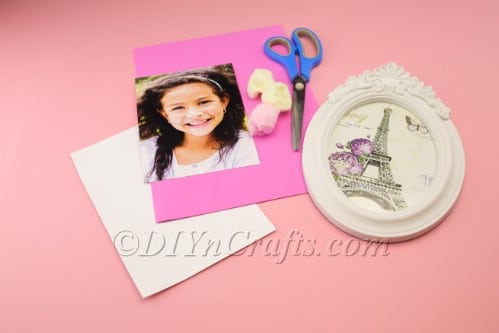 Your first step is to pick a photograph and a frame to work with. I chose an ornate little oval-shaped frame, and put a small picture inside it.
- For the frame, there really are no “rules,” but white is a good color since you can then make the bunny ears in a classic white as well.
- For your child’s photo, you are going to want to pick a portrait which will fill up the frame, and which has your child facing the camera directly. Get the frame and put the picture inside if it isn’t already in there.
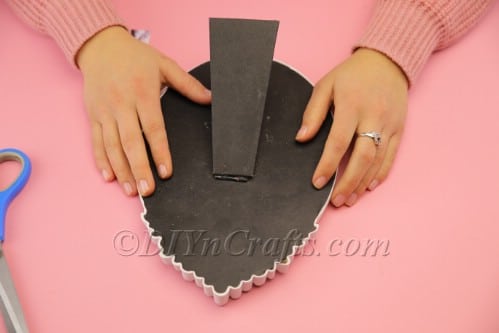
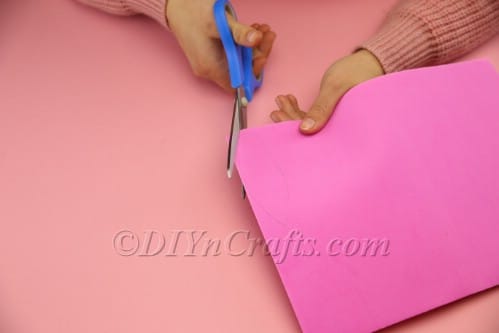
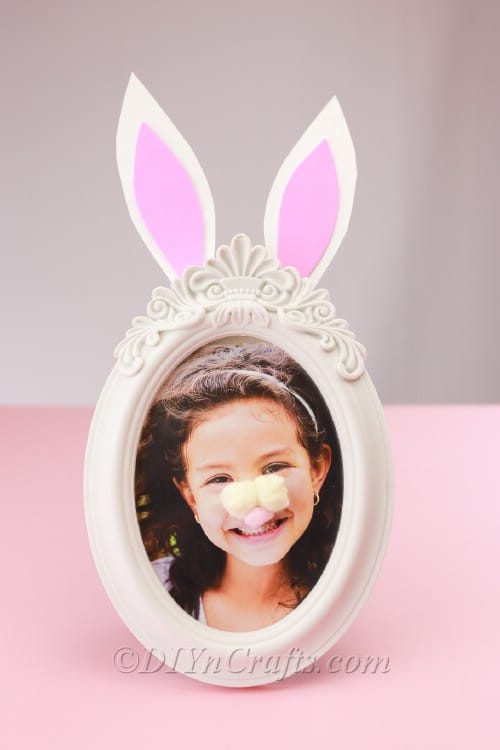
- Draw the shapes of bunny ears
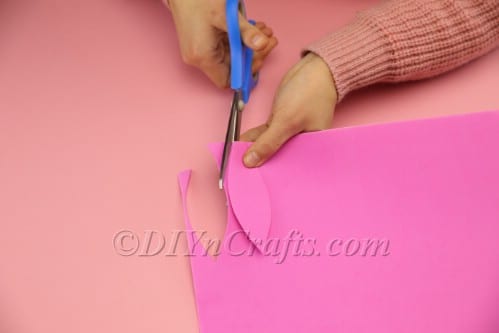
- On the white cardboard (white cardstock can work as well), trace the outlines of two matching bunny ears. Then cut them out.

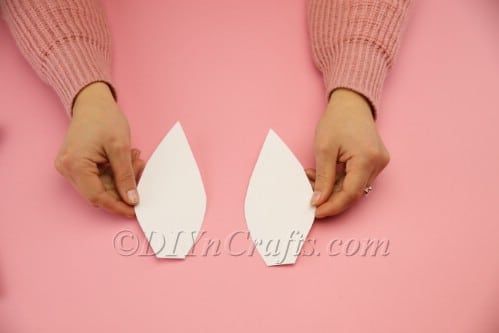
- To the best of your ability, cut out matching, smaller shapes from the pink foam sheet to serve as the bunny’s inner ears.
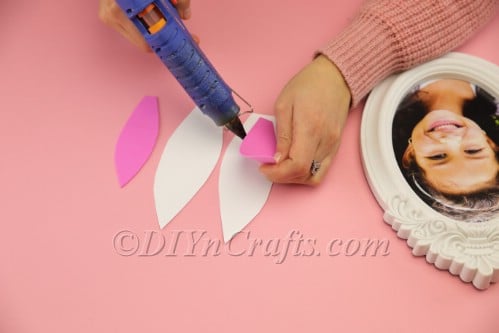
- Use glue to attach the inner ears to the outer ears.
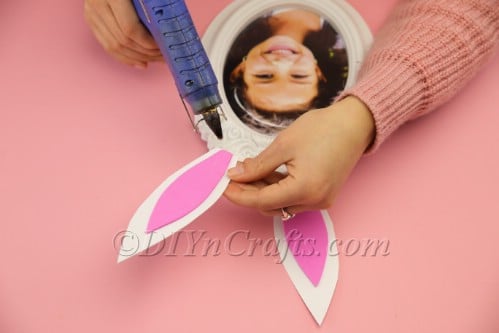
- Now, you can use hot glue to attach the bunny ears to the top of the photo frame.
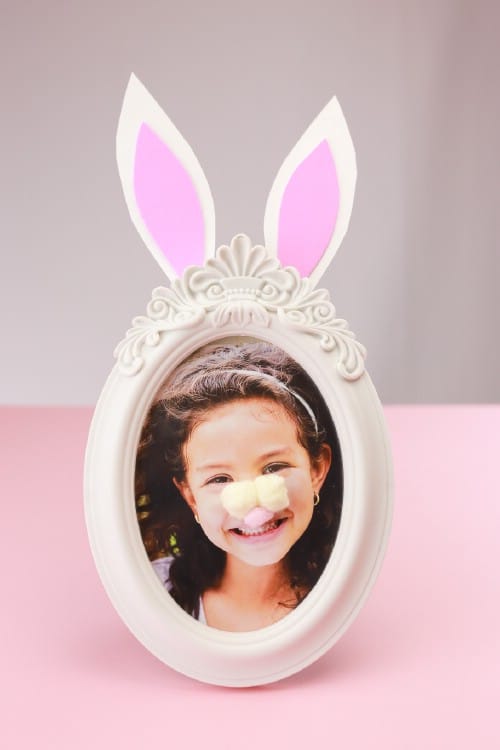
- The last step is to get a couple of pom poms or cotton balls and glue them to the frame glass over your child’s nose.
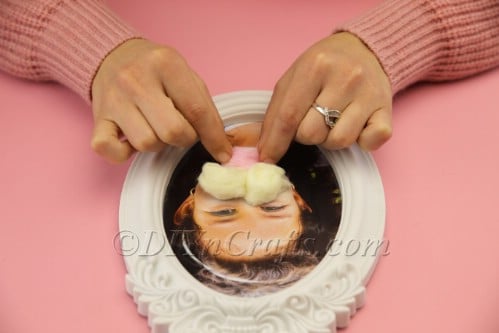
- You have now dressed up the picture frame (and your photo of your child) like an Easter Bunny. Set it up to display.
Notes
If you use hot glue to do this project, the conversion of the frame and glass to accommodate an Easter photo and theme may be fairly permanent. If you wanted to remove the ears and the cotton balls, it might be pretty tough to remove all be glue residue left behind.
If you just want to temporarily convert a regular picture frame into an Easter picture frame using this technique, you could try using double-stick tape instead.
There might be a little bit of sticky residue left on the glass afterwards, but you likely could scrub it off. You could then display the same picture in the same frame through the rest of the year, and decorate it again for Easter next year.
Recommended Products
As an Amazon Associate and member of other affiliate programs, I earn from qualifying purchases.

Your Child’s Picture Is Now Ready for Easter
Have fun displaying your child’s picture as an Easter bunny portrait! While you are at it, why not do one of these for every member of your family? You can then set them up together as part of an Easter display.
They would be perfect to set up in your entryway if you’re going to be greeting guests for an Easter dinner.
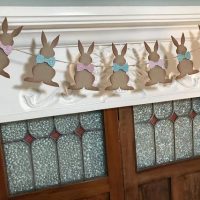
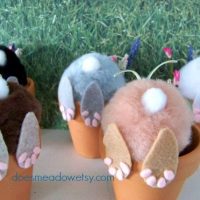
What other cute handmade Easter decorations can you display this year next to your family photos? We have plenty of ideas for you here on the site, along with video tutorials!
Easter Projects
To get started, here is how you can take a plain old Styrofoam cup and turn it into a cute DIY Easter bunny decoration. Another idea is to make an Easter basket with a flowery shape which is perfect for spring and which can hold a single egg.
While you now have a project to dress up your child’s photo as an Easter bunny, your child may also want a DIY bunny nose to play with this Easter. Here is a video tutorial that shows you how to make one out of simple supplies.
And, of course, your child will want some bunny ears to go along with that nose. You’ll find that DIY Easter tutorial right here.
We have so many Easter craft tutorials for you to check out on the site, plus we regularly add new ones! So dig deep into our archive, and check back again soon to see what new tutorials are available.


Leave a Reply