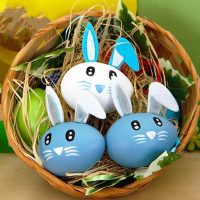
If there are two things that spring to mind when you think of Easter, they are probably Easter eggs and Easter bunnies. In this video tutorial, I'll show you how to make a fun Easter craft that combines both. You're going to learn how to decorate an Easter egg so that it looks like an Easter Bunny.

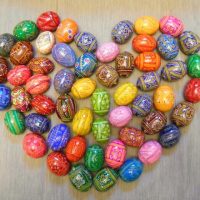
Decorating Easter eggs has probably been my favorite part of the holiday since I was a child. Every year, I try to come up with new ideas for how to transform the eggs I buy into something beautiful.
This project is fun, fast, and easy. It doesn't require a lot of detailed work or patience, and the materials and tools you need are very simple.
While I used hot glue, you could also probably use another type of glue if you prefer, which might also make the project more appropriate for young children.
In the list below, you can view all the materials and tools you will need to gather before you get started. I have included written instructions which you can read as you are watching the video tutorial.
Step-by-Step Photo and Video Tutorial
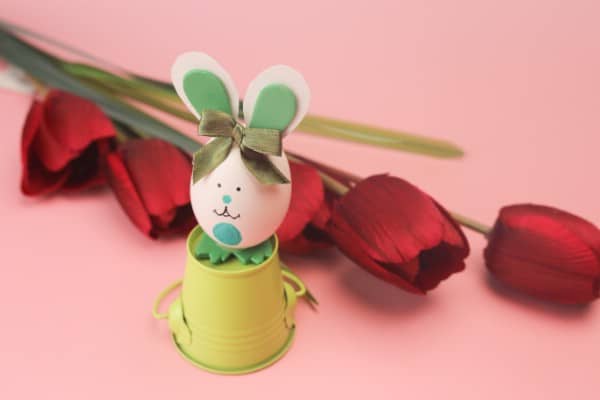
How to Make a Cute Easter Egg Bunny Decoration
Looking for a creative, fun new way to decorate an Easter egg? In this video tutorial from DIYnCrafts, you’ll learn how to decorate an egg in a few quick and easy steps so that it looks like a cute Easter bunny.
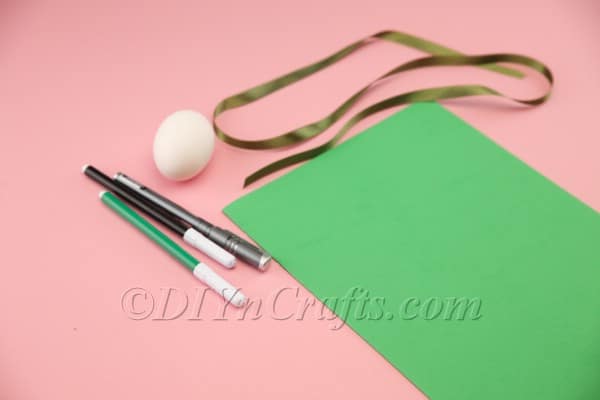
Materials
- Egg
- Black pen
- Green marker
- Green foam sheet
- Ribbon
- White cardboard or cardstock
Tools
- Hot glue and glue gun
- Scissors
Instructions
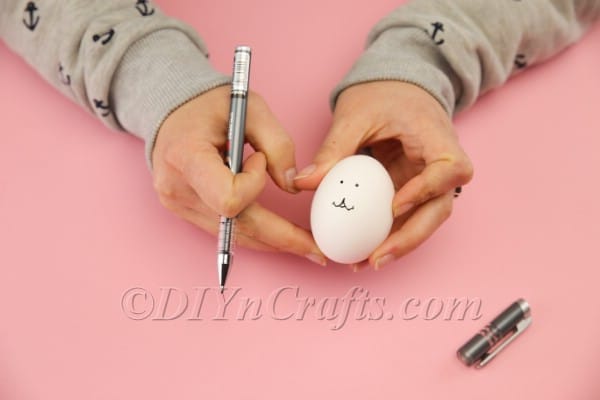
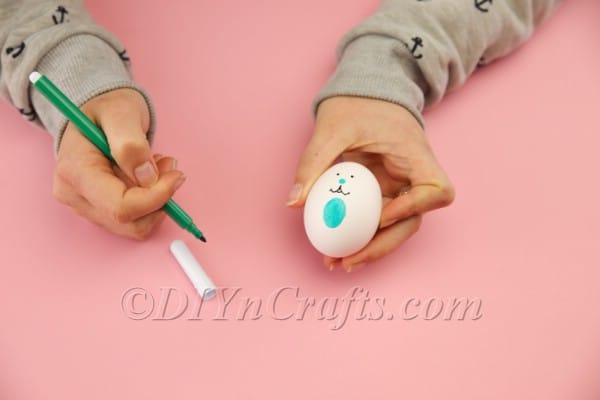
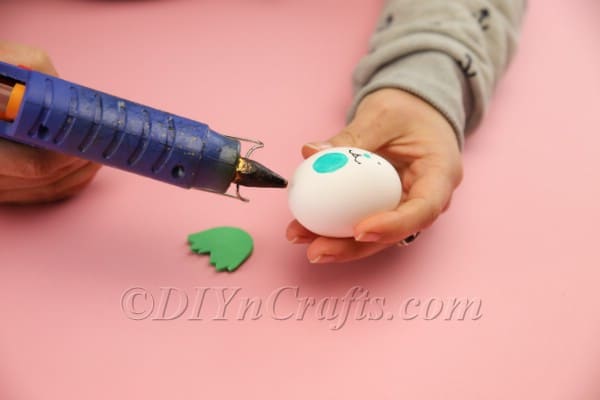
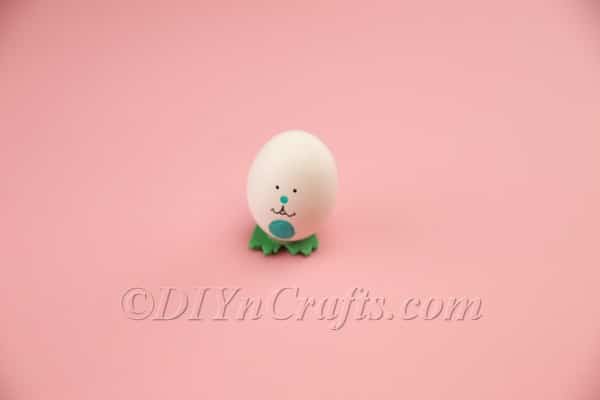
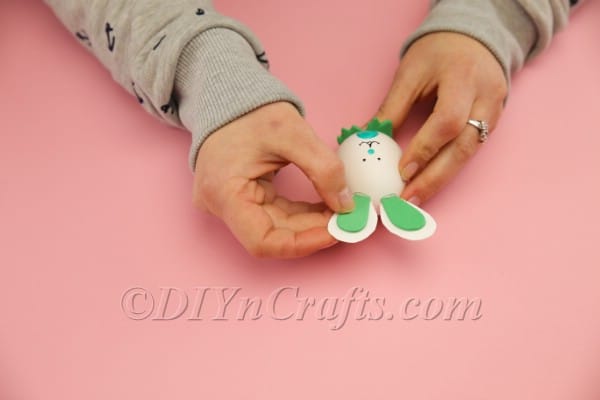
 Take your egg and use a black pen to draw on the eyes and mouth. Then use the green marker to draw the nose and the belly of the bunny.
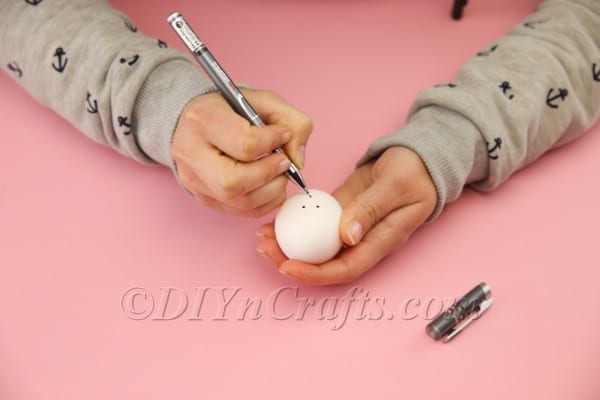
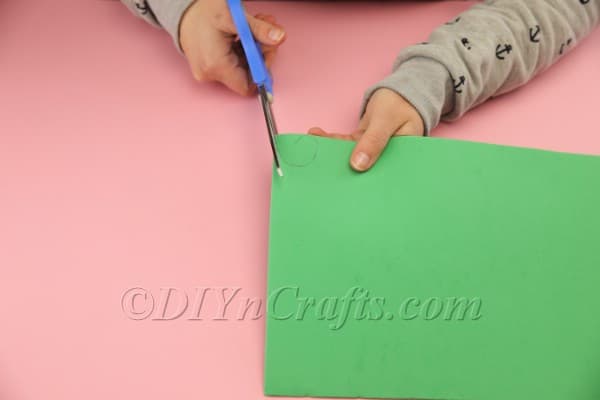
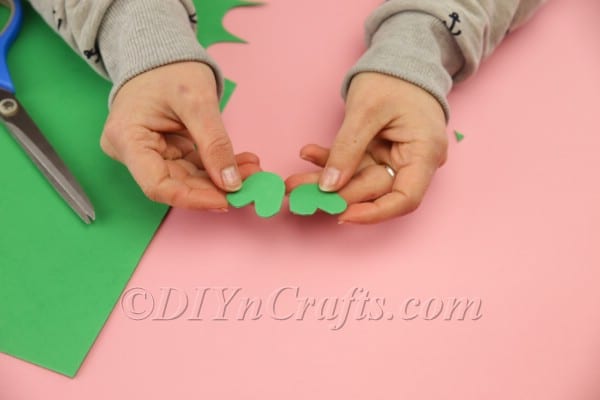
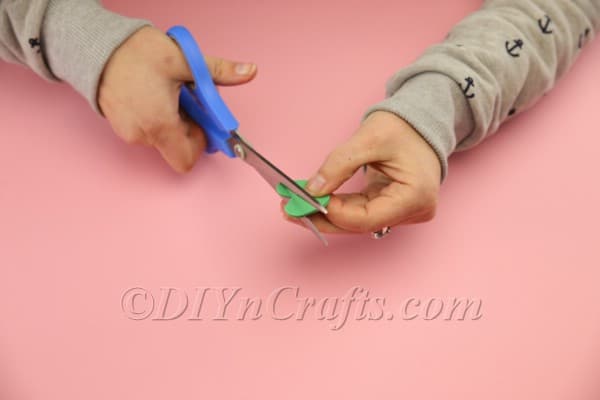
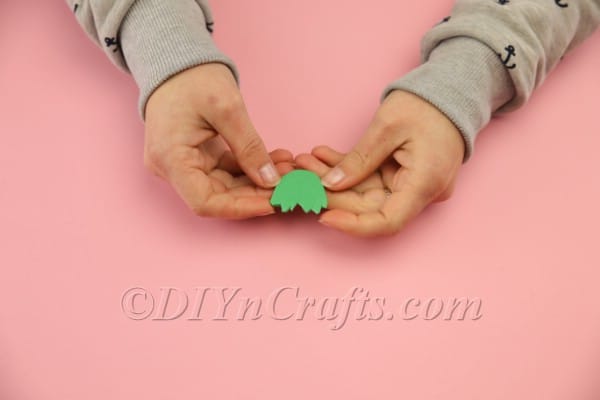
- You next need to cut out the shape of the bunny's feet from the green foam sheet. This is pretty much self-explanatory, but you will notice that I did it twice, and glued together the two identical pieces before gluing them onto the bottom of the egg.I decided to do this so that they would be more substantial, but you could use just one layer if you preferred.

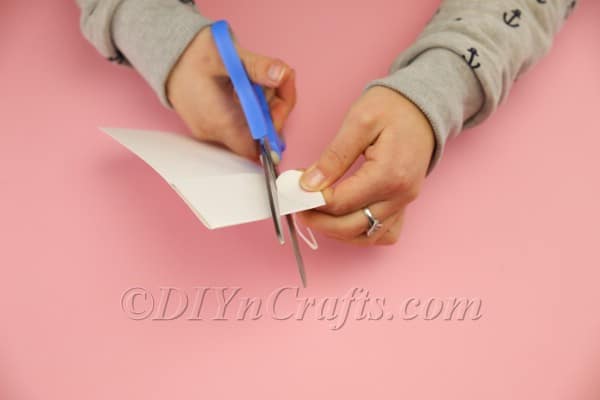
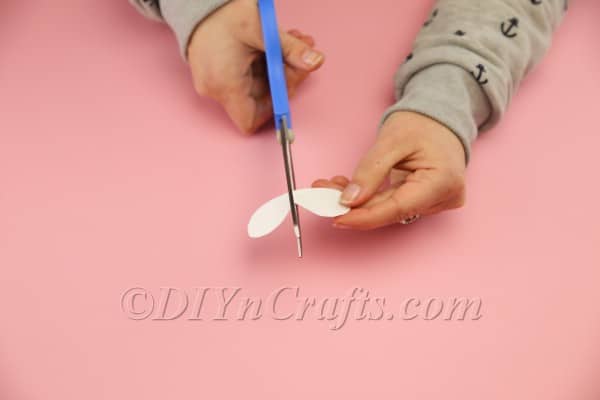
- Now you need to prepare the bunny's ears. Get the white cardboard or cardstock (construction paper is also acceptable) and cut out the shapes of the bunny's outer ears.
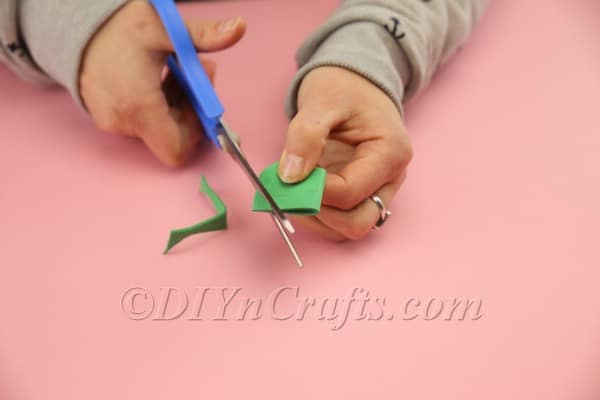
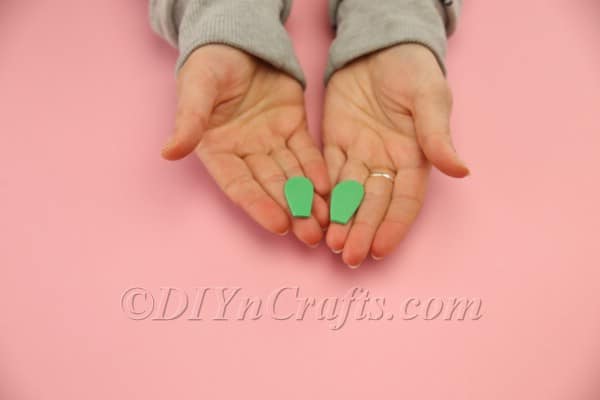
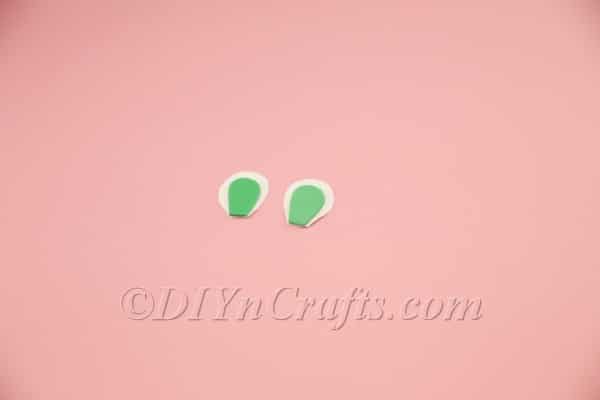
- Now we turn to the green foam sheet and cut out the shapes of the bunny’s inner ears.
- Glue the inner ears onto the outer ears.

- Glue the bunny's ears onto the top of its head. Note that if you use hot glue for this, you do not need little tabs at the bottoms of the ears to attach them to the top of the egg. But if you are using a regular glue stick, you will need to create this little tabs when you're cutting out the ears, or just fold the very bottom parts of the ears under in order to attach them.
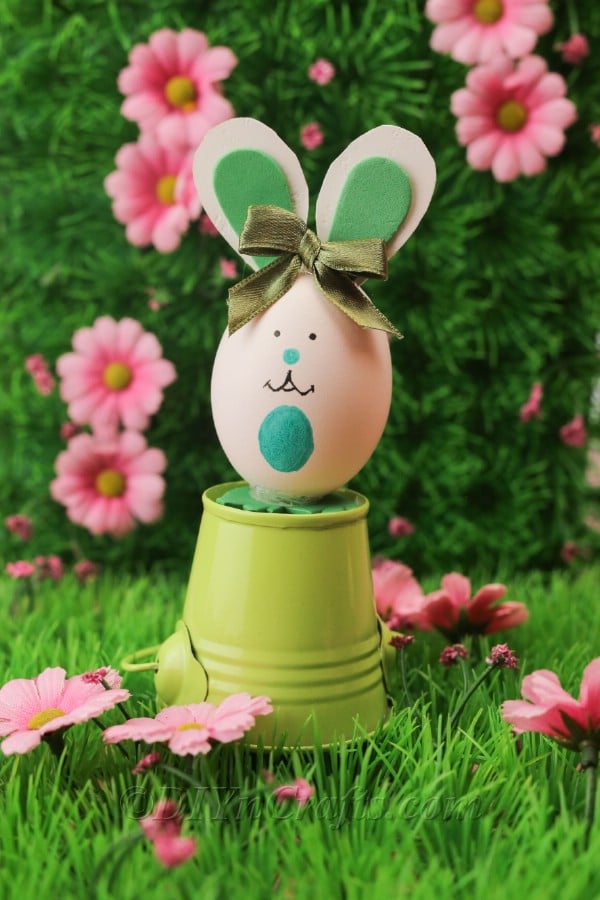
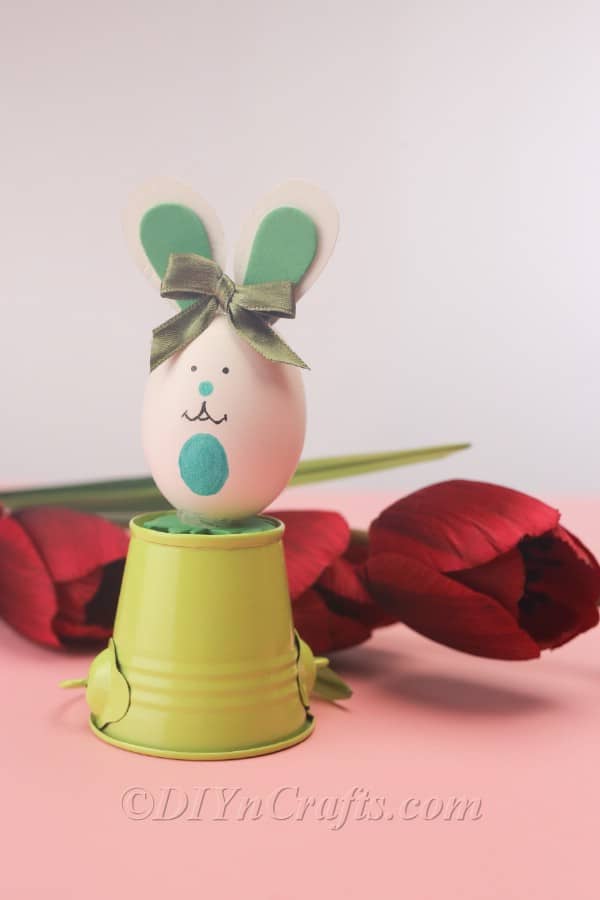
- As one last step, you can attach a bow to the top of the bunny’s head between its ears. If you do not have one handy, you can tie a ribbon like I did to create one. Now your Easter Bunny is all ready to display for the holiday.
Recommended Products
As an Amazon Associate and member of other affiliate programs, I earn from qualifying purchases.
Now, Make Some Friends for Your Easter Egg Bunny
Once you've made your first Easter egg bunny, you'll definitely want to make more so that he has some friends to frolic with in your Easter displays.
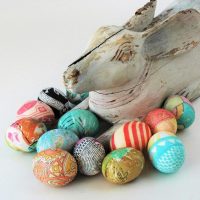
After you wrap up this project, you might still be looking for more fun and unique ways to decorate Easter eggs.
You are in the right place for that. After you make Easter egg bunnies, check out how to make colorful unicorn Easter eggs. You can also check out these 5 fun and easy Easter egg projects and another 5 Easter egg projects here.
Make sure that you also take a look at some of the other fun Easter tutorials on our site to learn how to craft other creative DIY decor.


Leave a Reply