
If you enjoy easy DIY projects that are both crafty and thrifty, you should be excited by the next Easter craft tutorial video that I have made for you. In this video, you will learn how you can create a beautiful Easter basket using nothing more than paper, a free printable template, some tape or glue, and some staples.
Lately, I have been getting back into making paper crafts. This is something that I enjoyed a lot during my childhood but it fell by the wayside as I got older and got into working with different materials.
But having gotten back into it now, I am amazed by how much easier it is.
With the internet, it is now a breeze to find written instructions and clear visuals for any number of papercraft projects. Sometimes, you even luck out and find a free printable template.
Just in time for Easter, I have a printable for you to download. With it, you can quickly and easily assemble a DIY Easter basket. Aside from the printed template, the only other supplies you will require for this project are a pair of scissors, some tape or glue, and a stapler.
You can find the written instructions, the free printable template, and the video below.
Step-by-Step Tutorial with Detailed Instructions:
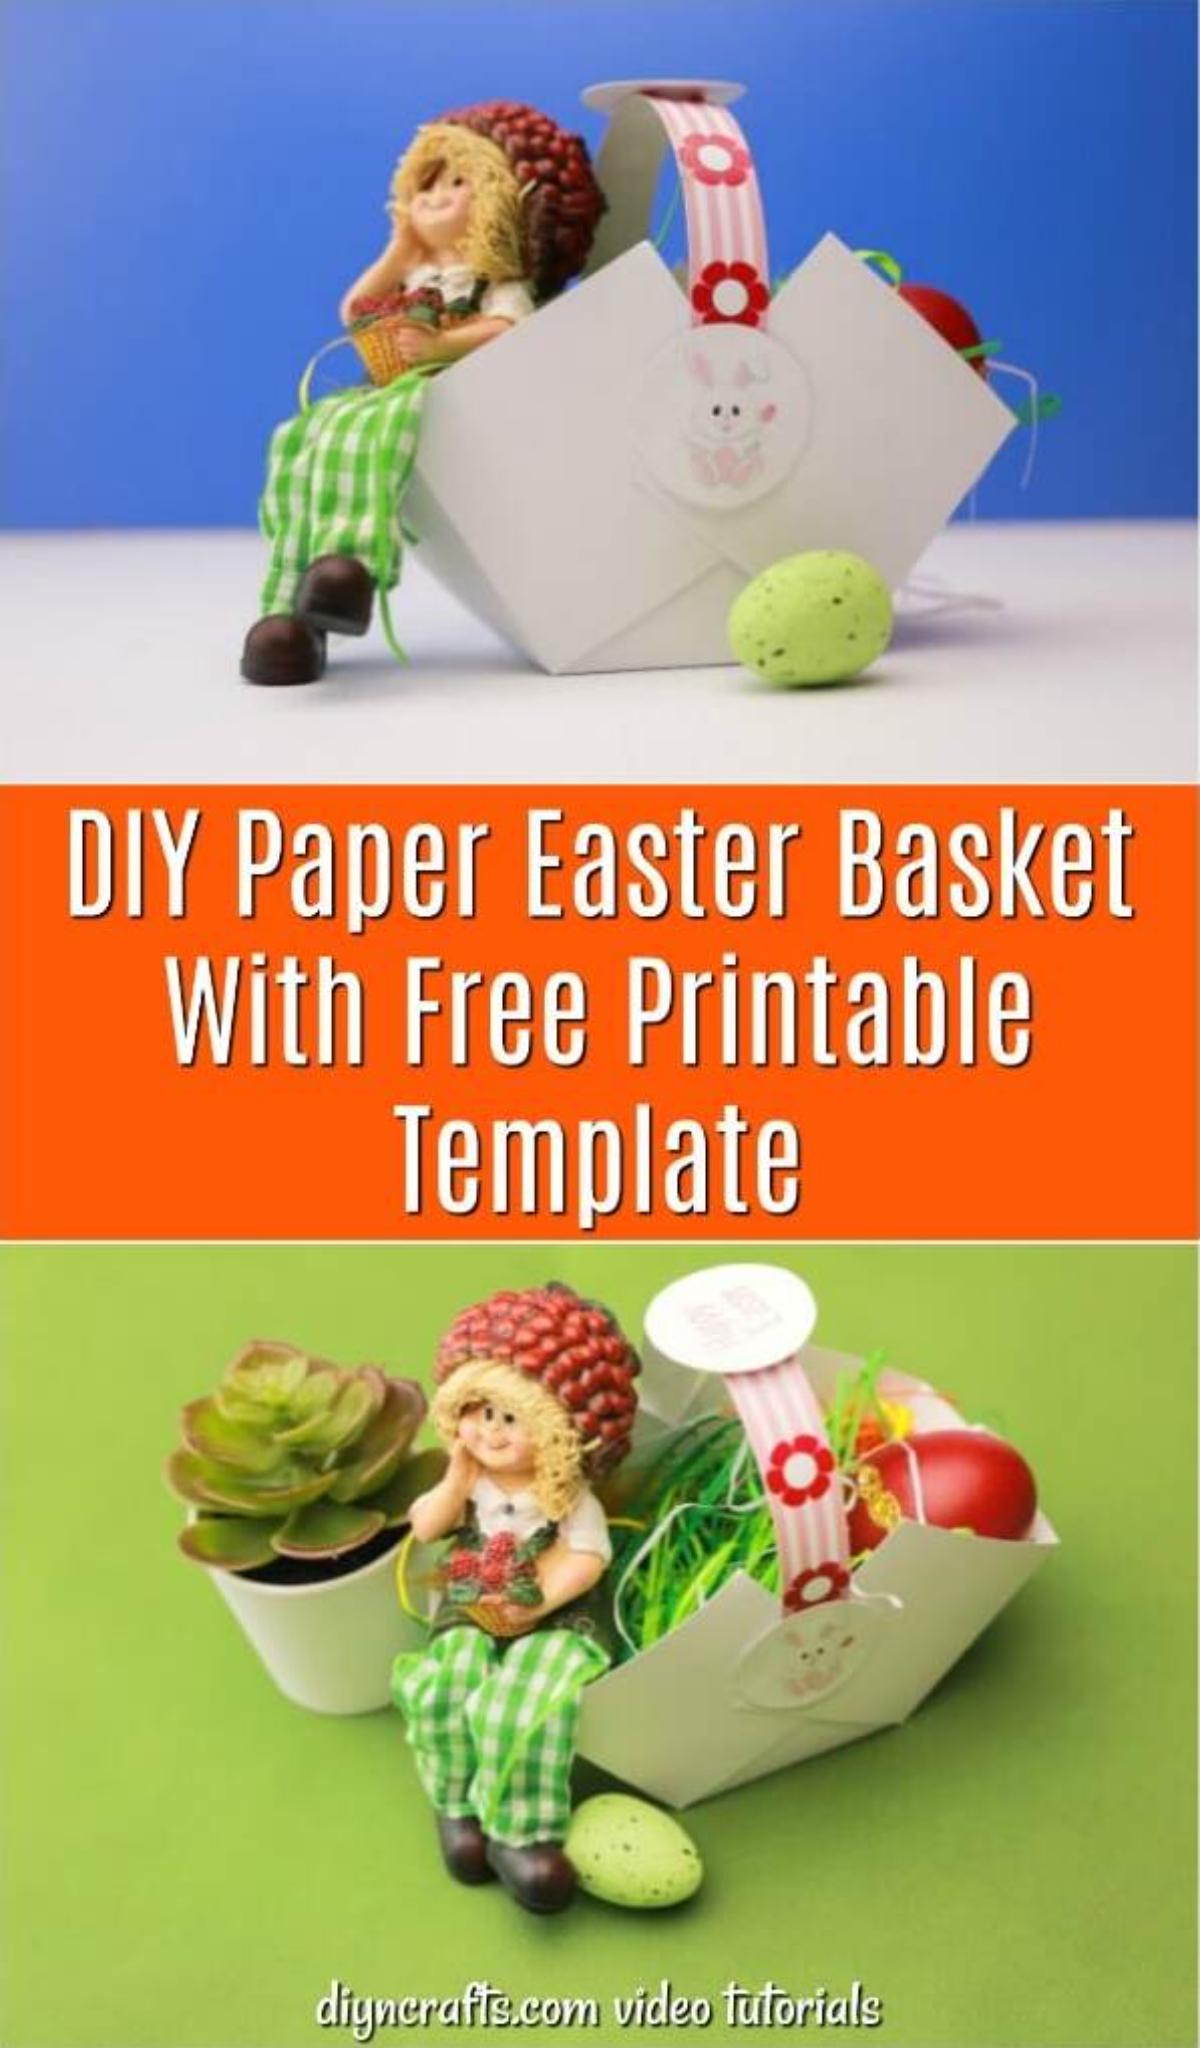
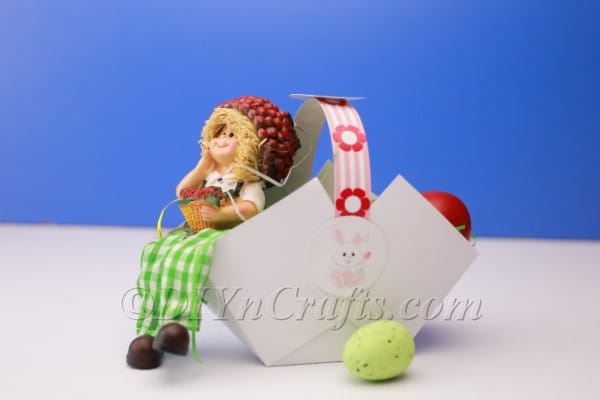
DIY Paper Easter Basket With Free Printable Template
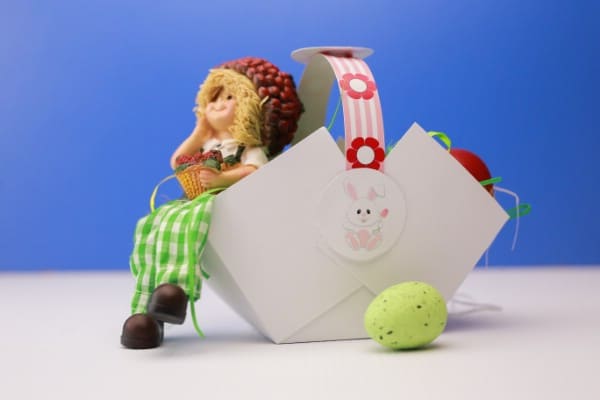
How cool would it be if you could make a DIY Easter basket using nothing more than paper, a pair of scissors and a stapler? Check out this exclusive video from DIYnCrafts to find out how to do it in just a few fast and easy steps using a free printable template!
Materials
Tools
- Scissors
- Stapler
- Double-stick tape or glue
Instructions
- The first step is simply to print out the template. It is designed for A4 size paper. Hopefully you have a color printer to do this, as the finished result will look much better in the colors the template is designed for rather than in grayscale.

- You will notice that the template contains three different sections. One of them is the main section which will become the basket itself. Next to this, you will see a small decorative strip which will become the handle. On the other side of this, there are several small Easter bunny pictures.Begin by separating these three sections. Cut out the strip from the center. Set it aside.

- Next, you will want to cut out the small Easter-themed images. It does not matter exactly how you want to go about this. I decided to cut out little circle shapes around them.

- You will now need to cut along the guidelines you see on the largest section of the template.

- You have presumably noticed that the lines that you are cutting in toward the center of the page to not go all the way to the center. You can imagine an invisible line on either side where the cuts stop.
- You are going to want to fold along both of those lines, and then unfold the page. It is important to get a nice, clean fold. One trick to doing this is to smooth over the edge using a plastic knife, as you see me doing in the video.

- The next step is easy, but it is a bit tricky to explain. On one side of the page, fold the central tab upward while simultaneously pulling the tabs next to it on either side inward.
- Hold all these together, and place one end of the strip which will serve as the handle over the join between them. Staple everything in place. It should only take a single staple to accomplish this.


- Do the exact same thing on the other side. Pull the opposite end of the strip down and staple it in place as well to complete the handle and hold the basket together.

- The last step is to hide the staples. To do this, you can use the circles that you cut out earlier with the Easter bunny pictures on them. You can attach one more to the top to complete the look (you can use hot glue for this as I did, or you can use another type of glue or even double stick tape). Now you just need to put whatever treats or decorations you want inside your basket and it will be ready.

Enjoy Your DIY Easter Basket Made Out of Paper
Once you understand how to create an Easter basket following these instructions, you probably will be able to make more of them without even using a template if you wish.
This really opens up possibilities creatively, as you can decorate the basket and the handle in any way you choose.
Because using the template makes this project extra quick and easy, you could print out a bunch of these to batch-produce paper Easter baskets as well if you wish.
You can then fill each of them with a little bit of Easter grass and some sweets and give them as gifts to friends or coworkers. They are sure to brighten anybody's holiday.
If you enjoyed this project and are looking for a similar one to try, this is not the first DIY Easter basket craft project that I have shared on this site. Here is another way that you can turn a regular sheet of paper into a beautiful Easter basket.
Easter Projects
Looking for more fun and creative paper crafts to try which are suitable for Easter? While not designed specifically with Easter in mind, you probably would enjoy making these colorful tissue paper flowers.
Here is another easy way to make paper flowers as well. And while you're at it, make sure that you check out other recent posts for even more Easter DIY video tutorials.


Leave a Reply