If you are in search of a DIY craft decor project that you can use to brighten up a room or an event, one thing you can do is try making flowers out of paper. This video will show you how you can make large, vibrant, colorful flowers from tissue paper and tape.
There are many different ways you can make flowers out of paper. In the past, I have shared how you can make DIY paper dahlias as well as construction paper poinsettias. I have also shared 10 easy ways to make DIY book page roses.
This project is a bit different from those linked above because tissue paper is very thin and is different to work with than regular paper or construction paper.
You only need three different supplies to turn this project into a reality. So long as you have tissue paper in several different colors, a pair of scissors, and some tape, you will be able to create a beautiful decorative masterpiece.
Below, you can review these materials along with the written instructions that accompany the video. Have fun following along and creating your own tissue paper flowers.
Video and photo tutorial:
How to Make These Colorful Tissue Paper Flowers

If you are in search of a DIY craft decor project which you can use to brighten up a room or an event, one thing you can do is try making flowers out of paper.
Materials
- Tissue paper
- Tape
Tools
- Scissors
Instructions
- First, gather your tissue paper, and decide on the colors you want to use. I suggest that you at least go with green for the leaves and yellow for the stamen. Beyond that, you can choose any colors you want for the flower petals.
- Take note that you are going to need fairly large sheets of tissue paper to do this project. If all you have are small sheets, you will not be able to achieve the level of detail you are looking for, and you would end up with very small flowers if you proceeded.
- The first step is to cut the sheets of tissue paper into strips. In the video, I have shown to the best of my ability what you need to do to prepare these sheets, but it is a little difficult to see exactly what I'm doing, so I will attempt to explain it as plainly as I can here. I used four different colors in all: green, yellow, pink, and a purplish color.
- For each of these, I stacked up about five different sheets. 5 yellow, 5 pink, 5 purple, 5 green.
- You do not need to use this exact same number if you are going for a slightly different effect. The more sheets you use, the thicker and for the blossom will be.
- Now, let's talk about how large the strips of paper should be.
- The thinnest strips should be the yellow ones.
- The pink and purple ones should be about the same width as each other, but wider than the yellow ones.
- The widest strips by far should be the green ones.
- When you're finished, they should look like what you see here:
- Now that you have all the strips of paper, make sure that they are stacked just the way I have shown in the picture above.
- Next, start folding back and forth and back and forth repeatedly from one end to the other to create a fan or accordion shape.
- Once you have done this, separate the yellow sheets from the others.
- Press the sheets together in their accordion shape, and fold them in half from end to end across the center line.
- Take your scissors and cut lots of little fringes in from the edge toward the center. Be careful not to cut all the way through. These little fringes become the flower’s stamen.
- Repeat step 14, but this time, do it with the pink and purple tissue paper instead of the yellow.
- Since the pink and purple sheets are going to become the flower petals, you will not cut fringes out of them. Instead, you need to use your scissors to cut arcs at both ends. This gives them a petal shape.
- As you did with the yellow, pink, and purple sheets, hold together the green sheets in the accordion shape, and cut the ends. But this time, try to cut more of a leaf shape than a petal shape.
- Now, unfold all of the tissue paper layers and lay them flat on the table. Stack them back up as you did before with green on the bottom, purple and pink on top of that, and yellow on the very top.
- Now, fold them again accordion-style, but make sure that they are all together.
- Pinch them together in the very center so that they have a kind of bow shape.
- Apply some tape around the center to hold this shape.
- Now comes the really cool part. Gradually start pulling the sides toward each other, creating a radial blossom shape. As you go, carefully start fluffing up the tissue paper. It should start looking more and more like a flower.
- Keep arranging the leaves, petals, and stamen until you are satisfied with your flower' s appearance. If you need to, you can apply some tape to the bottom to help the flower to hold shape.
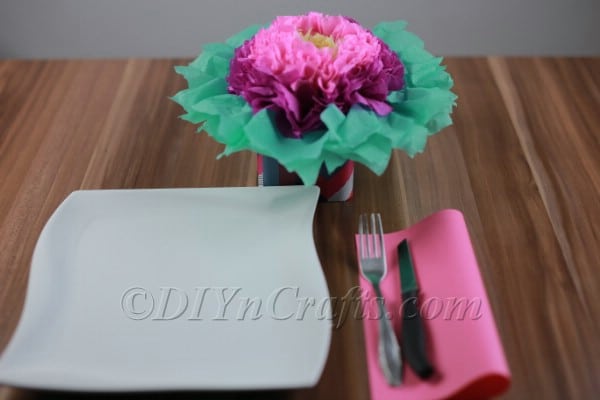
- When you're done, your flower should look something like this:
Recommended Products
As an Amazon Associate and member of other affiliate programs, I earn from qualifying purchases.
Video Tutorial:
You Now Have the Perfect Eye-Catching DIY Decor for Any Purpose
What is really superb about this project is not only how fun it is and how beautiful the result is but how versatile it is as well. Browse our large collection of DIY vases if you want to place them in a decorative vase.
You can use these flowers to decorate for any occasion. Just one makes for a lovely centerpiece for a table. But you could also make a whole bunch for a wedding or other big event.
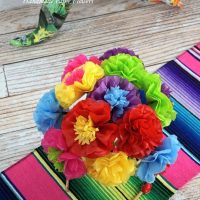
While I went with pink and purple for this video, you could choose any combination of colors, including more colors or fewer, depending on the effect that you want. Because tissue paper comes in so many different shades, it should be relatively easy to match any other décor in your home or at your event.
For that reason, these flowers would be great DIY decorations for weddings, etc. DIY wedding decor can keep costs down while also allowing you to express your creativity and personality.
If you enjoyed making these tissue paper flowers, be sure to check out some of the other tutorials that I linked to earlier. You can also check through my recent blog posts to explore some DIY Valentine's Day gift projects.





Thahira
Supper