
In Scandinavian mythology, a being called a “tomte” or “nisse” exists which is similar to a gnome. Traditionally, he is a kind of ancestor spirit who protects a household.
Since Christianity took hold in Scandinavia, he has come to be associated with the holidays. On Christmas Eve, the tomte travels with the Yule goat to distribute gifts (rather like Santa and his reindeer).
Want to make this Scandinavian tradition a part of your household this holidays season? In the video tutorial below, I will teach you how you can create your very own tomte out of some old socks, some rice, and other simple supplies!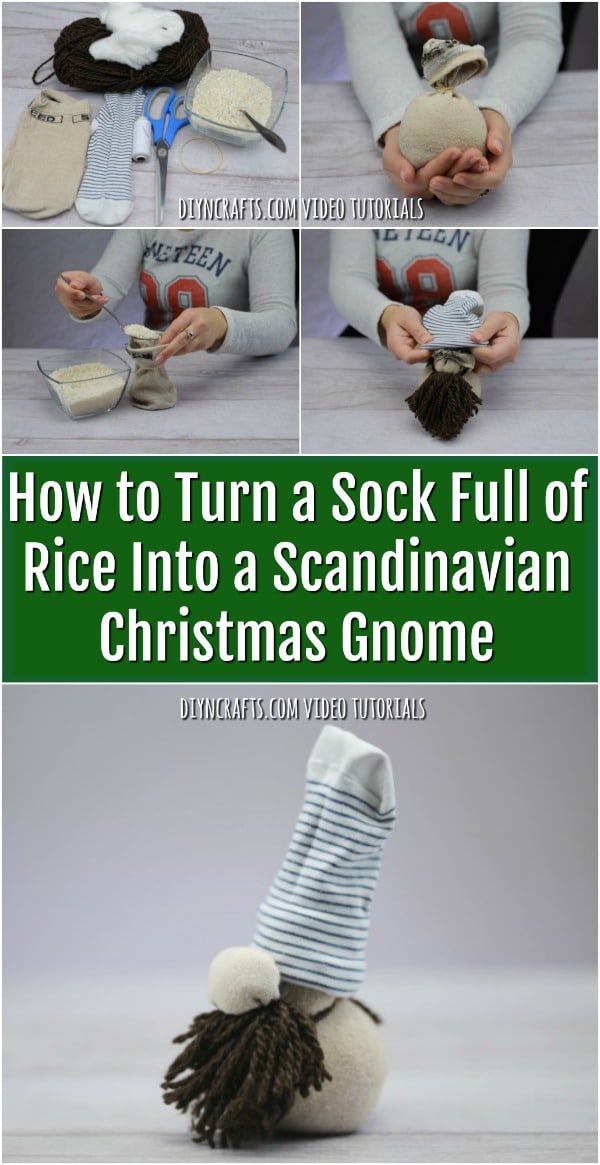
Video Tutorial:
You can jump right into this Christmas gnome craft without any further prelude if you like. But I do recommend that before you watch my Christmas craft tutorial, you look up the history of the tomte.
This is a wonderful chance to enrich your holidays by learning more about the history, mythology, and culture of Scandinavia.
A little basic sewing is required for this project, but you should not find it too challenging even if you are a beginner.
You also are going to need to grab a few old socks you are willing to transform. I recommend that you choose socks which do not match. Why? Because one of the socks is going to be made into the gnome, another is going to be made into the nose, while the third will serve as his hat.
You want the hat to stand out from the body of the gnome.
So try to pick a pair of neutral or flesh-toned socks to use for the body and nose of the gnome, and you can pick any color or pattern you want for the hat-sock.
 Let’s go ahead and get started. Review the list of materials and tools below, and then check out the video and the written instructions!
How to Turn a Sock Full of Rice Into a Scandinavian Christmas Gnome

Love the Scandinavian tradition of the tomte or nisse Christmas gnome? Bring that tradition into your home this holiday season by crafting your own tomte. Watch my video tutorial to find out how to do it using a couple of old socks, some rice, and some other simple supplies.
Materials
- Several old socks (two should be neutral or flesh-colored, one can be any color or pattern you want)
- Rice
- Needle
- Thread
- Yarn
- Rubber band
- Cotton stuffing (or cotton balls)
Tools
- Scissors
- Hot glue and glue gun
Instructions
- The first step is to fill one of the old socks with rice. Use one of the neutral or flesh-colored socks for this purpose, because it will become the body of your gnome.

- Once the sock is plump with rice, use the rubber band to tie off the top. Set the sock aside for now as you proceed to the next step.

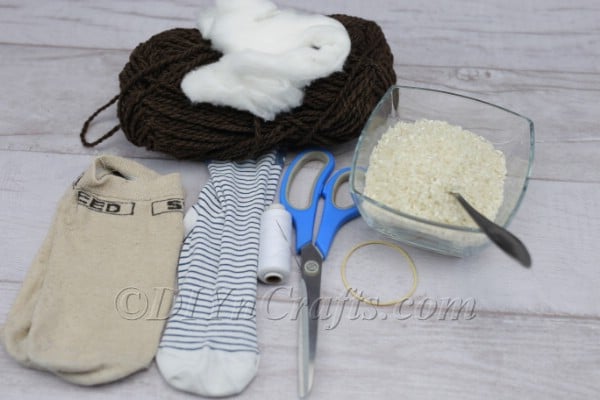
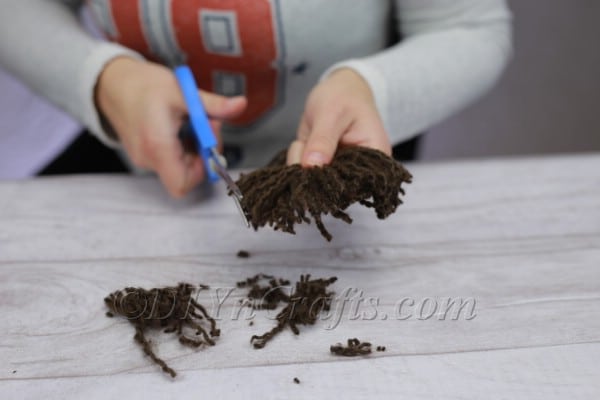
- Next, get some yarn. Go with a color of yarn which could represent a hair color, such as brown, blond, red, black, white, etc.
- Start winding the yarn around your hand again and again as if you were making a pom pom (on that note, check out this recent video tutorial to learn how to make a pom pom rug using yarn).
- Get a second piece of yarn and tie that around the middle of the spool of yarn you have just created to pinch it all together. This is again the next step you would take if you were creating a pom pom.
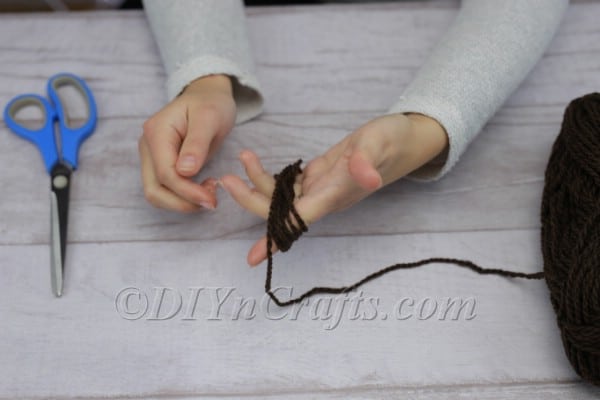
- With a pair of scissors, cut through the loops of yarn, just as you would while making a pom pom.
- Now you need to straighten out all the ends of yarn to make sure that they are not tangled together. This is going to become the gnome’s beard. I used a comb to help me do this, but you can also do it by hand if you prefer.

- If you need to, do some trimming in order to shape the beard to your liking. You can also get back to this step later if you prefer. You may find it easier to visualize the effect that you want later on in the process.
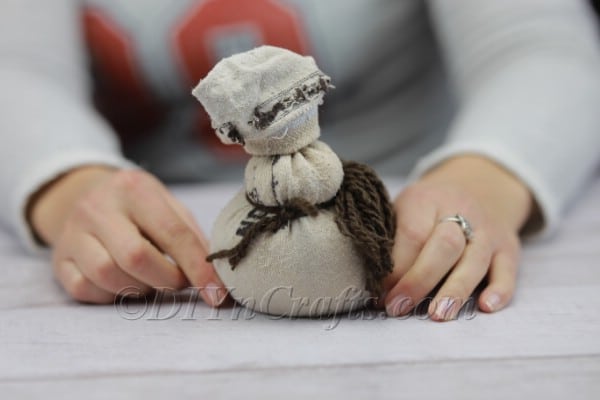
- The piece of yarn which you used to tie everything together while you were making the beard is still attached to it. Do not cut it off. Instead, you are going to use it to attach the beard to the gnome’s body. Return to the sock filled with rice, and tie it on around a third of the way down from the top. I recommend using a square knot since this should hold in place.
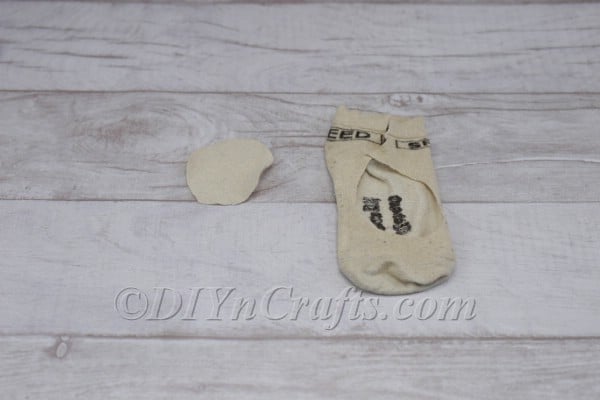
- Now it is time to craft the gnome’s nose. Get the other unused sock in the neutral or flesh color which matches the one you used for the body of the gnome, and cut a circle out of it.
- Work a needle and thread through around the edges, pinching in the fabric as you go. Once you've worked your way all the way around the edges, do not remove the needle and thread just yet.
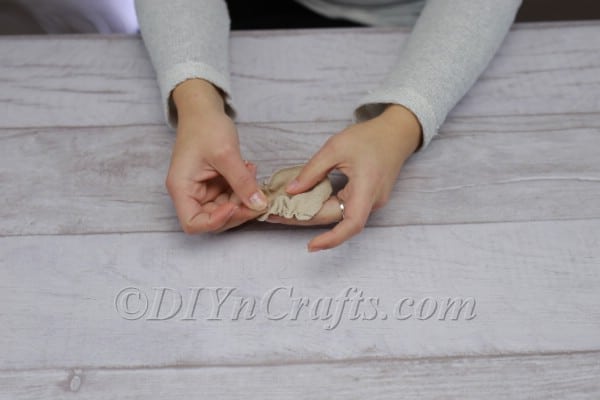

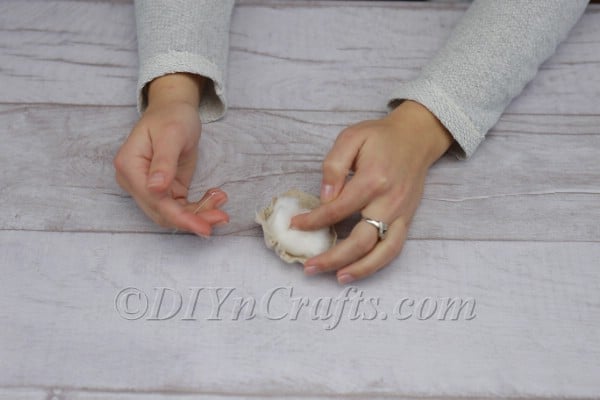
- Get some cotton stuffing and place it inside. If you do not have stuffing, some simple cotton balls can do the trick. Just shred them apart and stuff them inside.
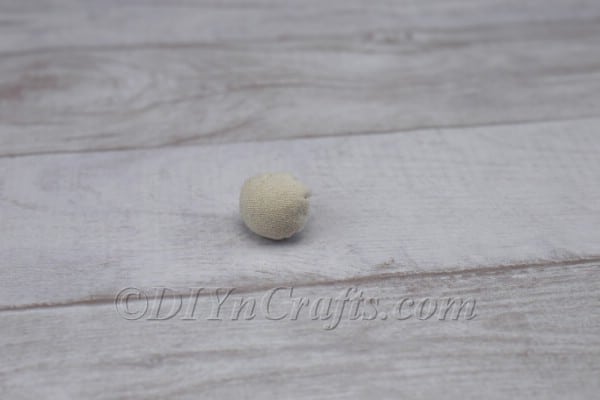
- Once you have sufficiently stuffed the nose, pull the thread tighter to pull the edges together around it. Then tie off the thread and remove the needle.
- Get the colorful sock and place it on top of the gnome’s head, covering up the tied-off end. This will be the gnome’s hat.

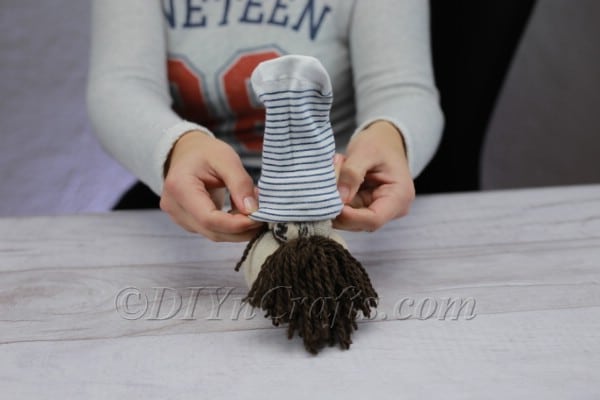
- Use hot glue to attach the nose above the beard and below the hat.

- If there is any last-minute arranging or trimming you want to do, take care of that, and your gnome will be complete!


Notes
If you do not have hot glue, you can still do this project—you just need to attach the gnome’s nose using thread instead. If you decide to take this approach, you will need to change the order of the steps. You will need to wait to fill the gnome’s body sock with rice until after you stitch the nose in place, as you will need to reach inside to do it well.
Once you get the nose situated, you can then proceed with the rest of the steps. Fill the body with rice, tie it off, make and attach the beard, and put on the hat.
Recommended Products
My favorite Etsy gnome listings.


While the myth of the tomte or nisse has evolved considerably over the ages and has taken different forms or meanings, this spirit can spread Christmas cheer and watch over your home and loved ones.
Make a tomte for your own home, and then make some for friends and family to watch over them as well.
Once you’ve made your Christmas gnomes, if you’re still up for more crafting, then take a look at some of the recent video tutorials I have uploaded. For another idea to use some of your old socks in a creative way, try this snowman sock project.
If you want to try a different yarn project, try making this easy Christmas wreath craft.


Christina green
these are so cute,i will certainly try them tomorrow,thank you for showing these.