I recently adopted a cat, so this year, I didn’t want to put poinsettias in my house for Christmas. I thought about it; I know that the toxicity to cats is supposed to be pretty mild.
But frankly, my cat has been through a rough enough year, and I just thought this year I would skip it.

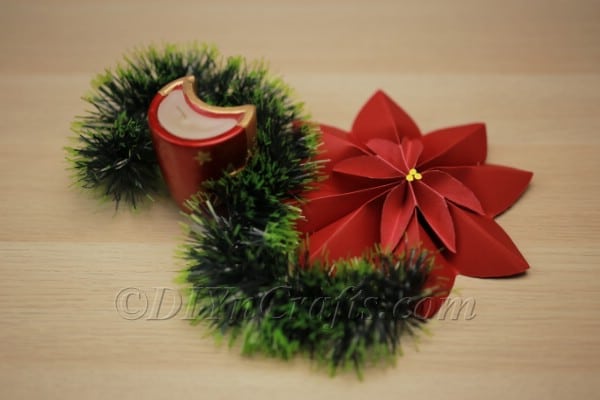
But you know what? I realized I really missed poinsettias. I was right about to go to the store to grab one after all when I thought of an even better idea. What if I made my own poinsettias from scratch using construction paper?
It took a bit of trial and error to get them to come out the way I wanted, but I am super happy with them now!
So, I made a video for you so that you, too, can learn how to make poinsettias out of construction paper.
Video Tutorial:
You need only a few things to make poinsettias. You are going to want a couple of pieces of construction paper for each, and you will need scissors, a stapler, and glue.
For the larger piece of construction paper, A4 works well to capture a realistic size.
But honestly, there are no strict requirements for this holiday paper craft—you can size the outer and inner petals of your poinsettia however you want.

In fact, while I wanted to make larger poinsettias out of construction paper, I also think that these easy paper crafts would be beautifully made out of origami paper. They would be smaller and not so realistic but still super festive.
Ready to get started with the tutorial? Below, along with the materials and tools list for this simple Christmas craft, you can find the instructions and the video.
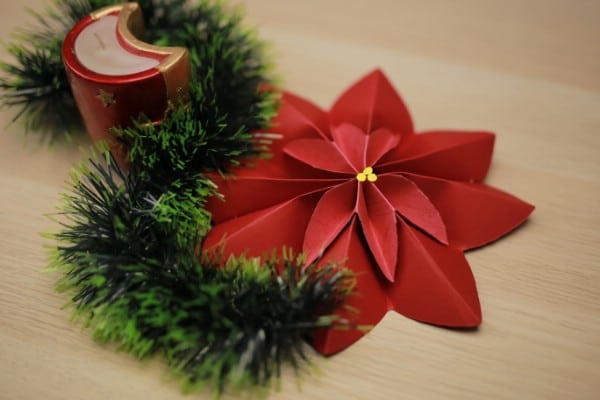
How to Make a Beautiful Poinsettia Out of Construction Paper
Materials
- Large piece of dark red construction paper
- Smaller piece of lighter red construction paper
- One piece of white or yellow construction paper
Tools
- Scissors
- Stapler
- Glue
Instructions
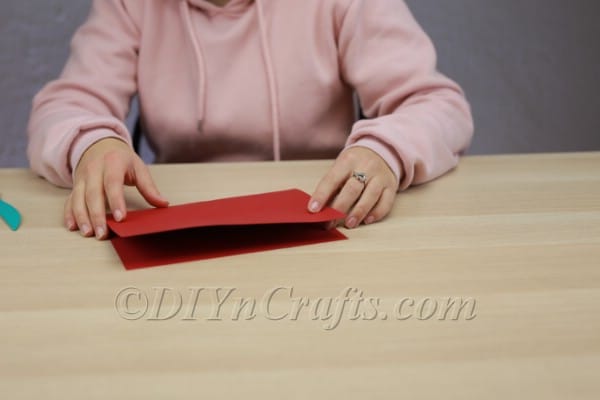
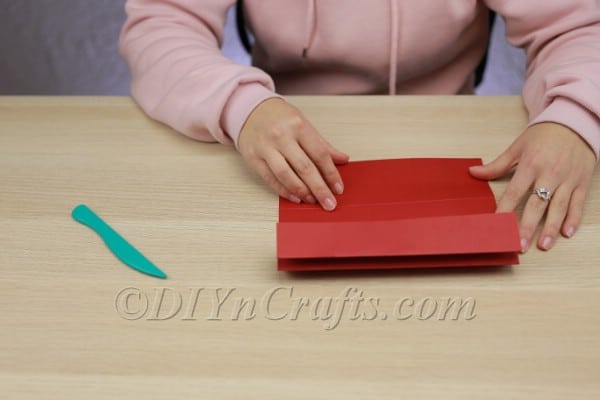
- Begin by folding the larger piece of construction paper in half.
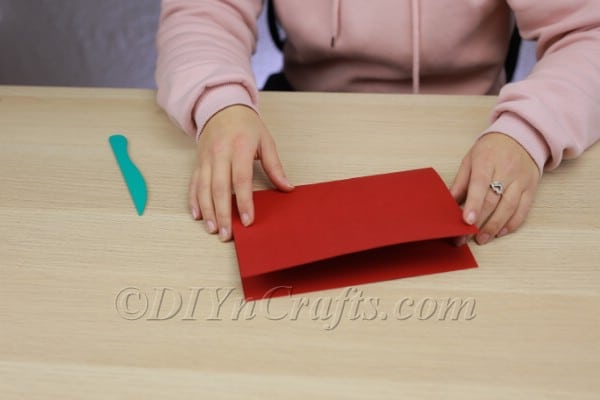
- After you have done that, lift the top section and fold that back in half over itself toward the crease you already created. Press that down to create a new crease. Then, turn the paper over and do the same thing to the other side.
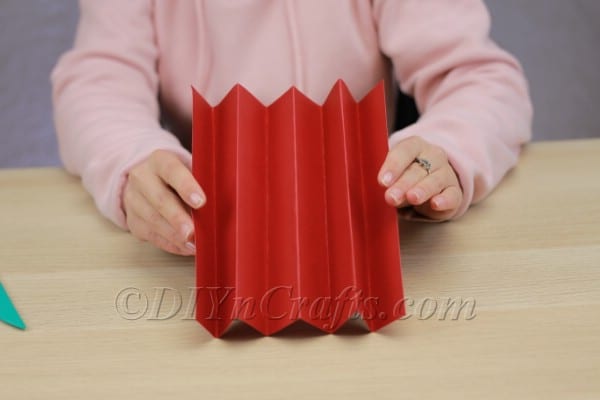
- Do the same thing again. Take the topmost section of paper and fold that back over itself. Press down to create a crease. Continue in this manner until you have created a "fan" like the one pictured below (it’s not really a fan, but if you pinched the bottom together, it would be).
- Follow the same steps above with the smaller piece of construction paper to create a similar set of creases.
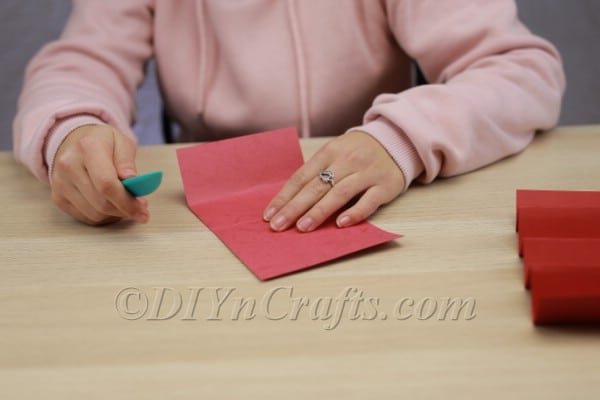
- Now, take the smaller piece of construction paper and pinch all the folds together so that you have a single flattened narrow rectangle.
- Folded it together again in half from the top to the bottom to create a rectangle which is half as tall. At this point, all of the ends should be gathered together.
- Use the scissors to cut an arc along with one side starting from the ends and stopping about midway. The ends should now come to a point.
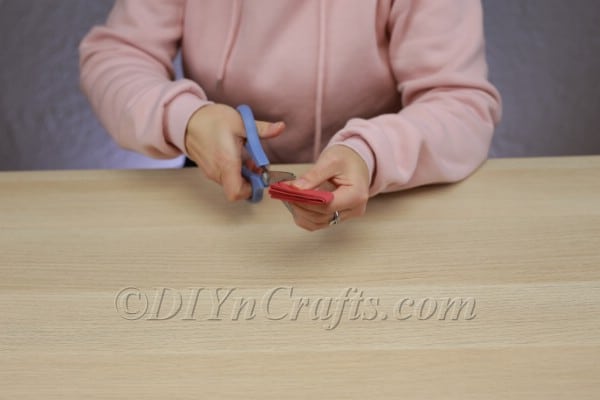
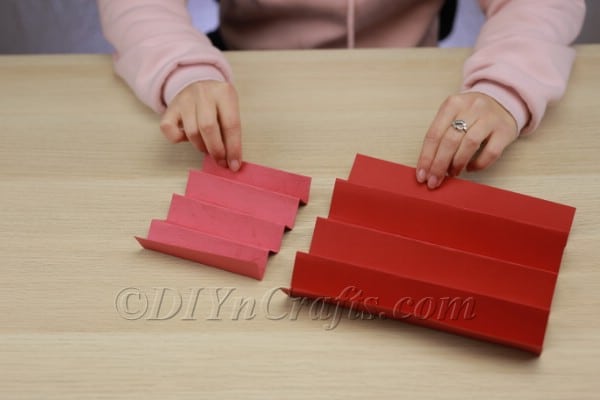
- Do the exact same thing with the larger piece of folded construction paper. Repeat steps 5 through 7. You can do some extra training if you need to in order to get the petal shapes right.
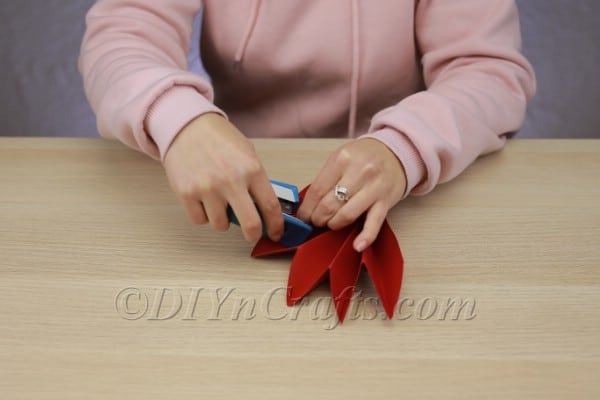
- Once you have completed the steps above, unfold both pieces of construction paper again, and set the smaller piece on top of the larger one in the middle, lining up to ridges and troughs.
- Pinch the papers together in the center so that they fan out on either side. Holding that in place, pull the ends together on either side and staple them in place. While this is difficult to describe in words, it is a pretty simple step. Check out the video to see how it is done. This is what creates the flower shape.
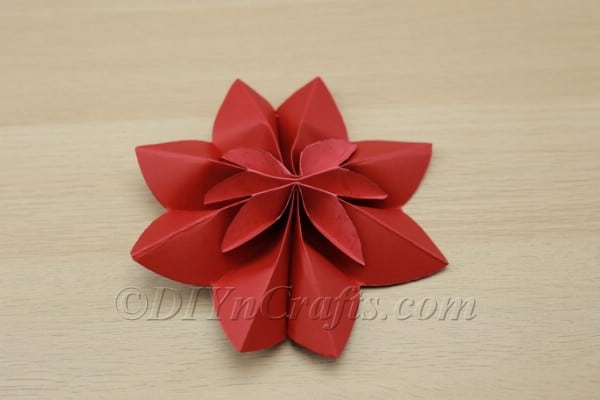
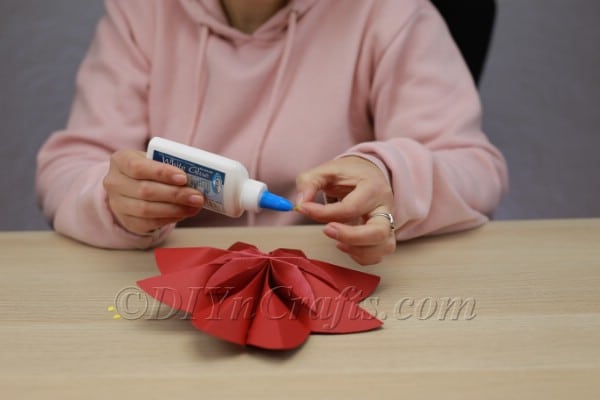
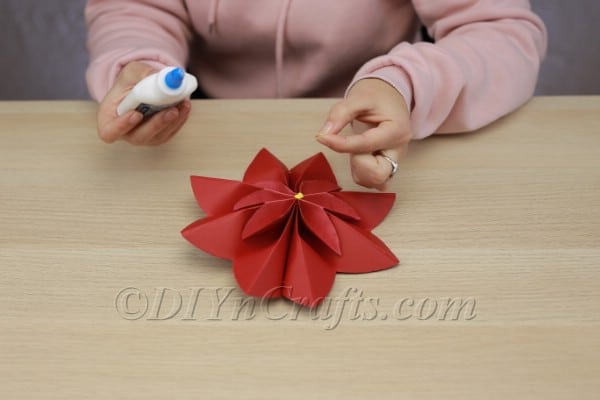
- The next step is very easy. Get the yellow or white construction paper and use the hole puncher to cut out a few little circles.
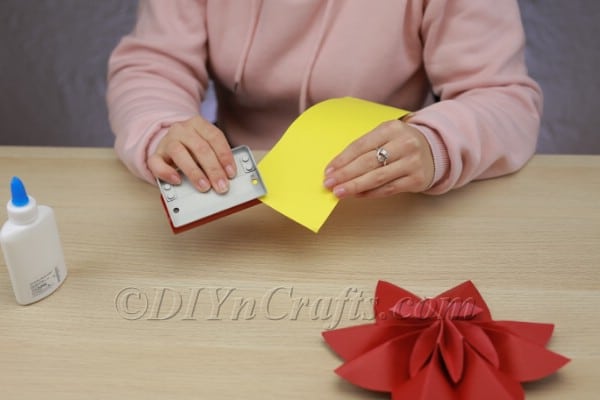
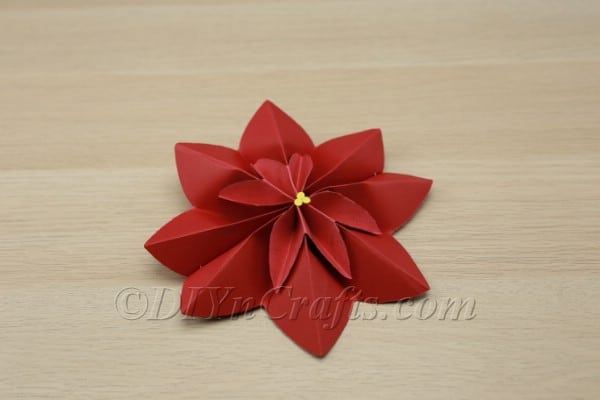
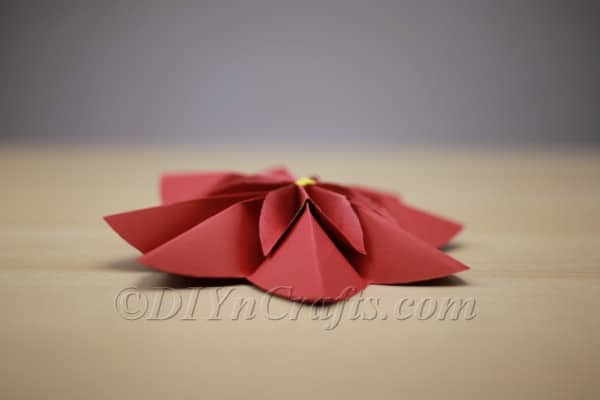
- Use glue to attach the little yellow or white circles to the center of the poinsettia. At this point, your project is complete!
Notes
You may have noticed in the video and some of the images that I have a plastic knife which I have been using during the folding process.
This is an optional supply. If you have one, it can be very helpful in flattening your creases, because construction paper resists making a neat crease. You can also use any other similar object to achieve this purpose. A metal knife works fine, or even a blade from your scissors. If you prefer, you can just flatten the paper by hand. So long as you take your time, you should get neat folds.
Recommended Products
My Favorite Related Etsy items.
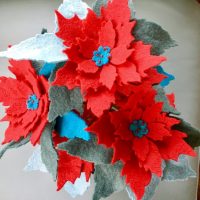


Once you have learned how to make your first poinsettia out of construction paper, you will be ready to make an entire bouquet of them. You can display them however you wish.
They can look beautiful if you attach them to a garland, or you could try crafting paper stems and putting them in a vase
If you had fun making construction paper poinsettias, you might enjoy some of the other Christmas paper crafts that I have shared recently.
Take a look at the video tutorial, which teaches you how to turn an old book into a Christmas tree, or check out how you can turn an old book into a beautiful Christmas angel.


Leave a Reply