With Thanksgiving behind us, we are now officially well into the holiday season. That means that if you haven't already, it is time to start working on DIY holiday crafts. If you are in search of easy rustic Christmas crafts to spruce up your home or make as gifts, you are in the right place.

Today, I will be sharing a very easy Christmas craft with you in my newest video. This project is a great one for adults or children. It is also easy to customize. We will be learning how to turn an ordinary flower pot into a cute snowman decoration.
For this project, you only need some really basic materials. I recommend using a flower pot, but if you do not have one, you can get away with substituting a bucket. The size and shape are up to you. In fact, if you have a few different sizes of flower pots or buckets, you can make a group of individual snowmen.
For the other materials, I listed white, yellow, red, and black paint below. If you have only primary colors, that will do just fine since you will be able to mix what you have to create what you need. If you happen to have orange paint, you can grab that as well, as it will make one of the steps easier.
Finally, one of the things that makes this project easy to customize is the fact that you can use tissue paper or fabric in any color you want. I went with blue, but you can choose any color according to your personality or aesthetic preferences.

How to Make a Cute Snowman Out of a Flower Pot
If the holiday season has you in the mood to work on some crafts, you’ll love this fast, easy and fun video tutorial. We’re going to teach you how you can turn an ordinary flower pot into a cute snowman decoration. This project is perfect for both children and adults.
Materials
- Flower pot
- White paint
- Red paint
- Black paint
- Yellow paint
- Ribbon
- Tissue paper or fabric
Tools
- Scissors
- Paintbrushes (large and small)
Instructions
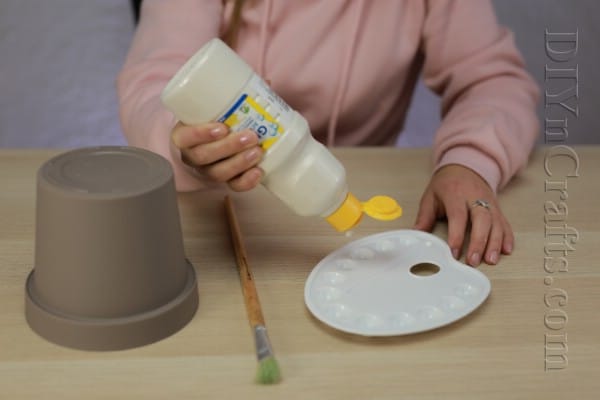
- Begin by setting out your supplies. Squeeze out some white paint on your work surface. I had an actual palette to work on, but if you do not, a piece of cardboard or even paper should do just fine.
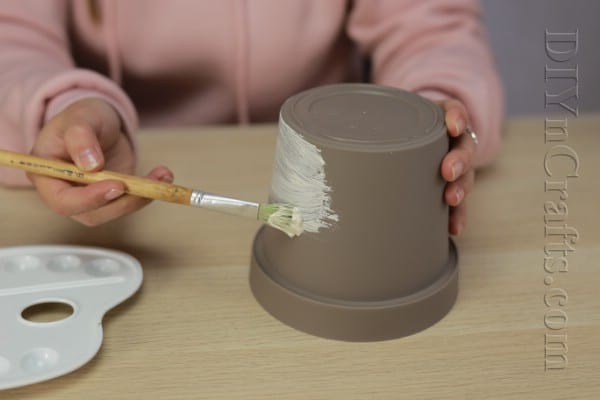
- Use the large paintbrush to paint your flower pot white. Then, wait for the paint to dry.
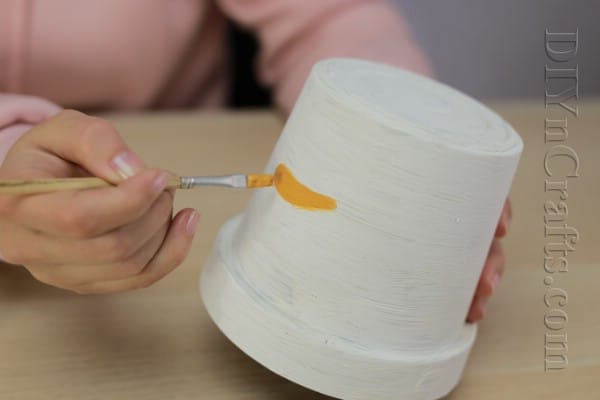
- Once the paint has thoroughly dried, you will be ready to proceed to the next step. Make sure that the flower pot is upside-down. Using the small paintbrush, create the snowman’s carrot nose. If you have orange paint, you can use that. If you do not, you can mix red and yellow to create orange.
- Next, use the small paintbrush to create eyes above the carrot nose. You can use the black paint to do this.
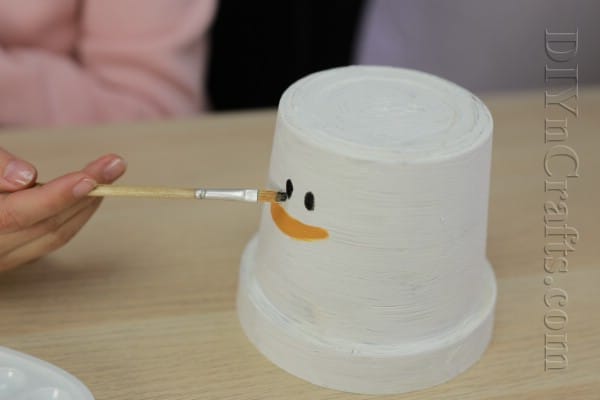
- After the nose and eyes have been painted, you can use the black paint to make the smiling mouth under the nose.
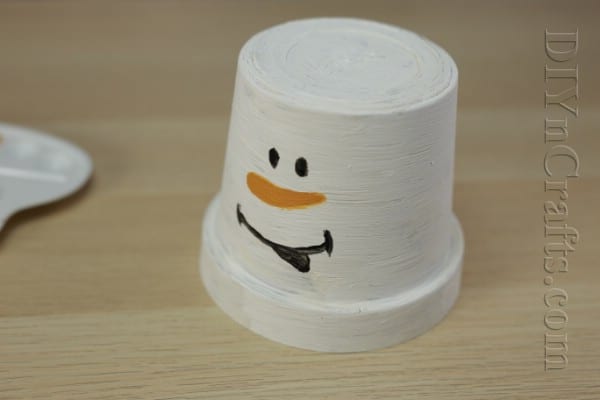
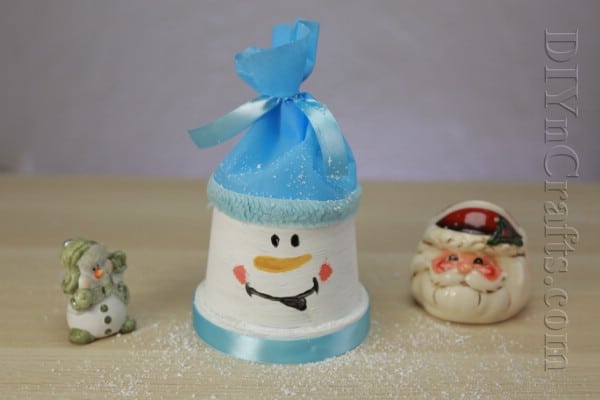
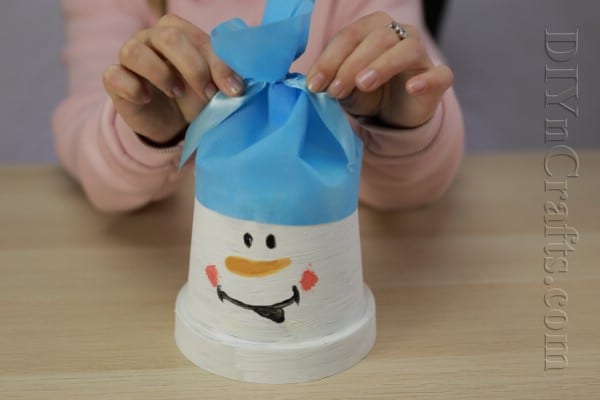
- Now you have finished painting your snowman’s face. Wait for the rest of the paint to dry before moving onto the next step. Once it is dry, cut a piece of fabric or tissue paper and wrap it around the snowman’s head as depicted in this image.
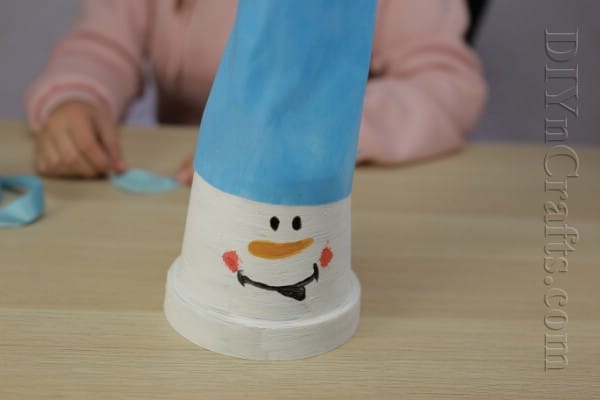
- Cut a piece of ribbon and tie it around the top of the fabric or tissue paper in order to create the shape of a winter hat. You can probably just get away with setting it there, but you might want to use some glue or tape to hold it securely in place.
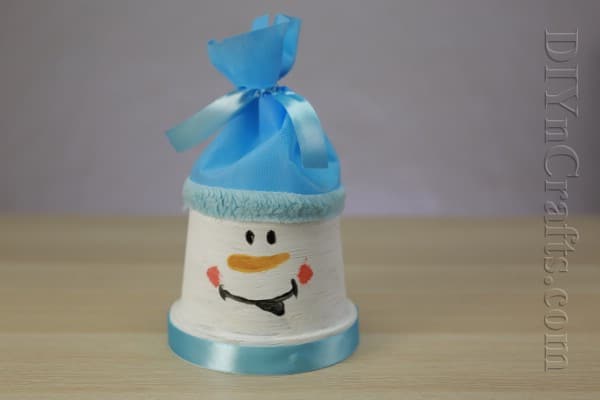
- Next, get another piece of ribbon and wrap it around the bottom of the snowman like a scarf. You will need to glue or tape it in place.


- At this point, you can say that the project is complete. But if you have any extra embellishments you would like to add, you can do so now. I was lucky enough to have a strip of furry fabric which I was able to wrap around the base of the hat to make it extra-convincing. Your cute DIY snowman decoration is now complete!
Notes
I mentioned that you should wait for the paint to dry after you cover the flower pot in white before you paint on the snowman's features. You might also want to wait for each feature to dry before you work on the next. Whether or not this is necessary depends on how well you can control your hand as you work.
Recommended Products
As an Amazon Associate and member of other affiliate programs, I earn from qualifying purchases.


Enjoy This Adorable, Easy Holiday Craft!
Congrats! You have just turned a basic flower pot into an unbelievably cute Christmas craft. Even though it is pretty obvious when you look at the finished craft that it started its life as a flower pot, the transformation is pretty amazing. And the fact that you can see that it was a flower pot only adds to its rustic charm.
I mentioned earlier that this is a good craft for children. Scissors are only really involved for a couple of steps. Since you can take care of these yourself if needed, this craft is even a good choice if your kids are very young. Children will have a fun time choosing tissue paper or fabrics to use, and will enjoy expressing their personalities through their art.
After you have had fun making this DIY Christmas project, make sure that you check out some of the other easy and fast tutorials on our site. I have been posting many Christmas craft videos lately. You can watch most of them in just a couple of minutes apiece, which lets you get right to all the joys of crafting. Thanks for stopping by, and Happy Holidays!


Anonymous
I'm learning