
If you're anything like me, the holiday season means crafting season. This year, I have been working hard to come up with as many easy DIY Christmas craft ideas as I can share with you.
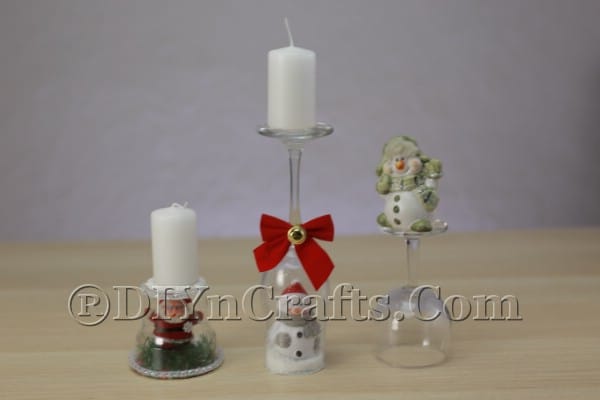
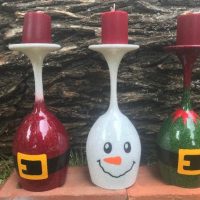
In my latest video, I show you how you can make a unique and beautiful Christmas candle holder using some pretty surprising supplies. For this project, you're going to need a clear wine glass, a tree ornament or decoration that will fit inside, and a few other common materials.

When I put together holiday project ideas, I usually have two goals in mind. The first is to provide you with a crafting activity that is easy and inexpensive for anyone to make.
The second is to make sure that you can customize your DIY holiday decorations and really bring your creativity into play. This product is ideal for that.
You can choose the shape and size of the wine glass you want to use, as well as the color of the candle and bow. You also can select any Christmas ornament to place inside. That means that every one of the candle holders you make can be totally unique.
Alternately, if you want to make a set of matching candle holders, that is easy to do as well if you have a set of matching ornaments and wine glasses.
Kids can work on this project with you. Just keep in mind that small children need to be supervised so that they do not drop and break the wine glasses. You also need to make sure that you do not give a hot glue gun to a child who is too young to use it safely.
How to Make Festive Christmas Candle Holders Out of Wine Glasses
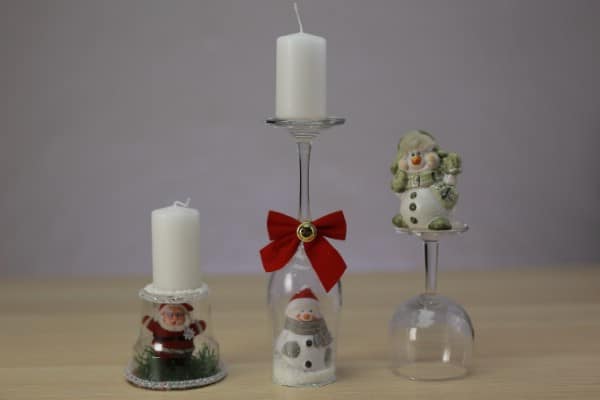
What better way is there to celebrate the holiday season than with some Christmas handcrafts? In this exclusive video, I show you how you can turn an ordinary wine glass into a gorgeous Christmas-themed candleholder. This project is simple, fun, and easy to customize!
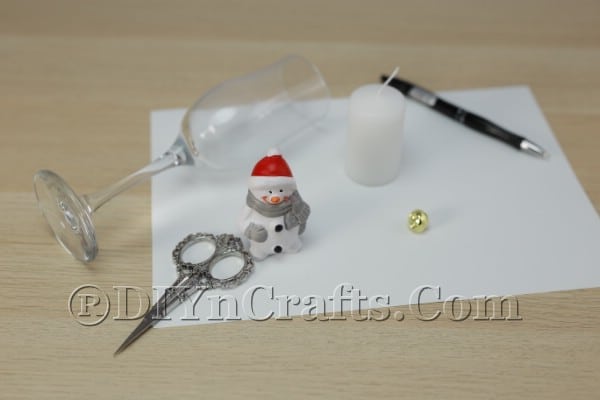
Materials
- Wine glass
- Cardboard
- Christmas ornament
- Artificial snow
- Candle
- Bow or ribbon
Tools
- Scissors
- Pencil
- Hot glue and glue gun
Instructions
 The first step is to place your wine glass upside-down on your cardboard. Take a pen or pencil and draw around the rim of the glass to create a circle on the cardboard with a matching size. I highly recommend that you use high-quality white cardboard for this step, not the cheap brown stuff which packing boxes tend to be made of. You want the cardboard to sort of “blend in” with the finished candleholder, not call attention to itself.
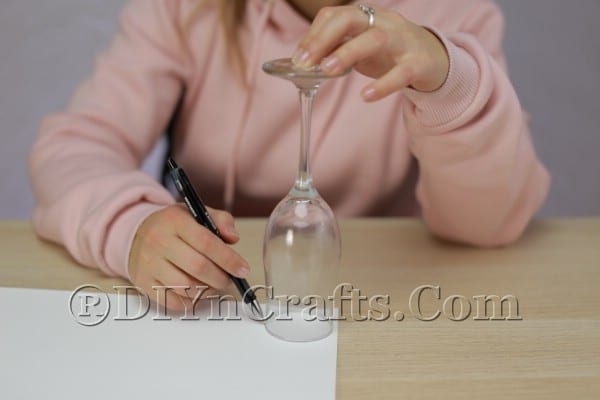
- Once you have drawn the circle, you will need to cut it out using a pair of scissors. Try to err a bit on the side of too big rather than too small. If you cut the circle too small, you will have to try again; if too big you can fix (we’ll get to that later).
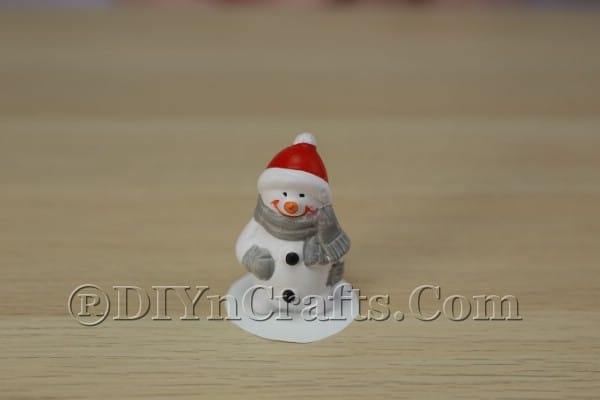
- Next, select the ornament that you wish to use. The main requirements are twofold. First of all, it needs to fit neatly inside the upside-down wine glass. Secondly, it needs to have a stable base.
- Use hot glue to attach the ornament to the circle you have cut out. You can see now why we had to use cardboard instead of paper; paper would not provide adequate support for the weight of the ornament.
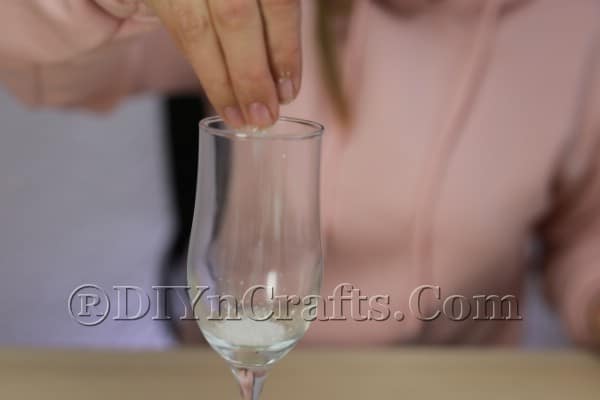
- Sprinkle some artificial snow inside the wine glass. You are going to want some of it to stick to the bottom and sides, but some of it to fall when you turn the glass over (as you will be doing shortly). So I would recommend spraying a little adhesive inside before you add the artificial snow. That way, some of it will stick to the bottom.
- Use your hot glue gun to add a layer of glue around the rim of the glass.
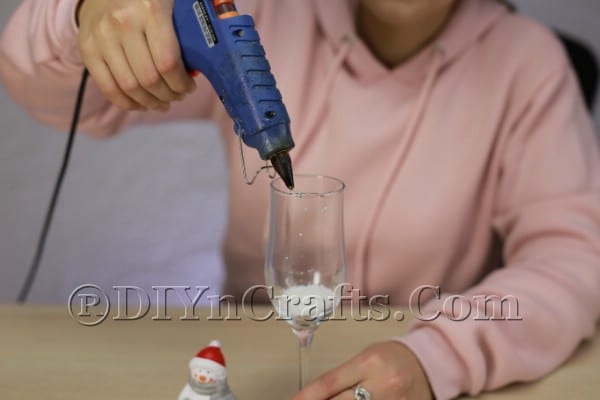
- Now, turn the piece of cardboard with the ornament glued to it upside down. Lower the ornament into the glass, and then press down around the edges so that the glue adheres to the cardboard. Wait a moment for the glue to dry.
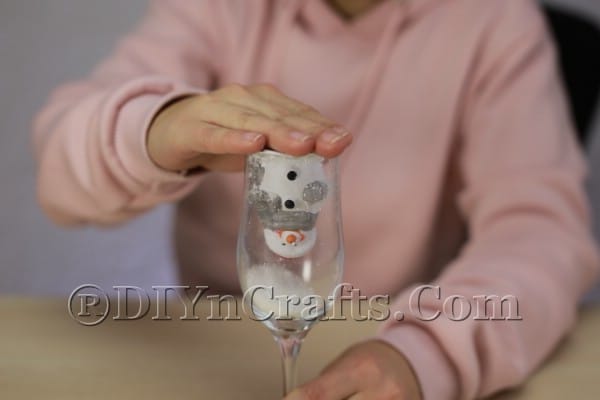
- Flip the glass upside-down and set it down on your work surface. When you do this, the ornament will be right-side-up. A bit of the artificial snow should fall down from the top of the glass to land on the ornament.
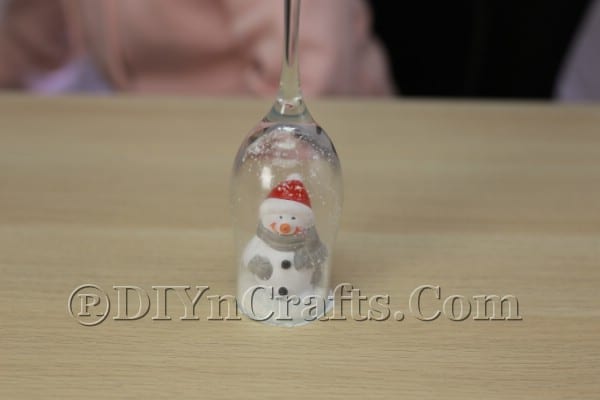
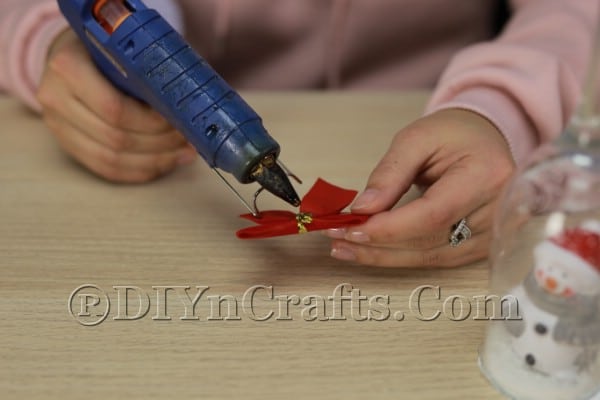
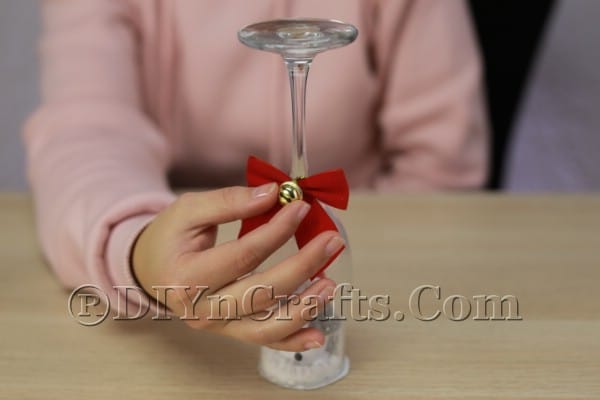
- Next, you are going to use your hot glue to attach a bow to the stem of the glass right above the bulb. Don’t have a bow? You can make one using some ribbon. I suggest tying a little twine around the knot so that it holds. Some carefully-applied glue might also do the trick.
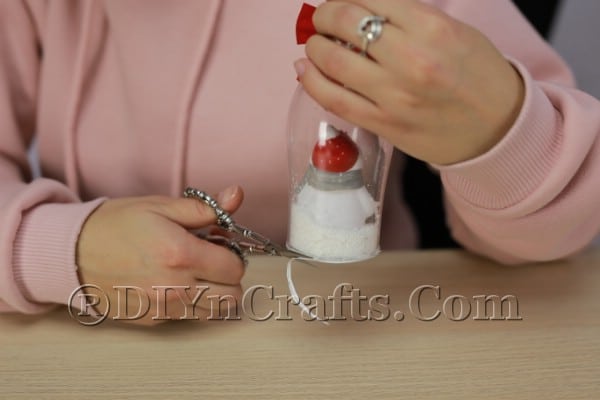
- Your candleholder is starting to look pretty fabulous now, but look at those cardboard edges sticking out at the bottom! You need to do something about that. Thankfully, this is as easy as picking up a pair of scissors and doing a little trimming.
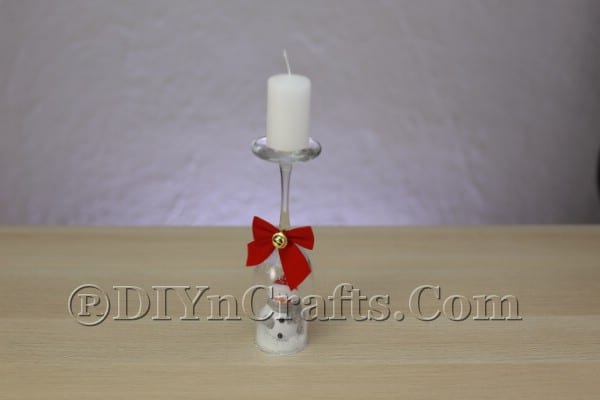
- The last step is to get a candle and place it on top of your candleholder (which is actually the base of the wine glass).
Notes
Recommended Products
As an Amazon Associate and member of other affiliate programs, I earn from qualifying purchases.

These Handcrafted Christmas Lights Can Bring Light and Cheer to Every Room
After you have finished crafting your Christmas candle holders, all you need to do is place them in every room of your house that you want to spruce up a bit for the holidays.
These candle holders are extra fragile. Not only can the glass break if they are stored improperly, but also the ornaments inside. So, when you are putting away your holiday decorations after the season is over, stuff some extra packing materials around these candle holders so that they can be safely stored for next year.
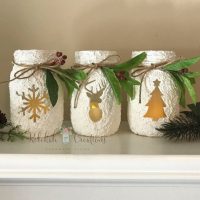
If you enjoyed this Christmas candle holder project and are looking for another that is similar, check out how to make wintry frozen candle jar decorations. This project is arguably even faster and easier to make and has a beautiful result that you will be proud to display.


Annalee Reeve
Hi can I ask when candle is lit does wax run down the whole wine glass?
Vanessa Beaty
It should not if the glass is bigger than the candle and if you clean up wax occasionally.