
The other day, I was shopping at a local department store, and I was browsing the Christmas decorations to get some ideas for this year. While I was there, I saw some cute miniature Christmas trees, which I really liked. They were small enough that they could easily be put anywhere in the house, even in a small space.

I fancied the idea of making some of these for myself and friends and family. I figured it would save money, and I could customize the trees to make them look even more beautiful than the ones that I saw in the store.
So, I figured out how to do it, and in today's video tutorial, I will be sharing the steps for this easy DIY Christmas craft project with you.
Video Tutorial:
The real beauty of this project lies in its versatility. If there is a tight space in your home you want to fill with cheer for the holidays, you can literally plan to create a tree that will fit. The tree can be as tall or as short as you want and as wide or narrow as you need it to be.
This project is also versatile since you can customize it with your choice of garland and ornaments. Just switching out one garland for another can completely change the look that you end up with.
For the ornaments, the ball ornaments that I selected are inexpensive, easy to come by, and easy to work around. But you could choose any ornaments that you wanted and again end up with a different finished look. You could even make your own DIY Disney tree ornaments.

Once you have your supplies all picked out, it is time to craft! Let’s go ahead and get started creating a miniature Christmas tree.
How to DIY a Miniature Christmas Tree Decoration

Want to discover how you can make a miniature Christmas tree out of cheap supplies following a few easy steps? Watch our exclusive video to learn how to create one of these lovely little trees for your own home. They make wonderful gifts as well, so plan to make one for yourself and one for a friend!
Materials
- Cardstock
- Ball ornaments
- Tape
- Swath of fabric or tissue paper
- Small container or stand
- Twine
- Christmas garland (fake)
- Any additional embellishments you want to add to your tree
Tools
- Scissors
- Ruler
- Pencil
- Drafting triangle
- Hot glue and glue gun
Instructions
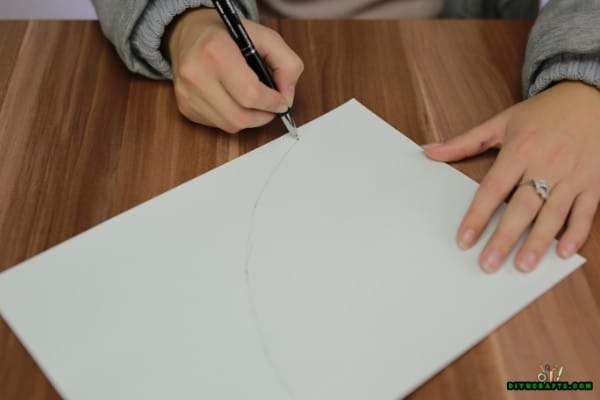
- Your first step is to make a cone to serve as the underlying structure for the tree. You can use paper, cardstock or cardboard to do this. The best choice is cardstock, because it is firm enough to hold its shape well, but flexible enough to effectively make into the cone shape to begin with.
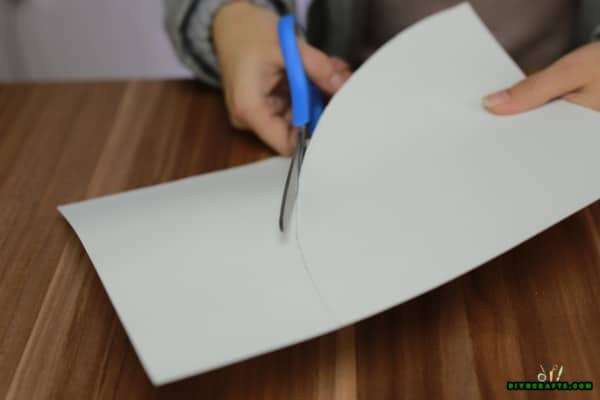
- To help guide you in your efforts to cut a smooth, even curve, try using a drafting triangle as you see in the video and photos. If you do not have access to one, do not fret. You can probably just take a guess and cut carefully and get the result you need. If you need to make any corrections to the base of the cone, you can do so after you have folded it.
- Once you have created the cone shape out of the cardstock, apply some tape to hold it together.
- Next, use some tape to attach the ball ornaments around the outside of the cone. Tried to distribute them evenly for an aesthetically pleasing effect. Note that at this point, your miniature Christmas tree does not look like much, but that is about to change.
- Now comes the step which is truly magical. Take the garland you have picked out, and start hot gluing it around the cone. I found it easiest to begin at the very top and start wrapping around and around until I reached the bottom. As you go, you will need to weave the garland around the ball ornaments so that they can be seen.
- After completing the step above, you will have what should look very convincingly like a miniature Christmas tree. You will need to find some kind of a base for it to stand upon.
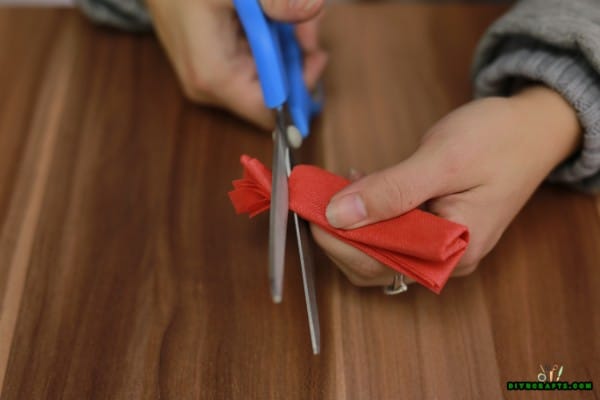
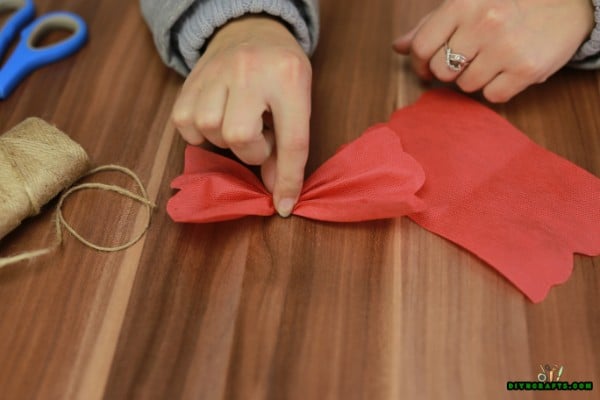
- I decided that the tree would look much better if it had something on top, so I decided to make a bow ornament as a tree topper. To do this, I simply took some red fabric and made it into a bow shape. I then tied it off with some twine. I attached a little bell I had as well.
- Now all you need to do is attach the bow to the top of the tree. Voila! You have a miniature Christmas tree which is exquisite in every detail.


Recommended Products
As an Amazon Associate and member of other affiliate programs, I earn from qualifying purchases.


So that is how it’s done! Who would have thought it would be so easy and inexpensive to create such a fabulous Christmas craft?
Once you have your supplies gathered, you really only need a few minutes to complete this project. It’s amazing that one moment, you are looking at a paper cone and the next, you are looking at a stunning little tree.
The first of these I made I ended up keeping for myself. I put it in my entryway so that it would be the first thing that guests would see when they came over to celebrate the holidays with me.
The second one I sent as a gift to my daughter in college. She gets to come home to celebrate Christmas with us, but I didn’t want her to miss out on any of the cheer of the season.
This project made it possible for me to give her a Christmas tree, which she could squeeze into a tiny corner of her dorm.
No store-bought tree would likely have fit in her room with all of her stuff. As you can imagine, she was thrilled when she opened the box in the mail!
It is my hope that you will have as much fun with this DIY Christmas project as I did and that you will also check out some of our other Christmas craft projects.
Looking for more miniature Christmas tree ideas? Find out how to create an aromatic Christmas tree using a real sprig of pine.


Cheryl
What a cute idea! I'm definitely going to make a few of these for my area at work. Thank you!