I get so caught up enjoying the fun of summer that I always dread it coming to an end. So I tend to forget that I also adore autumn. That means that every year, I fall in love with fall all over again. And it’s always when I start crafting that I remember everything which is fabulous about this season.
If you’re looking for some fun fall crafts, there are so many great ideas you can check out right here on the site! Learn how to make 40 beautiful autumn wreaths, or bring some autumn festivity to your porch with these 25 decorating ideas.
But if you’re looking for something simpler, something fast and easy you can do with basic supplies, I have three great projects to share with you! All of them involve transforming plain glass jars into autumn masterpieces. Check out the video below and be sure to scroll down for instructions!

Materials:
Glass jars (one for each project)
Paint
Sponges and brushes to work with
Twine
Embellishments
Fall leaf cutout
Acorns
Votive LED light
Straw
Burlap, lace, and ribbon
Space to work (this can be a messy project)
Blow dryer
1. Painted Polka Dot Mason Jar
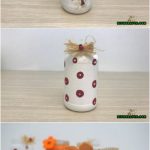
1. Gather your supplies. Put down an old towel or some newspapers or something so that you do not get your workspace dirty. Then get a jar, some paint, and some sponges and brushes. While you can technically use any paint colors you like, I went with white for this project.
2. Use the sponge to cover the jar with white paint.
3. Get a paintbrush and a contrasting color of paint. I used red, because I was going with a ladybug theme. Add little dots around the jar.
4. At this point, you need to wait for the jar to dry. If you want to speed this process along, you can use a blow dryer.
5. Add some craft straw to the top along with whatever embellishment you might have handy. I had this cute ladybug to use.
Here’s the finished jar! Isn’t it cute? This would make a great fall gift for a friend or relative!
2. Fall Leaf Mason Jar Candle Holder
1. As with the first jar, gather your supplies. Put something like an old towel down to work on so you don’t make a mess. Get some paints, sponges and brushes together. You also will need a fall leaf cutout for this project. I suggest you use paper and not a real leaf, because you want it to stick flush against the jar (you’ll see what I mean in the next step).
2. Adhere the leaf to the jar. I suggest using double-stick tape for this, because the leaf is not going to stay there. You are going to have to peel it off later.
3. Use a sponge to apply paint to the jar. Cover it thoroughly.
4. Next you need to wait for the paint to dry. You can use a blow dryer to speed up the process.
5. Now, peel off the leaf that you painted over. This will leave behind its silhouette, offering a clear leaf-shaped window into the jar.
6. Do any touch-up work that you need to with a small brush.
7. Pour acorns into the jar (or anything else you want to create a fall look).
8. Tie some twine around the top and add a glass pearl or other embellishment. You can also do some more painting around the edges of the leaf shape to add even more character to the jar.
Here’s the gorgeous result!
3. Jack-O'-Lantern Painted Jar
1. Get your towel laid down on your work surface so you don’t make a mess and gather your paints and other supplies. For this project, get a shorter glass jar. Apply paint all around the outside using a sponge.
2. Use a blow dryer if you want to speed up the drying process with the paint.
3. Make two little bundles of straw and glue them to either side of the jar.
4. Now add some glue around the top of the jar and attach some burlap, lace and ribbon (you can use all of them or just one or two—it is totally up to you).
5. Paint on some eyes, a nose and a mouth, like you would put on a jack-o-lantern. Add a cute flower or other embellishment.
Isn’t he adorable? And unlike a pumpkin, this cute little jack-o-lantern will never expire. He’ll be with you year after year to welcome fall!


Ellen
You can turn your mason jars into gorgeous snow globes. All you have to do is empty the mason jar, and fill it with fake snow, glitter and plastic ornaments. Lastly, glue the toy mistletoe on the top of the lid, and screw it back on. If you are looking for mason jars of different sizes, head over to Premium Vials we offer wide range of mason jar mugs.