Tired of looking at your old dresser or wardrobe, but don’t want to thrift it?
Sometimes we get attached to old furniture items which have sentimental value—or we simply do not have the money or desire to replace them. Yet we are still left longing for a fresh look.
Well now you can have it … revitalizing your old furniture may be easier and cheaper than you think!
All you really need is paint and some creativity and patience.
The following ideas range from simple to elaborate, easy to challenging. Some of them might take you weeks, but many will take you only a couple hours on a Sunday afternoon.
They are perfect for transforming your tired old furniture into something new and beautiful, or for upgrading or flipping furniture you find at thrift stores or garage sales.
Jump to:
- 1. Chip a design out of paint.
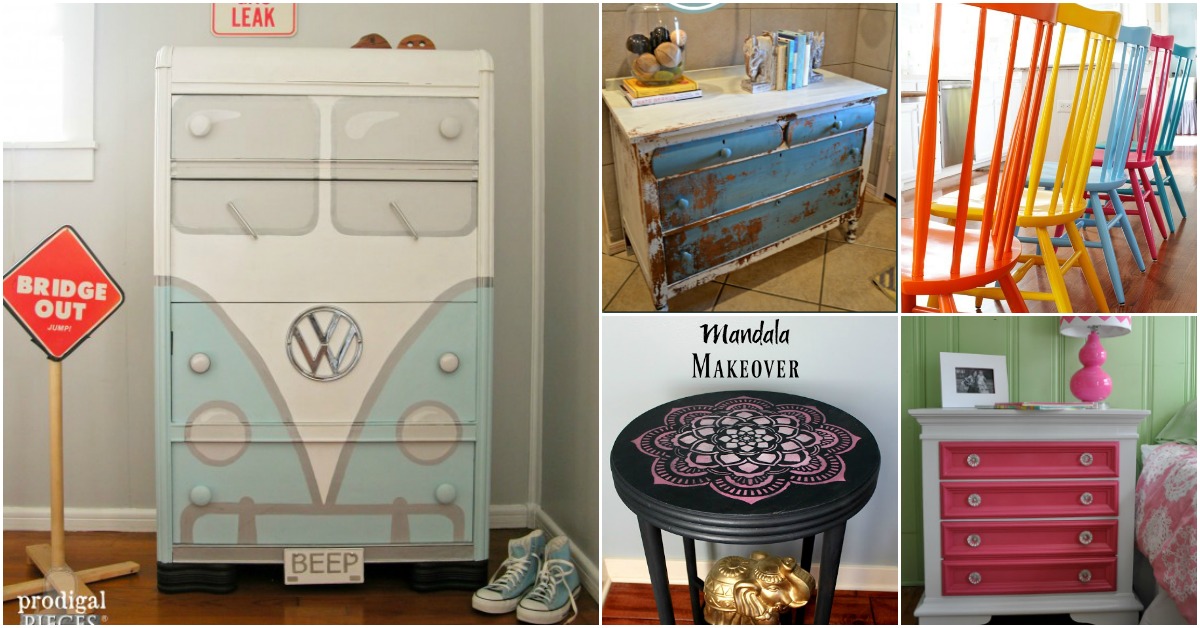
- 2. Splatter paint for a cool artsy look.
- 2. Add silver or gold accents.
- 3. Stencil on a simple design ...
- 4. ... Or stencil on a slightly more elaborate pattern.
- 5. Paint elaborate designs inspired by nature.
- 6. Make intricate designs using lace.
- 7. Try creating a “dipped” look with paint.
- 8. Just paint the drawers in a chest of drawers for a splash of vibrant color.
- 9. Paint your furniture in a fun spectrum of hues.
- 10. Paint an elaborate scene.
- 11. Paint an end table to look like a townhouse or other building.
- 12. Paint a dresser to look like a bus.
- 13. Go with stunning contrasts for a bold effect.
- 14. Blend together colors in an unusual way.
- 15. Make your chest of drawers look like a NYC subway sign.
- 16. Paint a lovely, simple, elegant design.
- 17. Go with stunning high contrast, leaving the natural wood grain visible.
- 18. Paint a herringbone design.
- 19. Adorn your furniture with bold geometric patterns.
- 20. Create a gradient of hues.
- 21. Go for the “shabby” look.
- 22. Don’t forget about chalkboard paint.
- 23. Paint with fun bright colors and patterns.
- 24. Paint a mandala on a table.
- 25. Create a vivid, realistic design with beautiful colors.
- How to Paint Your Own Laminate Furniture
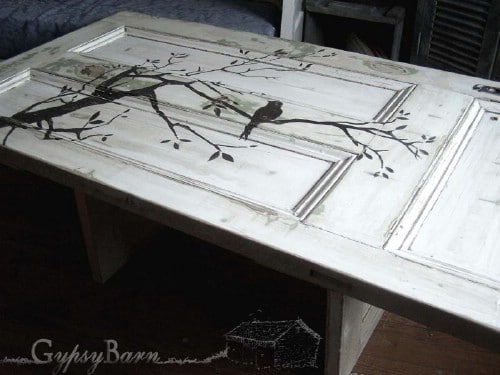
1. Chip a design out of paint.
Believe it or not, this beautiful design from Gypsy Barn was apparently made simply by chipping away bits of white paint, leaving behind the a simple yet stunning image of a bird on a tree branch.
Source/Tutorial: gypsybarn
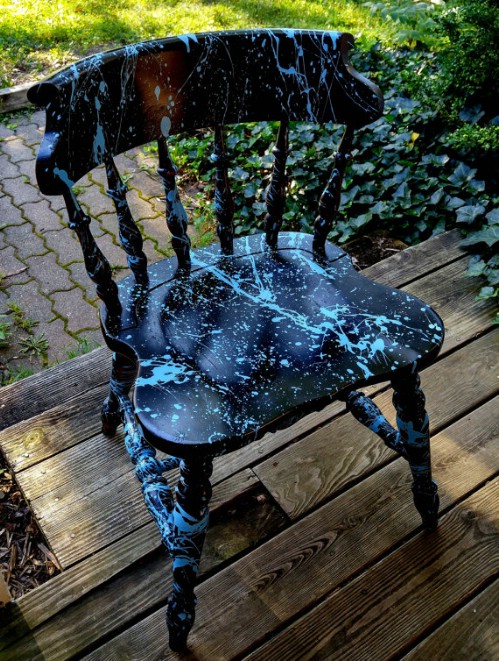
2. Splatter paint for a cool artsy look.
Looking for an idea which is simple and fun, but which can have a really eye-catching look? Check out this beautiful modern accent chair on Etsy, made by splattering one color of paint on top of another. The high contrast is so vibrant!
Source/Tutorial: etsy.com
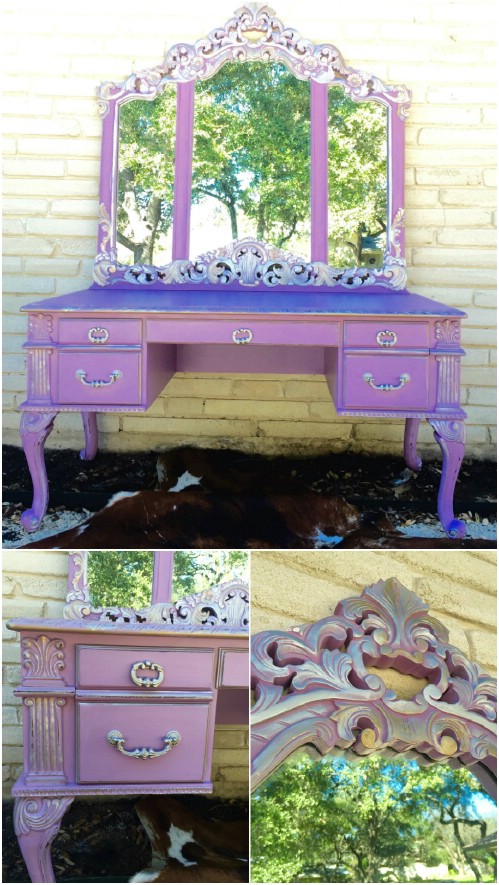
2. Add silver or gold accents.
If you want to add some opulence to a furniture item without going totally wild and redoing the entire thing, one idea is to simply add some silver or gold metallic embellishments (or copper or bronze or any other shade you like). Click the source link to see how it’s done!
Source/Tutorial: traceysfancy
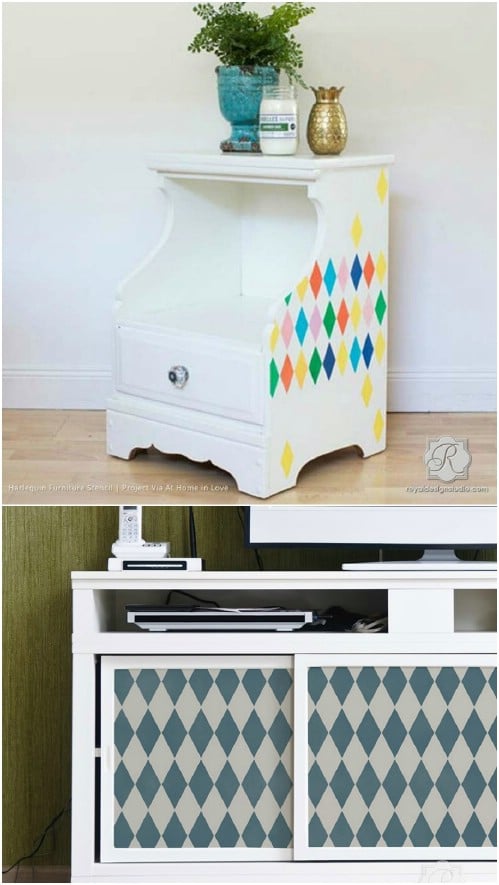
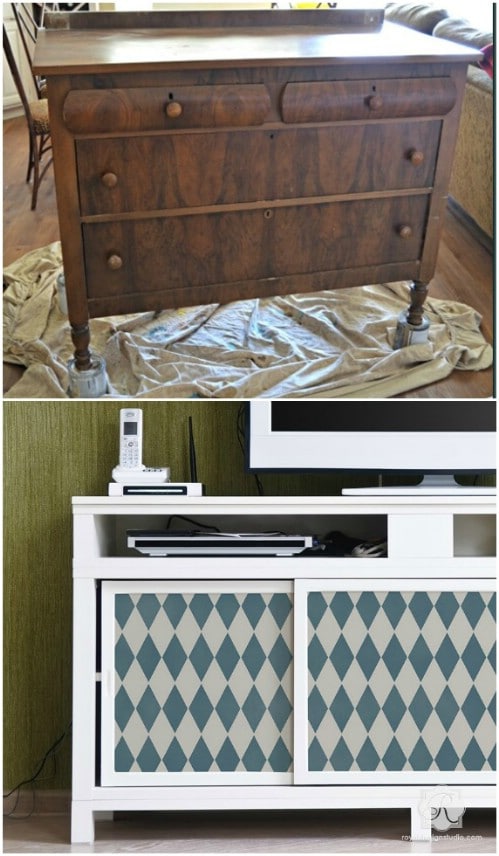
3. Stencil on a simple design ...
Check out what you can do with a simple harlequin furniture stencil. This is a product you can buy (see the source link), but it is also something you could make yourself.
Source/Tutorial: royaldesignstudio
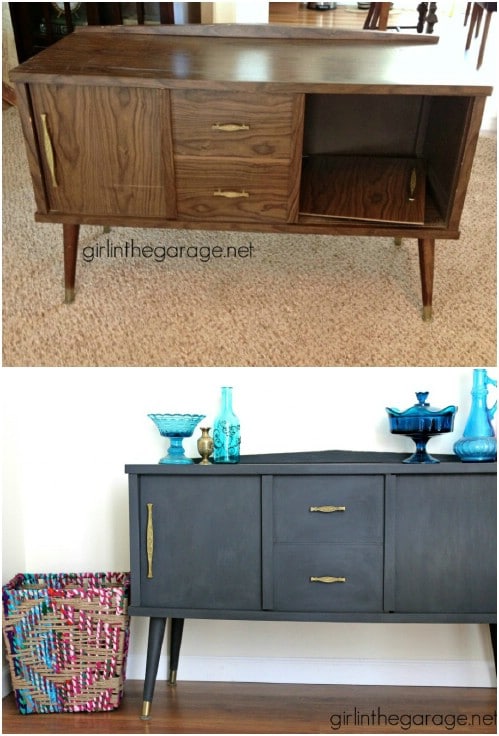
4. ... Or stencil on a slightly more elaborate pattern.
If you enjoyed the previous idea, you are going to love this one. This gorgeous pattern looks elaborate, but it was also created using a custom stencil. I highly recommend checking out the link so you can see the full transformation of this piece, which looked quite nondescript originally. It now looks phenomenal!
Source/Tutorial: girlinthegarage
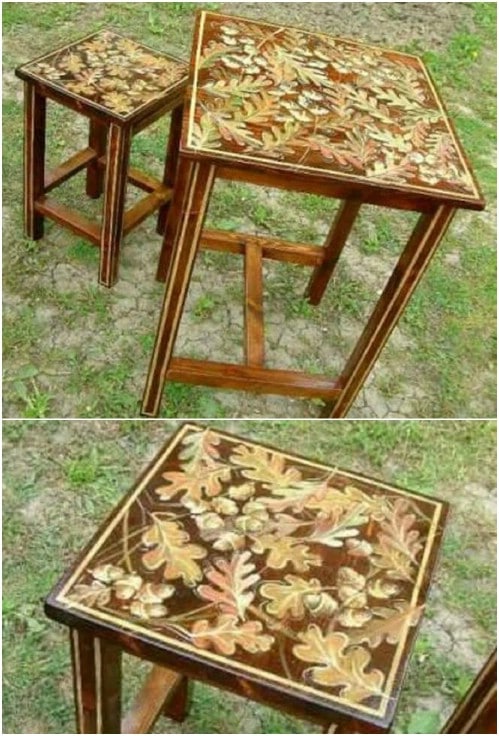
5. Paint elaborate designs inspired by nature.
Here is an incredibly lovely design on Etsy. I love how natural colors were used for the leaves—the kinds of colors you might find on real leaves. In fact, if you don’t look too closely, these painted leaves give the illusion that they are the real thing, simply settled on top of the table and chair.
Source/Tutorial: etsy.com
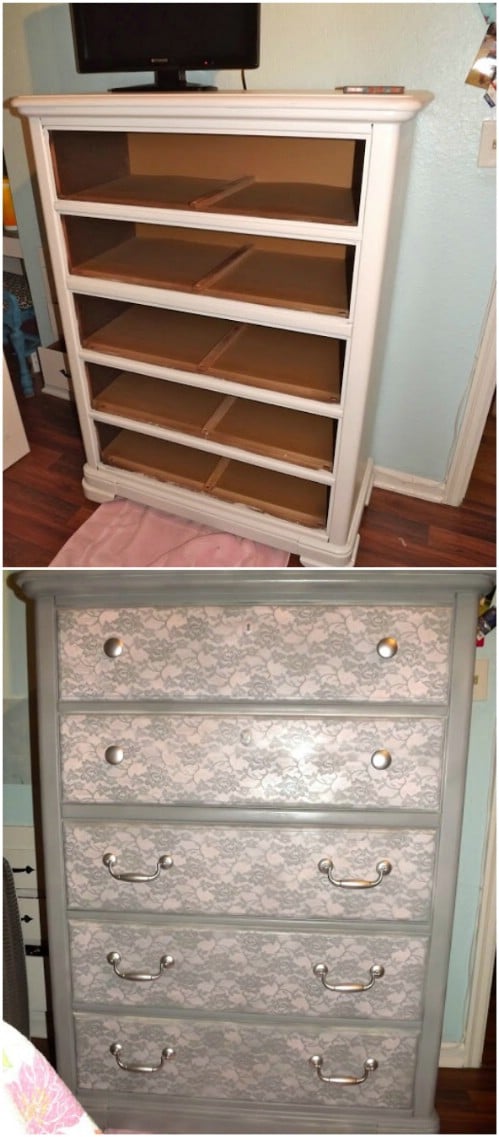
6. Make intricate designs using lace.
Want to make a very elaborate design on a dresser or another furniture item without putting in a lot of effort? Click the source link below to view a tutorial on one of the most clever furniture paint transformations I’ve ever seen. All you have to do is apply spray paint through lace to achieve gorgeous designs!
Source/Tutorial: kjohnson88
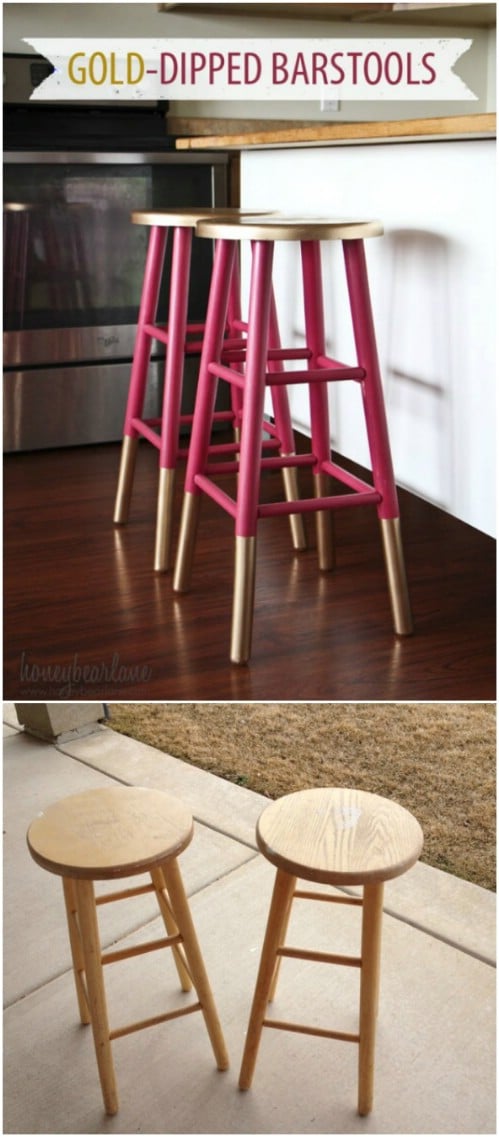
7. Try creating a “dipped” look with paint.
This is a quick and easy project for adding just a little extra flair to a bar stool. You could also use this same technique to dip the legs of a dresser or table or anything else you wanted.
Source/Tutorial: honeybearlane
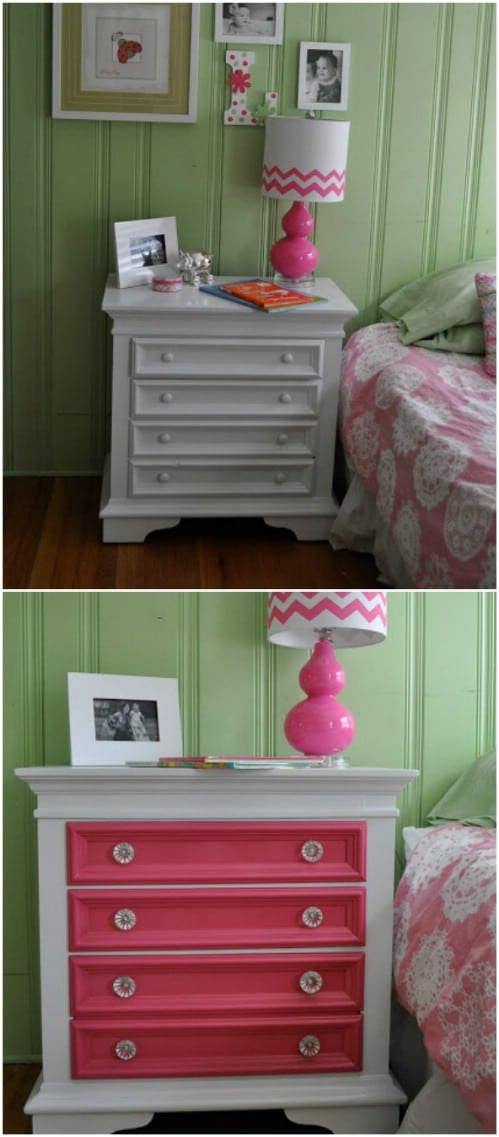
8. Just paint the drawers in a chest of drawers for a splash of vibrant color.
These drawers were originally all-white and didn’t stand out at all; they just blended into the woodwork as it were.
But with just the drawers painted a bold pink, there is a lovely contrast for a really vivacious effect—and it works very well with the white-and-pink lamp and bedspread!
Source/Tutorial: aubreycrawford
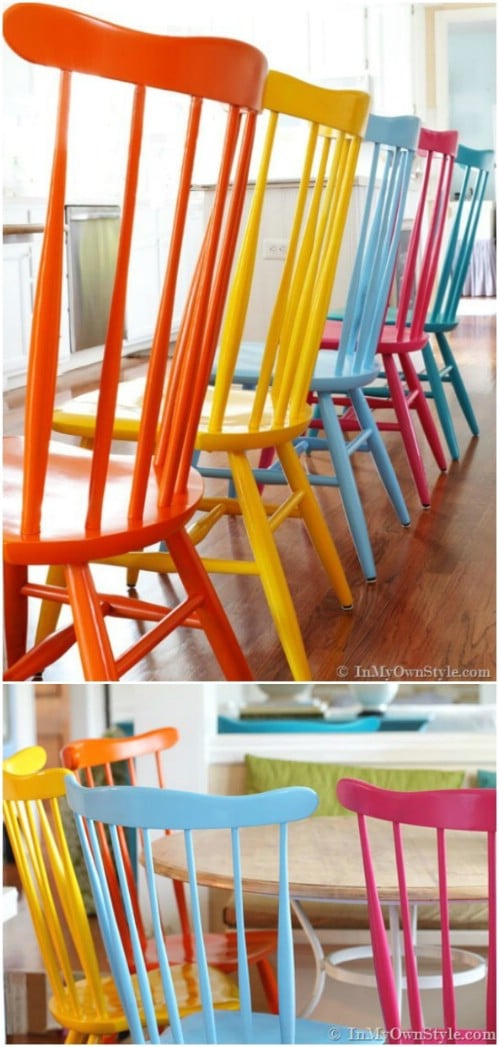
9. Paint your furniture in a fun spectrum of hues.
Sometimes what you need to create a visually appealing effect isn’t complexity with any one furniture item—it is simply a fun distribution of colors across a set. Each of these chairs features a simple monochromatic paint job, but together they are a rainbow of awesome!
Source/Tutorial: inmyownstyle
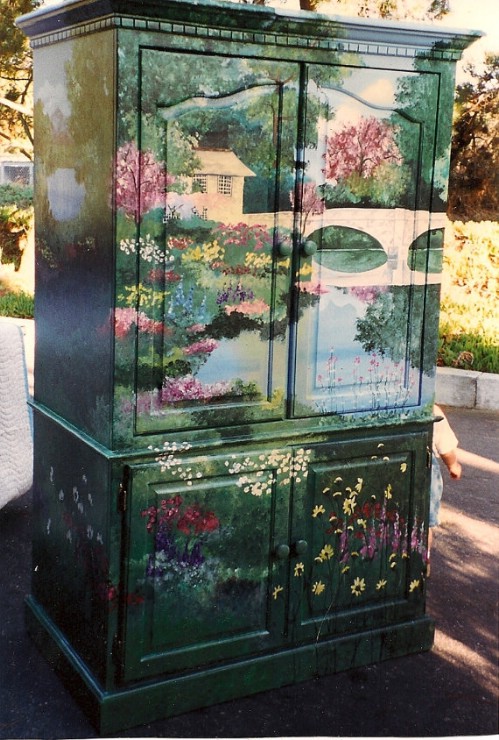
10. Paint an elaborate scene.
For something really fun and whimsical, you can’t beat this colorful scene of a garden and a bridge on this hand-painted armoire. What a beautiful item this would be to add to any bedroom—a wardrobe that really does contain a whole other world!
Source/Tutorial: etsy.com
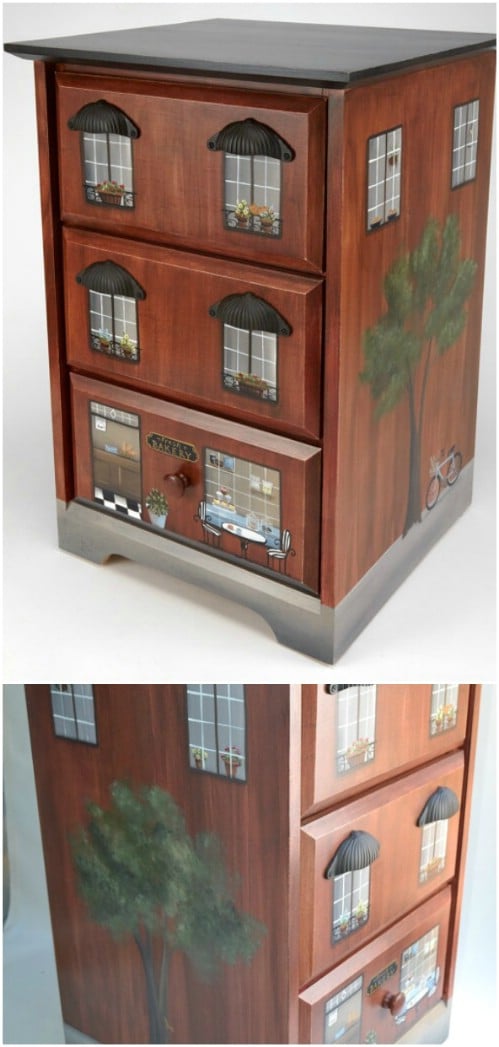
11. Paint an end table to look like a townhouse or other building.
One cute trend on Etsy right now is to paint end tables so that they look like realistic imitations of buildings. Check out how the drawer handles are doubling as the awnings on the window, adding some dimension to the illusion. What a fun concept!
Source/Tutorial: etsy.com
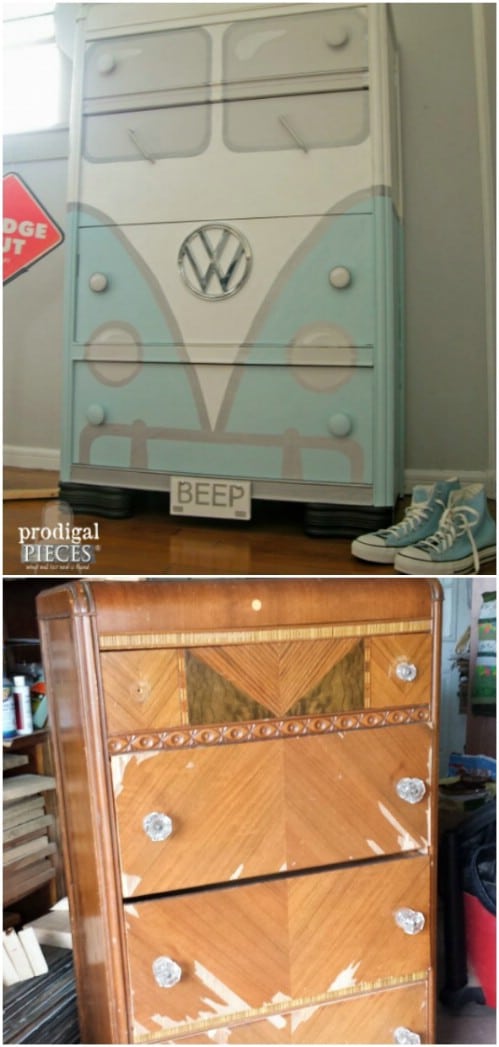
12. Paint a dresser to look like a bus.
Here is an adorable idea for painting a dresser in a child’s bedroom! This particular dresser was in pretty poor shape when it was acquired. Check the link to watch its amazing transformation into a cute Volkswagen bus!
Source/Tutorial: prodigalpieces
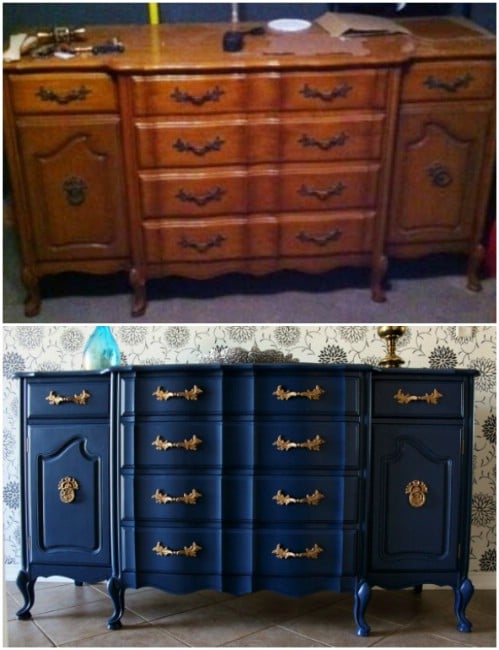
13. Go with stunning contrasts for a bold effect.
This was a beautiful piece originally even before it was painted, but afterwards, there is no denying that it took on an even more dramatic appearance. That deep midnight blue contrasts spectacularly with the gold handles!
Source/Tutorial: re-tiqued
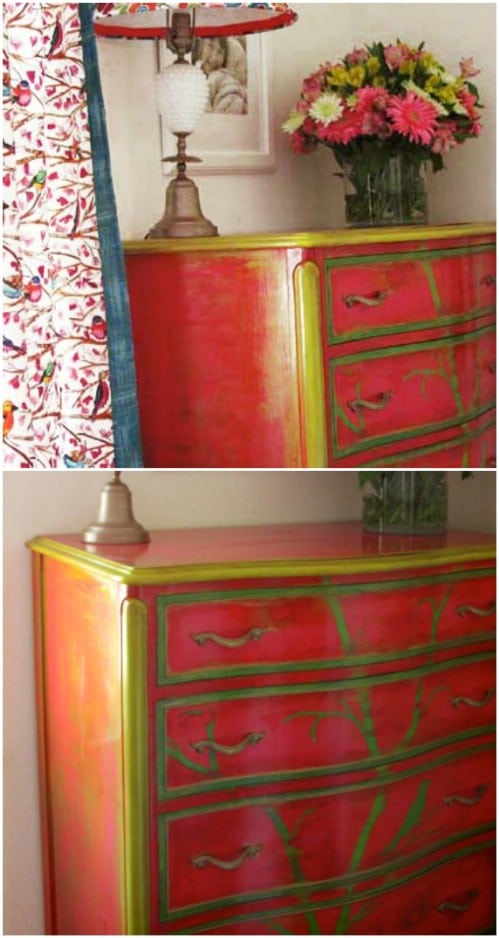
14. Blend together colors in an unusual way.
Here is a fascinating paint makeover on a dresser. What really grabs my attention with this one is the way that the colors are blended on the side—they do not meld perfectly together, so you can see the brush strokes, but that actually creates a really neat effect, adding to the artistry.
Source/Tutorial: lauragunn
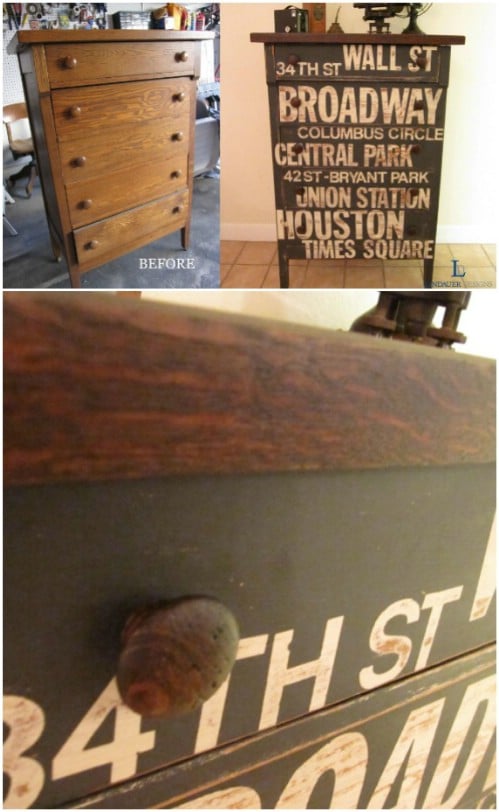
15. Make your chest of drawers look like a NYC subway sign.
Here is a fun idea which has a really bold, dramatic effect. This chest of drawers would instantly get the attention of anyone who walked through the door!
Source/Tutorial: lindauerdesigns
16. Paint a lovely, simple, elegant design.
This design could not be simpler, but it has a really gorgeous finished effect. The rough finish of the paint has a nice rustic vibe, but it isn’t so over the top that it distracts from the imprint of the branch. Lovely work.
Source/Tutorial: artisbeauty
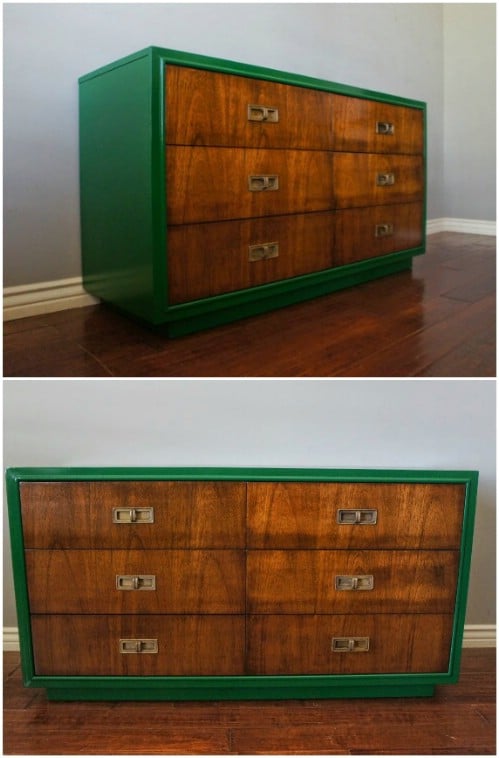
17. Go with stunning high contrast, leaving the natural wood grain visible.
For some reason a lot of people who are repainting furniture forget that you do not need to hide all of the natural wood grain with paint to achieve a cool effect. In fact, wood grain is quite beautiful, and some of the most striking pieces are those which leave it intact.
Source/Tutorial: europaintfinishes
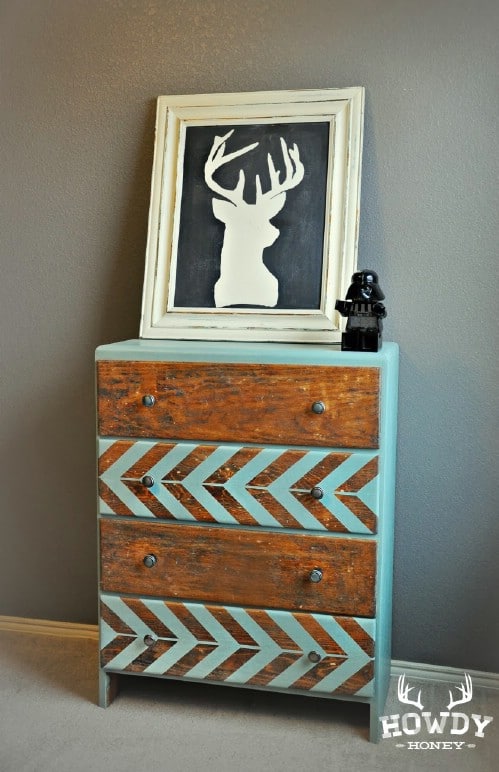
18. Paint a herringbone design.
Sometimes a really basic design like a herringbone pattern can really stand out, especially in high contrast paint against distressed wood.
Source: howdy-honey
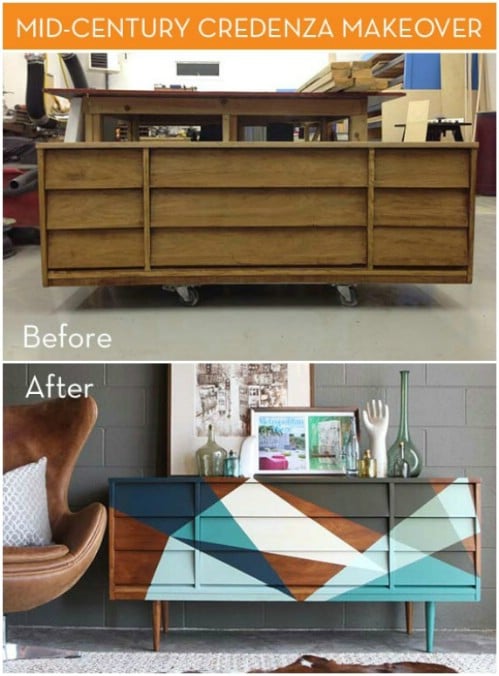
19. Adorn your furniture with bold geometric patterns.
Sadly, the original tutorial for this piece has been removed from the website where it was first posted, but the gorgeous credenza is still here to see. The genius of this piece is in the contrasting colors and the way the lines completely ignore the drawers, which makes for a very “seamless” look.
Source/Tutorial: curbly
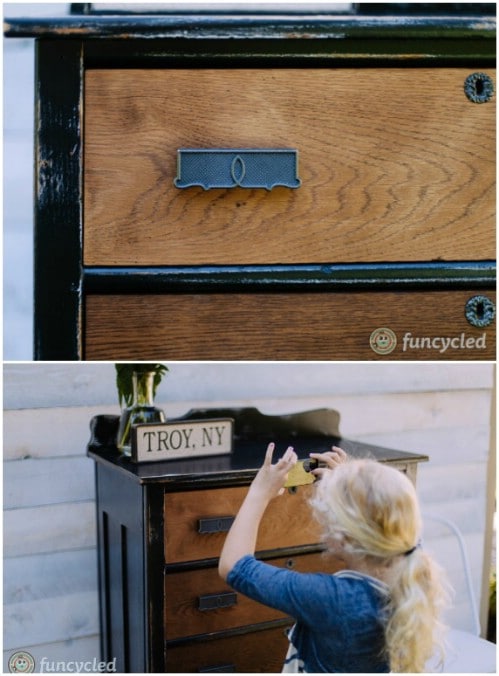
20. Create a gradient of hues.
Another fun idea for painting a chest of drawers is to use a gradient of colors. Here is one example which leaves the wood grain on display.
Source/Tutorial: funcycled
21. Go for the “shabby” look.
As you can see, the before and after for this one are quite impressive—within just a day, this dresser looks like it has aged into an antiquated treasure. The secret is something called “Milk Paint” which chips and flakes as it dries.
Source/Tutorial: refunkmyjunk
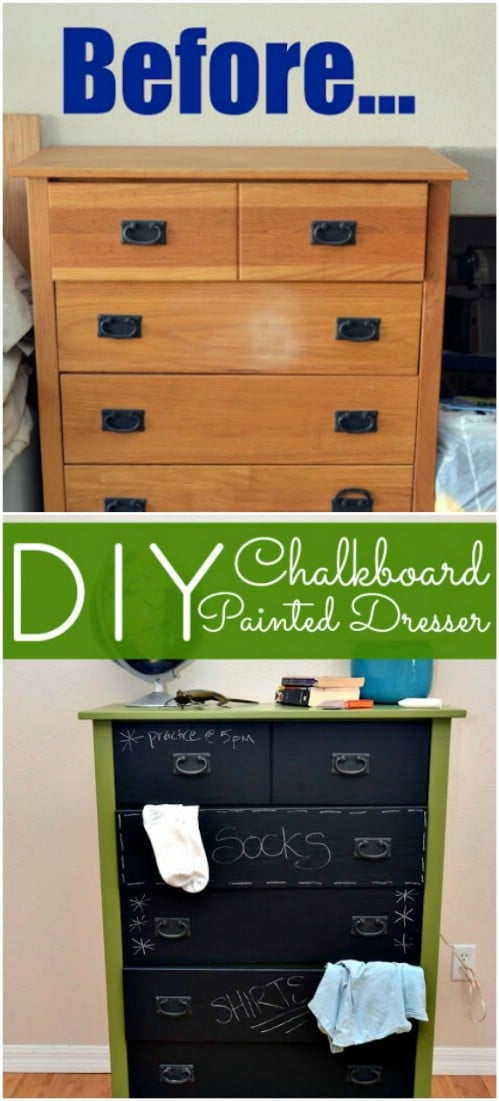
22. Don’t forget about chalkboard paint.
By now, it’s an oldie but still a goodie—chalkboard paint remains a staple for furniture repaints. No, it isn’t a very “polished” look, but sometimes that isn’t what you want—and it certainly does provide convenience for those who like to stay organized and remember what’s in their drawers!
Source/Tutorial: sewwoodsy
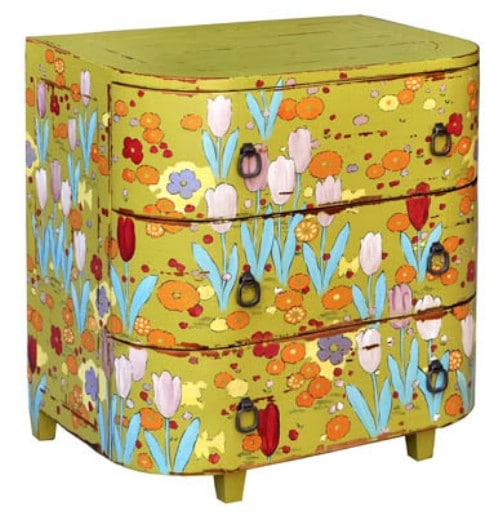
23. Paint with fun bright colors and patterns.
This dresser is incredibly appealing with its bright, playful colors and whimsical flower designs!
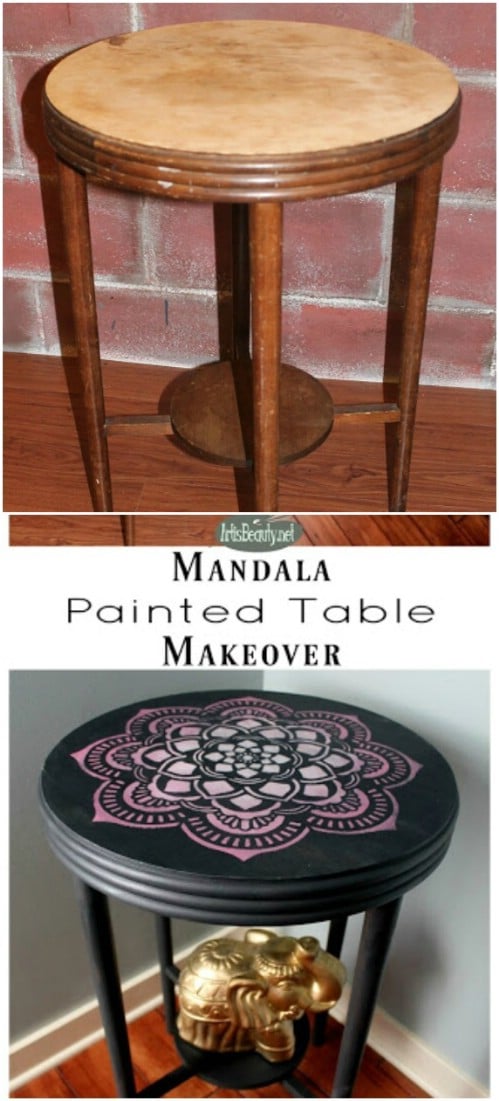
24. Paint a mandala on a table.
This beautiful table was painted with the aid of a stencil. The elaborate design perfectly complements the shape of the table for a vibrant effect!
Source/Tutorial: artisbeauty
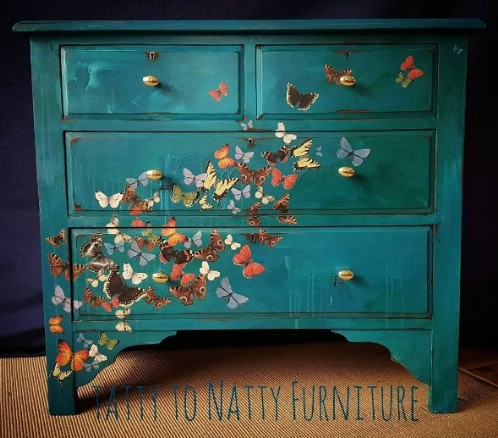
25. Create a vivid, realistic design with beautiful colors.
Finally, here is one more dresser repaint which is absolutely gorgeous. The butterflies are a meticulous design, painted with lifelike detail. But because they do not overtake the entire dresser, the look never becomes “busy.” Instead, it is very elegant.
Bonus: how to avoid your brush strokes showing through when you paint.
Finally, here is one more link to help you out. Click through and you will be taken to a short series of tips and tricks to ensure that you get nice smooth brushstrokes. This is important if you do not want them showing through on your finished repaints!
Source/Tutorial: paintedfurnitureideas
How to Paint Your Own Laminate Furniture
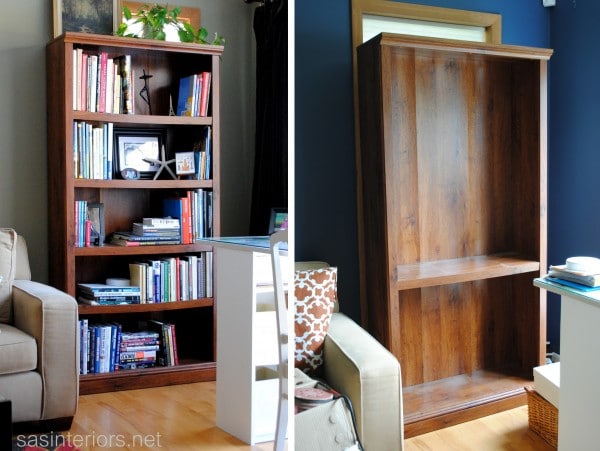
Ok, so laminate furniture is a bit less expensive than the real stuff. I mean, you can get a bookcase like the one here for much less than what you would pay for a solid wood bookcase.
Still, you want your furniture to look good and sometimes laminate just doesn’t do the trick.
Well, SAS Interiors has a great tutorial on how you can paint laminate furniture and make it look better – and more expensive. It tells you step-by-step how to sand the furniture down and paint it and even how to repair it. This is a must for those who are looking to update their decorating on a budget.
Source/Tutorial: sasinteriors
Now you have a lot of great ideas to get you started on furniture makeovers. With some paint, a few brushes, maybe some stencils, and a lot of creativity, you can turn even the shabbiest old dressers and tables into dazzling works of art!





Erin
I love the blue and gold dresser! It really stands out and looks very professional.
Berna cedillo u
Hermoso trabajo hay manera de que nos enseñarás como gracias por compartir maravilloso
Sabrina Hunter
I LOVE number 13. The bold blue dresser. I am looking for that color, where did you get it? Valspar? I would like to use that deep midnight blue on my own dresser.