I recently had the pleasure of painting my home. We didn’t do anything fancy, but did change the colors in a few rooms. That being said, I had no idea what an undertaking it was just to paint a room a new color!
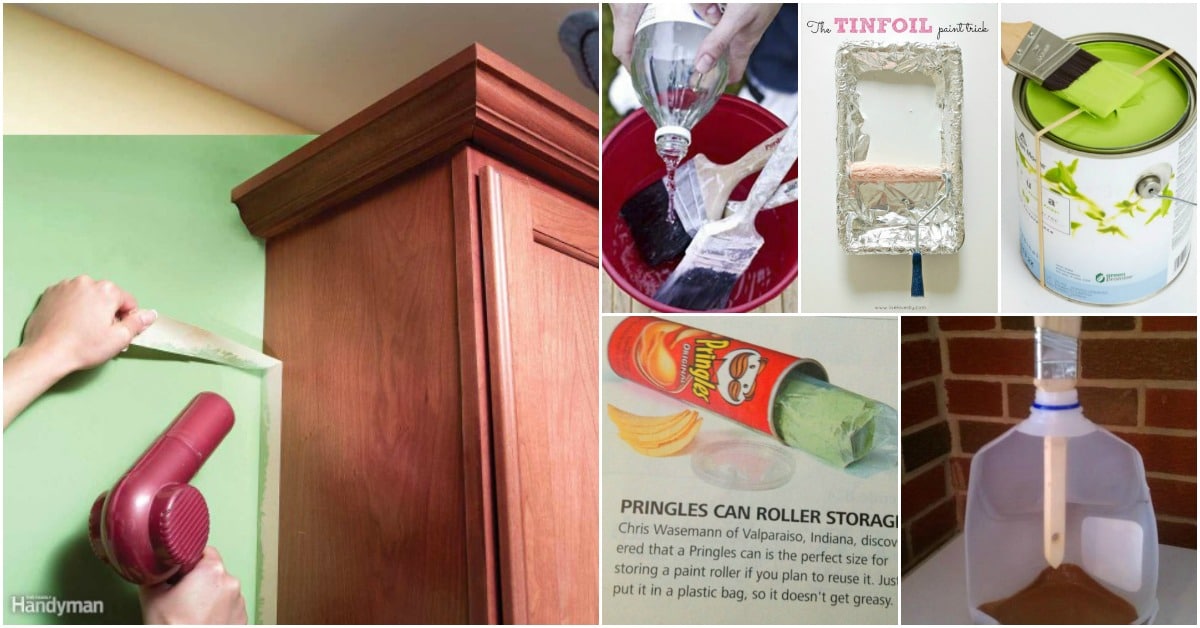
Aside from the obvious choosing colors and purchasing supplies, there are so many things to consider when you decide to paint.
What do you do when you spill paint on your furniture? How in the world do professional painters get such perfect lines?
Whether you’re changing the color in a single room or you’re remodeling or building a new house and need to paint all of your rooms, there are tips that you can follow that will make it a bit easier on you.
I’ve actually found 30 great tips for helping you to make painting your home a breeze.
Jump to:
- 1. Create Solid Drop Cloth Corners Painting Hack
- 2. Get Brushes Deep Clean
- 3. Use Fabric Softener For Cleaning Brushes
- 4. Remove Paint Roller Fuzz
- 5. Fix Uneven Baseboards With Caulk
- 6. Paint Corners With Ease
- 7. Avoid The Fumes
- 8. Cover Paint Trays For Faster Cleanup
- 9. Prep Walls With A Swiffer
- 10. Prep Rollers Before You Begin
- 11. Store Rollers In Pringles Cans
- 12. Keep Paint Cans Clean With Rubber Bands
- 13. Mark Off Unpainted Areas With Vaseline
- 14. Remove Masking Tape With Heat
- 15. Remove Paint Lines And Drips
- 16. Remove Paint From Furniture
- 17. Easily Clean Paint Off Skin
- 18. Remove Masking Tape At An Angle
- 19. Use A Knife For Painter’s Tape
- 20. Thoroughly Clean Brushes With Vinegar
- 21. Turn Acrylic Paint Into Spray Paint
- 22. Keep Paint From Cracking
- 23. Grab Paint Spills Quickly
- 24. Avoid Roller Streaks
- 25. DIY A Milk Jug Paint Holder
- 26. Save Paint By Scraping
- 27. Use Tape To Paint Perfect Lines
- 28. Keep Paint From Drying Out With Plastic Wrap
- 29. Clean Up Windows Easily After Painting
- 30. Use Q-Tips For Paint Smudges
- Conclusion
1. Create Solid Drop Cloth Corners Painting Hack
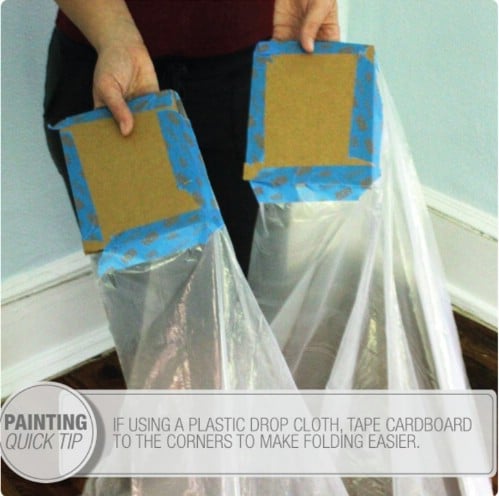
Drop cloths are great for keeping paint off your floors and furniture and they’re completely reusable…if you can get them folded, that is. A great trick is to tape cardboard to the corners of the plastic.
The cardboard makes the plastic a big more foldable and makes it really easy to put the drop cloth away until next time. It’s also great for moving it from room to room when you’re painting multiple rooms.
Source: elasticbeanstalk
2. Get Brushes Deep Clean
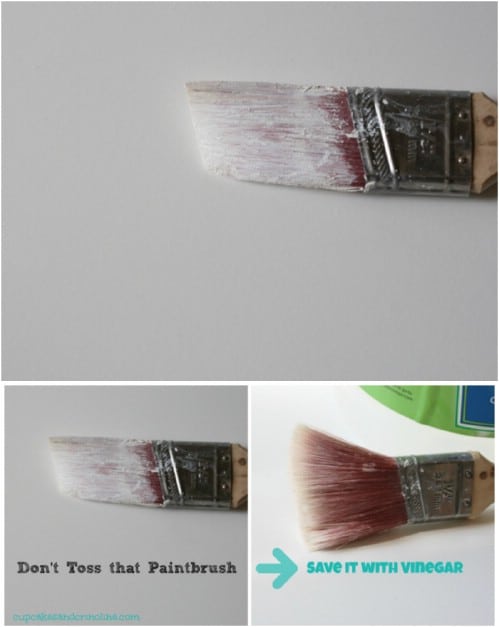
If you’ve ever painted with a paintbrush, you know how frustrating it can be to get all of that paint off the brush when you’re finished.
Paintbrushes are tools that you can definitely use for more than one job, if you can remove all the paint, right? Vinegar does a wonderful job of breaking down that paint and stripping it from your brushes. They’ll look brand new when you’re finished cleaning them – ready for the next job!
Source: cupcakesandcrinoline
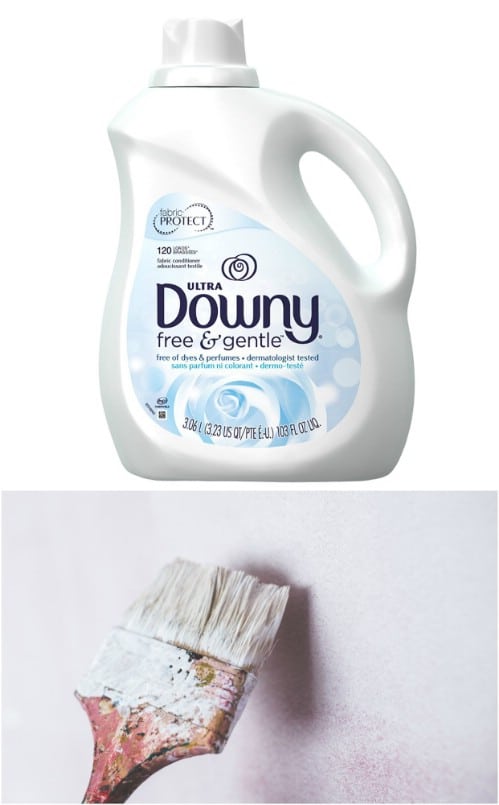
3. Use Fabric Softener For Cleaning Brushes
You can also clean your paintbrushes with fabric softener. This is a great idea for those of you who don’t really like the smell of vinegar or paint thinner. Plus, fabric softener is a bit cheaper than paint thinner and you can use the cheap stuff from the Dollar Store.
Just soak your brushes for a bit and then rinse them clean with warm water. Not only will they sparkle like new, they’ll smell amazing.
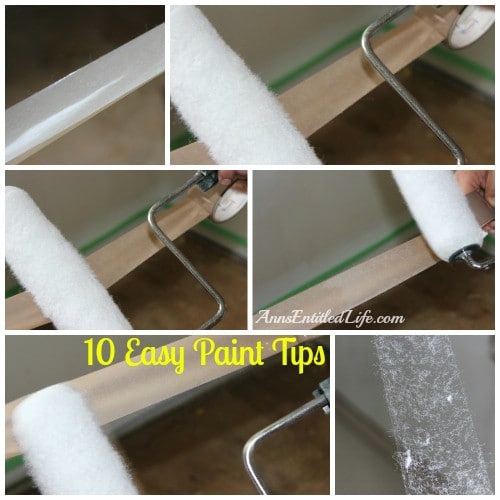
4. Remove Paint Roller Fuzz
Paint rollers are great for covering large areas but the cheaper ones often have fuzz that can really mess up your paint job.
Before you begin painting, take some packaging tape – that you can get at the Dollar Store for just a couple dollars – and use it like a lint roller on your paint roller. It will remove all that fuzz and ensure that your walls look perfect when finished.
Source: annsentitledlife
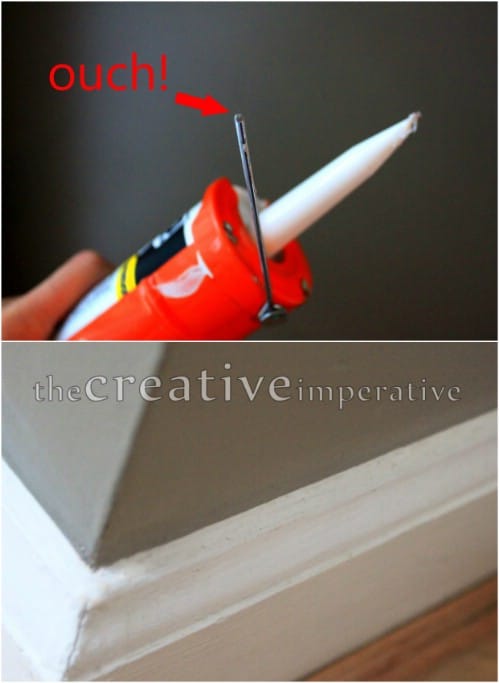
5. Fix Uneven Baseboards With Caulk
Uneven baseboards can be difficult to paint. Not only that, but they look much less attractive than they should. Before you begin painting, check your baseboards.
If you have spots of unevenness, take some caulk and fill them in before you begin. Then, when you paint, the caulk will be covered and no one will be the wiser.
Source: thecreativeimperative
6. Paint Corners With Ease
Corners are the hardest to paint. You just can’t get the roller in there to cover them and brushes leave unsightly lines most of the time.
A great way to cover those corners with ease is to hot glue a paint edger refill pad to a paint stir stick. You can use the pad to cover even the sharpest corners and leave them looking just as good as the rest of your walls.
Source: familyhandyman
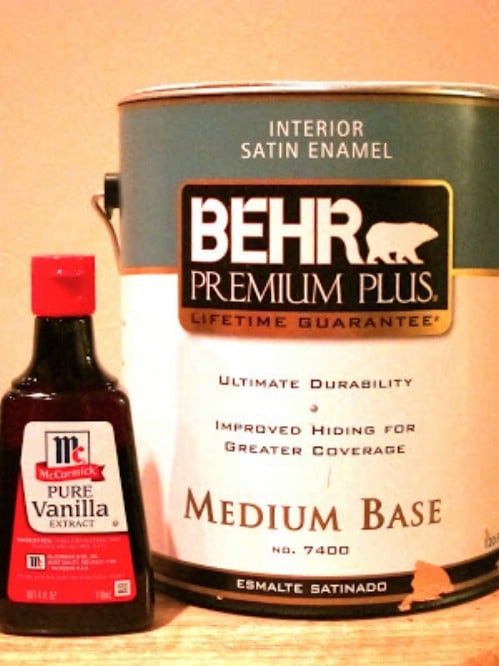
7. Avoid The Fumes
I love painting but the fumes are another story. Did you know that you can skip the fumes? Just mix in a tablespoon of vanilla extract for each pint of paint that you’re using.
Stir it in really well and paint away without those annoying paint fumes. The vanilla won’t affect your paint at all – provided you mix it well – and you’ll get to smell wonderful vanilla instead of paint fumes while you work.
Source: doityourselfdivas
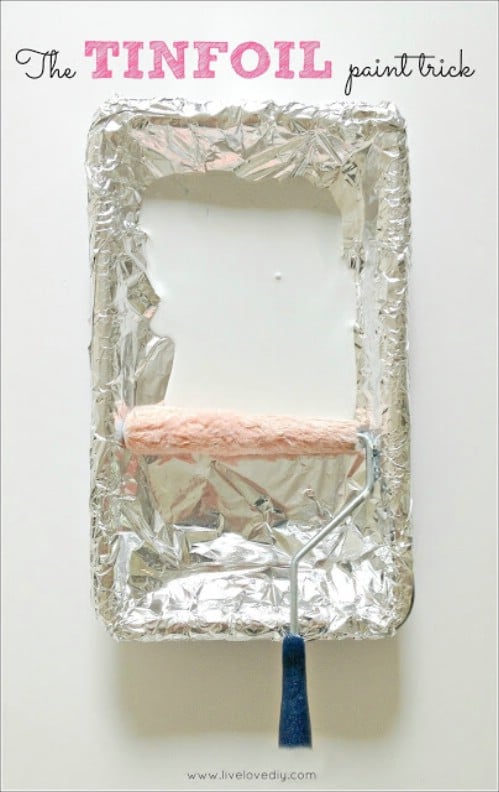
8. Cover Paint Trays For Faster Cleanup
One of the worst things about painting is the cleanup. Those pans take forever to clean. Paint can be difficult to remove – even water based paint.
So, the next time you’re filling up that paint tray, take a moment to cover it with aluminum foil before you add the paint. The foil will keep the tray clean. When you’re finished with your paint job, just remove the foil and throw it out – your tray will still look like new!
Source: livelovediy
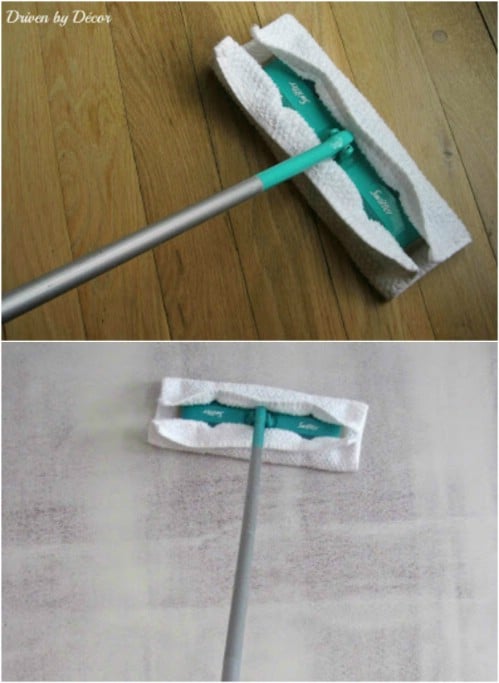
9. Prep Walls With A Swiffer
You can easily remove drywall dust, cobwebs and other debris from walls with a Swiffer. Cleaning the walls is a must before you paint to ensure that your paint goes on smoothly and you don’t have any unsightly spots.
Just dampen a dry cloth that’s attached to your Swiffer and swipe your walls to remove that debris before you paint. Once the wall is dry – which will only take a few minutes- you’re ready to go.
Source: drivenbydecor
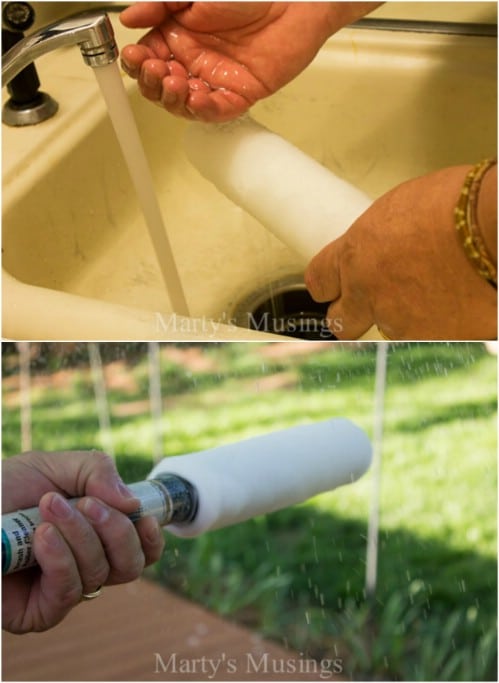
10. Prep Rollers Before You Begin
There’s a tip called prepping your roller that will help you to paint those walls flawlessly. Prepping the roller with warm water sets it which helps it to absorb the paint better, resulting in a much more smooth and beautiful finish. You just let warm water run over your hand and then brush the roller with it before you begin painting.
Source: martysmusings
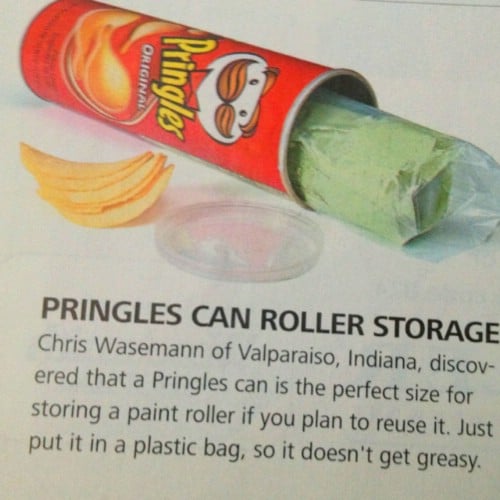
11. Store Rollers In Pringles Cans
Pringles cans are perfect for storing your paint rollers. If you plan to reuse your rollers after you’ve finished painting, just clean them, place them in a plastic bag and put them inside a Pringles can.
This keeps them from getting dirty or smashed by other objects, so they’re as good as new when you need them again.
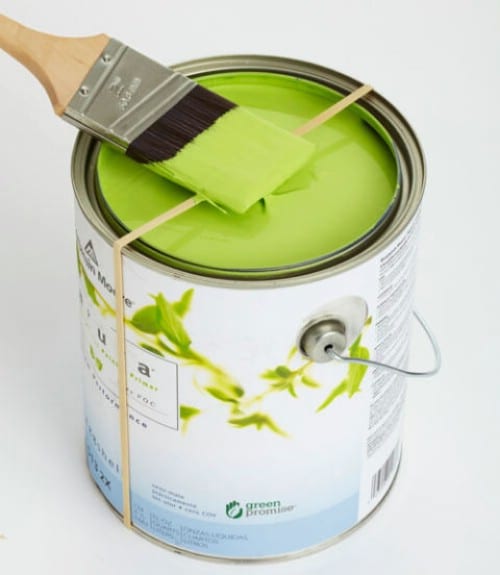
12. Keep Paint Cans Clean With Rubber Bands
If you place a rubber band around your paint can before you begin painting, you can use the can as a paint tray and still avoid messy spills and drips. When you dip your brush into the paint can, simply wipe off the excess paint with the rubber band.
This keeps the paint from dripping down the can and making a mess and it keeps those can edges clean so the can is much easier to reseal when you’re finished.
Source: goodhousekeeping
13. Mark Off Unpainted Areas With Vaseline
While you’re certainly going to want to use masking tape to keep large areas unpainted, if you have smaller sections that you don’t want to paint, you can cover them with Vaseline.
This is a great trick for spray painting. You just cover the area with Vaseline and then paint. The Vaseline keeps those smaller areas from getting paint on them without worries of having to trim around them.
Source: sweetpickinsfurniture
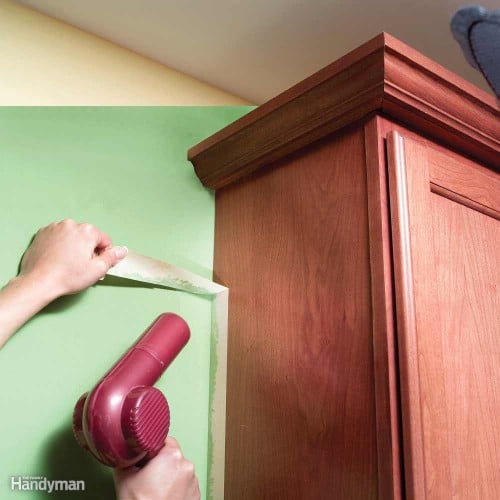
14. Remove Masking Tape With Heat
One of the hardest things to do after painting is getting off all that masking tape without pulling on walls or furnishings.
You want to use the tape to avoid painting areas that don’t need painted but sometimes the tapes sticks too well and you end up damaging the surface of those covered areas. You can easily remove that masking tape by heating it first with a small heat gun or blow dryer. Once it’s warm, it peels right off.
Source: familyhandyman
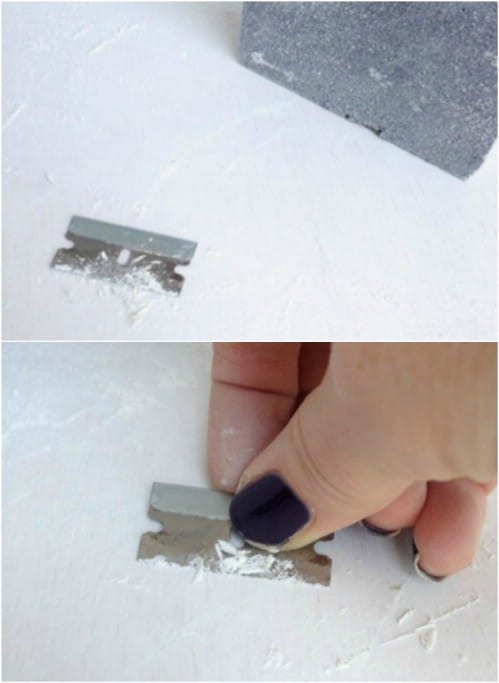
15. Remove Paint Lines And Drips
You can use a sander or a single side razor blade to remove those unsightly drips and lines after you’ve painted. This is a trick that works well for cabinets or other furnishings.
When your paint has dried, try lightly sanding the surface to see if it removes those blemishes. If not, you can go to the razor blade and just lightly scrape them off, leaving your finish professionally perfect.
Source: sawdustgirl
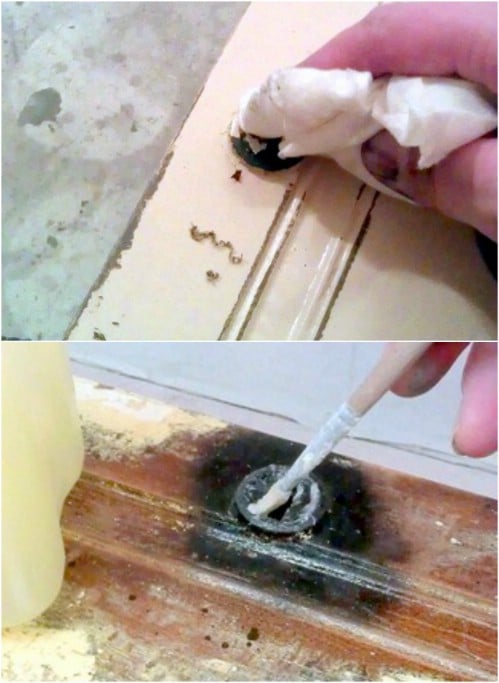
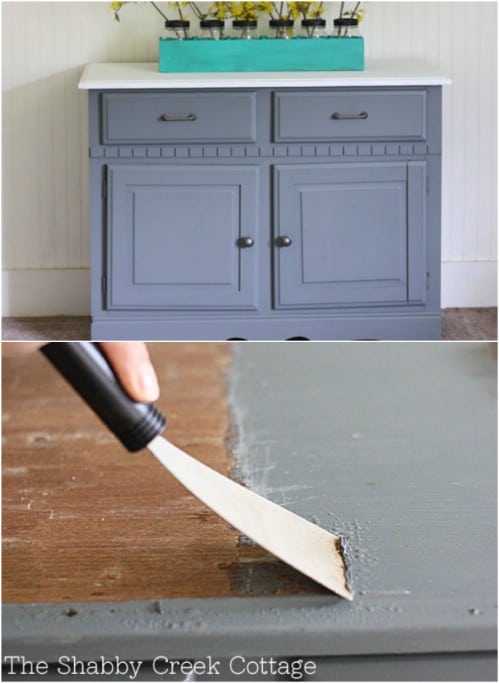
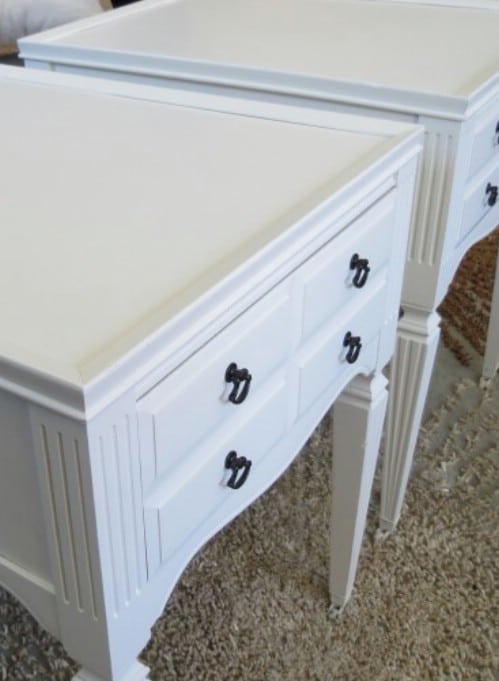
16. Remove Paint From Furniture
Even if you are the most professional and careful painter in the world, there is a good chance that you’re going to have a least a tiny drip of paint on your furniture.
If and when that happens, you can easily remove the paint with heat. Just heat up the area in question and then
use a scraper to scrape the paint right off. This is also a good way to prep furniture for a new paint job.
Source: theshabbycreekcottage
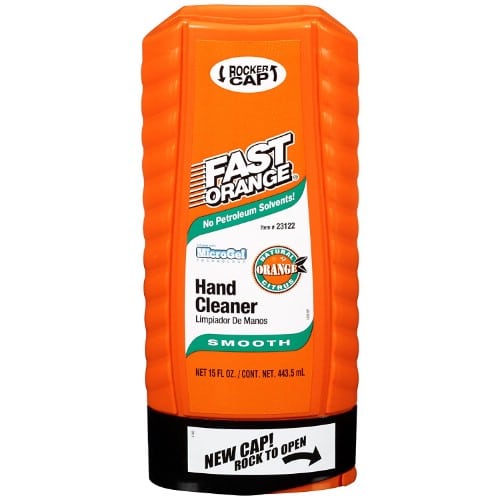
17. Easily Clean Paint Off Skin
Unless you’re using water based paint, you’re going to have a hard time getting it off your hands, or arms or even face, depending on how messy you are when painting. There are a number of ways to get it off, but the easiest way is to use a pumice based cleaner.
Fast Orange is a great one to try. It’s marketed as a means of removing grease from your hands – for auto mechanics and the like – but also works perfectly to get off that paint.
Source: amazon.com
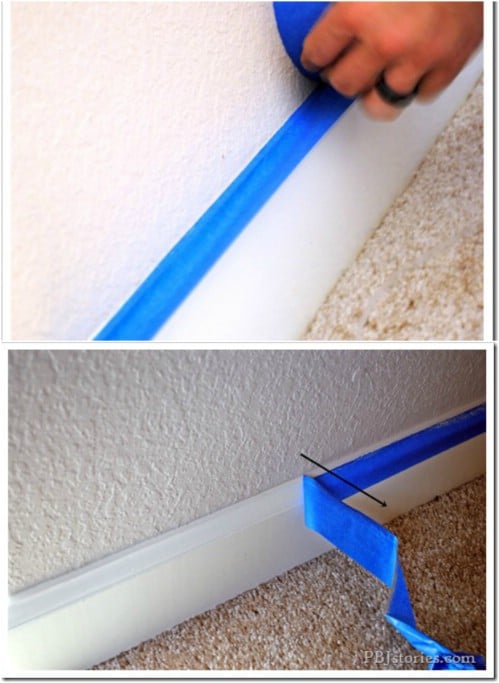
18. Remove Masking Tape At An Angle
When it’s time to remove your masking tape, after the paint has dried, pull it off at an angle instead of straight up or down.
Pulling at an angle leaves a beautiful straight line finish on the paint and helps you to get all of the tape off at once without worries of smearing or blemishing your great paint job.
Source: pbjstories
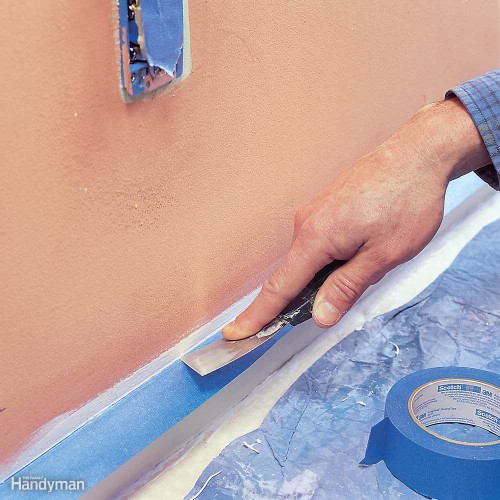
19. Use A Knife For Painter’s Tape
When you’re applying painter’s or masking tape, use a putty knife to seal it in. This helps you to get a great barrier against paint and prevents that paint from dripping or bleeding behind your tape.
Just lay your tape onto the area in question and then press it down tightly with a putty knife. You can also leave the paint straight – not pressing it down on the sides of your trim – to help catch spills and drips.
Source: http://www.familyhandyman.com/painting/tips/paint-job-tips-neater-painting#19
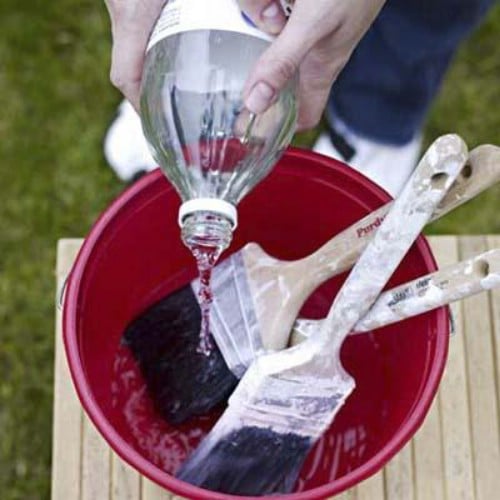
20. Thoroughly Clean Brushes With Vinegar
When it’s time to put your brushes away, you want to make sure that they are clean. Leaving paint in brushes makes them really hard and gunky and basically ruins them for future paint jobs.
You can avoid this mess by soaking your brushes in white vinegar after you’ve finished painting. Leave them in vinegar for about half an hour and then rinse them clean with soap and water.
Source: thisoldhouse
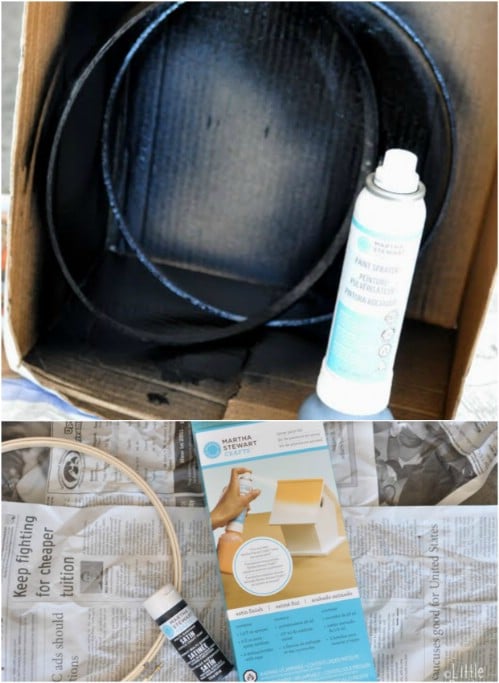
21. Turn Acrylic Paint Into Spray Paint
If you need spray paint but just can’t find the right color, you can turn acrylic paint into spray paint. This is a neat trick for furniture and other things where spray paint would make more sense than traditional cans of paint.
There’s actually a neat little kit that turns your acrylic into an aerosol and you just have to mix the paint with a medium to get the perfect color every time.
Source: littlebirdiesecrets
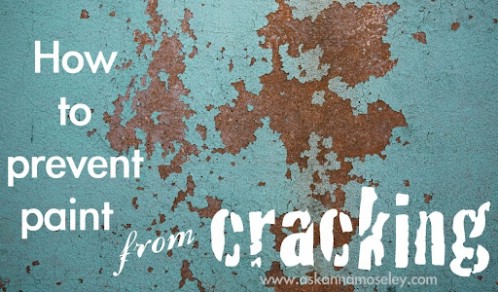
22. Keep Paint From Cracking
Those newly painted cement floors will look great for a few years, but what about after that? How do you keep your gorgeous paint from chipping and cracking? You use vinegar!
If you brush the floors that you’re painting with white vinegar prior to painting, it will help to preserve the paint and keep it looking fresh for years. Be sure to let the vinegar dry completely before you begin painting.
Source: http://askannamoseley.com/2012/03/vinegar-paint-tricks/
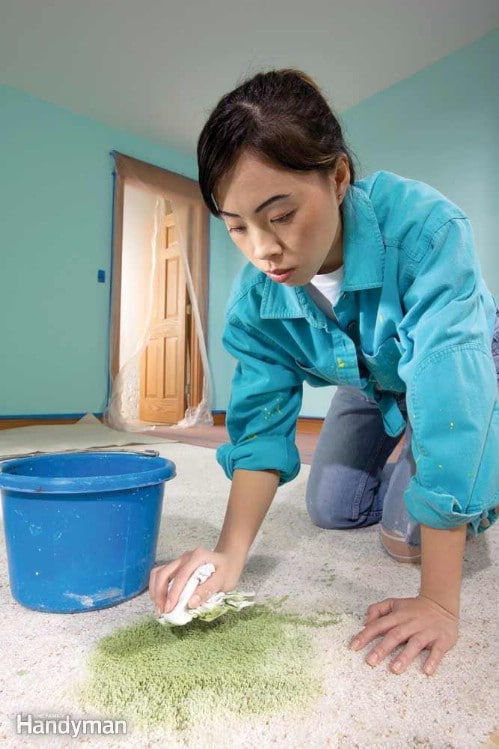
23. Grab Paint Spills Quickly
If you spill paint on the carpet, the best way to ensure that you get it cleaned up is to get to it quickly. Leaving it to dry could make it nearly impossible to remove.
Don’t wipe paint from carpet. Instead, scoop it up with a putty knife and then blot the paint stain with a wet rag. For smaller drips, you can let the paint dry and then trim them away with scissors.
Source: familyhandyman
24. Avoid Roller Streaks
The trick to avoiding unsightly roller streaks is to always roll in just one direction. This can seem difficult on walls but it’s always the best way to go. It’s especially important when you’re painting furniture. Keep your roller going in the same direction and be sure that you aren’t over soaking the roller in paint, which can cause drips and spills as well as streaks.
Source: paintedfurnitureideas
25. DIY A Milk Jug Paint Holder
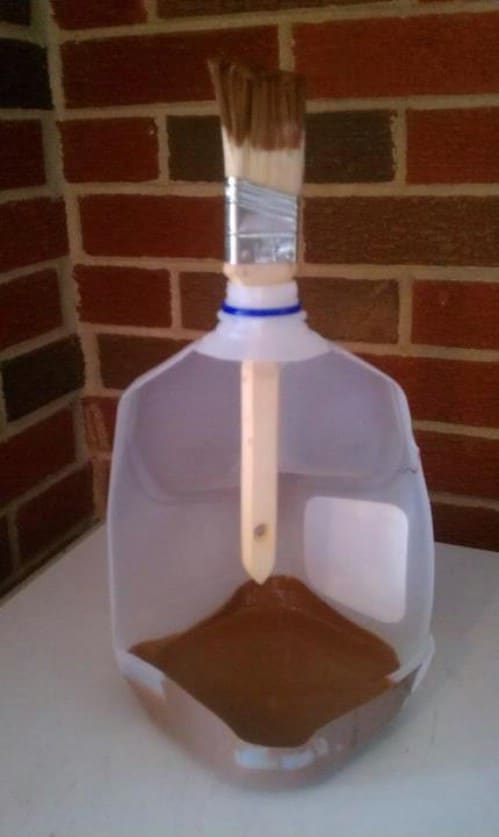
You can repurpose an empty milk jug into the perfect paint holder, and it comes complete with a paintbrush holder, too. Just cut the front out of the milk jug, leaving then handle and the top intact.
The top perfectly holds your paintbrush and keeps it from dripping on the floor. The bottom of the jug works as a compact paint holder so you don’t have to use a drip tray for those trim jobs.
Source: savvyhousekeeping
26. Save Paint By Scraping
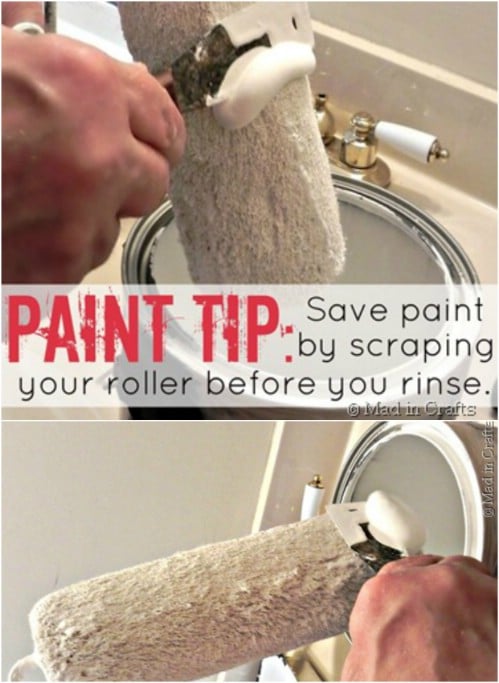
When you’re finished with your rollers and you need to clean them up, take a putty knife and scrape them first. So much paint gets stuck in those rollers and you never really know how much until you begin rinsing. If you scrape them down with a putty knife before you rinse, they’re much easier to clean and you can save all that extra paint for future jobs.
Source: madincrafts
27. Use Tape To Paint Perfect Lines
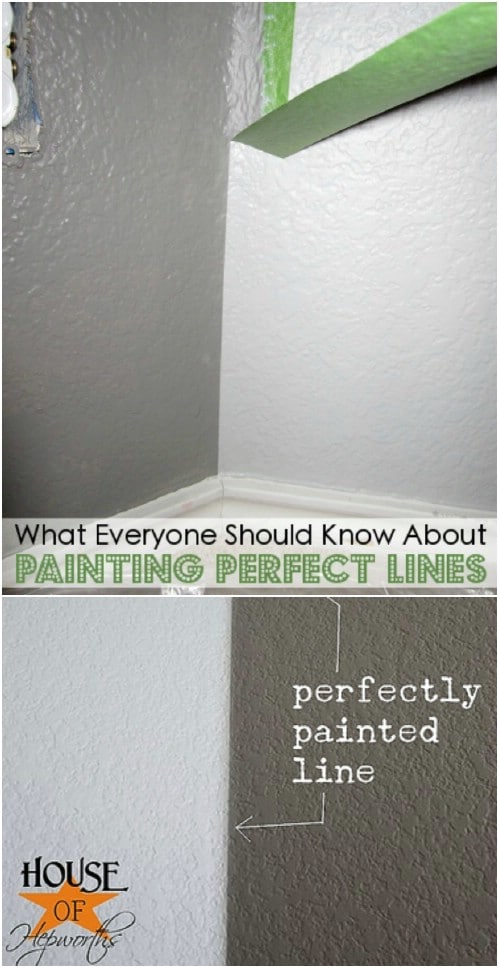
Masking or painter’s tape is great for helping you to get perfectly straight lines. This is really important around those sharp corners and especially if you are painting an accent wall.
Just line the edge with masking tape and then use an angled brush to get the paint in all the right places. Once you remove the tape, you’ll see those perfect sharp lines that you want.
Source: houseofhepworths
28. Keep Paint From Drying Out With Plastic Wrap
When you’re finished with your painting, assuming you have a little paint left over, you can preserve it longer if you cover the top with plastic wrap before you replace the lid.
This creates a clean seal so the lid will hold tighter. It’s also a good idea to dab a bit of the paint onto the lid so that you know on a quick glance what color is inside.
Source: https://www.realsimple.com/home-organizing/home-improvement/painting/painting-tricks-time-savers/label-it
29. Clean Up Windows Easily After Painting
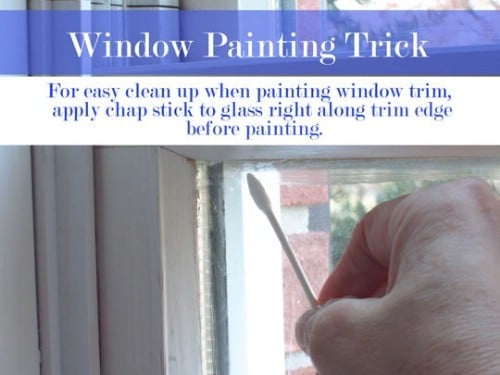
If you are painting window trim, there’s actually an easier way to keep those windows clean aside from using tape.
Even with tape, you often get a few smudges of paint on your glass. If you apply Chapstick to the glass right before painting, it will wipe right off and bring any paint smears with it.
Source: inmyownstyle
30. Use Q-Tips For Paint Smudges
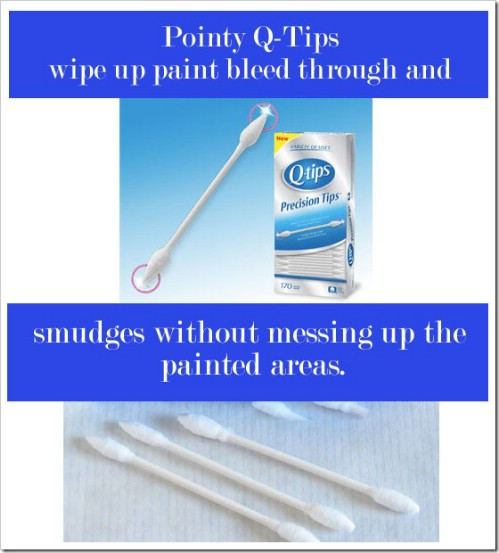
Q-Tips are perfect for removing paint smudges from cleanings and accent walls. You’ll want to wet the end of the Q-Tip and then form it into a point. If and when you drip or smear paint in an area where you shouldn’t, you can use those Q-Tips to easily remove the paint.
You can also buy Q-Tips that already have those pointy tips if you want to spend the extra money. The cheaper ones from the Dollar Store work just as well, if you form them into a point before you paint.
Source: inmyownstyle
Conclusion
I love hacks and these are some of the best I’ve seen. And, speaking of hacks, be sure to check out these 50 genius life hacks that will solve so many common problems.
From prepping the wall – in the easiest way imaginable – to keeping paint from dripping down the sides of your paint can, I’ve found some wonderful painting hacks that will make painting seem more like a fun task and less like a job.
Just like these 30 life hacks to make life easier, these painting tips and hacks will definitely save you some time and many of them will save you money as well. If you’ve ever painted, you know how expensive it can be, so ever little penny that you can save will help.
So, if you’re ready, let’s talk painting hacks. I’ve found some wonderful tips that will help you to make your next painting job so much easier and some great ways to remove paint spills and other accidents that happen all too often when we take on interior painting.
I hope these little tricks help you as much as they have helped me.



Mona
Thanks! Really helpful. 🙂
Lillian
This was really helpful. I enjoyed using the "milk jug" hack because I had an old milk carton laying around. Do recommend! Some hacks also help with staining (I had to stain a fence recently).
Feriha Sentas
Thanks, great hacks