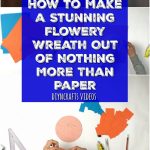
I still remember when I was first introduced to origami as a child. I was so thrilled that you could make literally anything you could imagine out of paper! My love for paper crafts has never faded; it’s only grown.
In the past, I’ve shared some very cool projects with you, like DIY paper lanterns and DIY paper dahlias. Now I have something really awesome for you: a DIY & Crafts exclusive video that teaches you how you can make a beautiful “wreath” out of paper. It looks a bit like a large, elaborate flower. You can hang it up as décor (it’s great for a party with its festive look), but there are other things you could do with it too, like use it to top a large present.
Video tutorial:
Materials:
Paper in two or more colors of your choice
- Scissors
- Pencil
- Drafting triangle
- Glue
- Cardboard circle with a diameter of 16 cm.
Instructions:
1. Start by cutting out the circle from the cardboard with a diameter of 16 centimeters.
2. Cut 66 squares out of one color of paper (orange in the video). Each should measure 5 x 6 cm.
3. Cut 17 pieces out of the other color of paper (blue in the video). Each should measure 3 x 5 cm.
4. Roll up the squares of paper and glue their edges to make them all into little cones.
5. Starting around the edges of the cardboard circle, begin gluing the orange cones.
6. Continue to work your way toward the center of the cardboard. Once you use up all the orange cones, you will be ready to start gluing on the blue cones in the center of the wreath.
When you are finished, your wreath will look like this:
Attach a string to it and hang it somewhere to display:
… Or find another way to display it. This is a very versatile decorative item, and you will discover there is so much you can do with it! It is relatively easy to make, and when it is completed, it looks very dramatic!


Leave a Reply