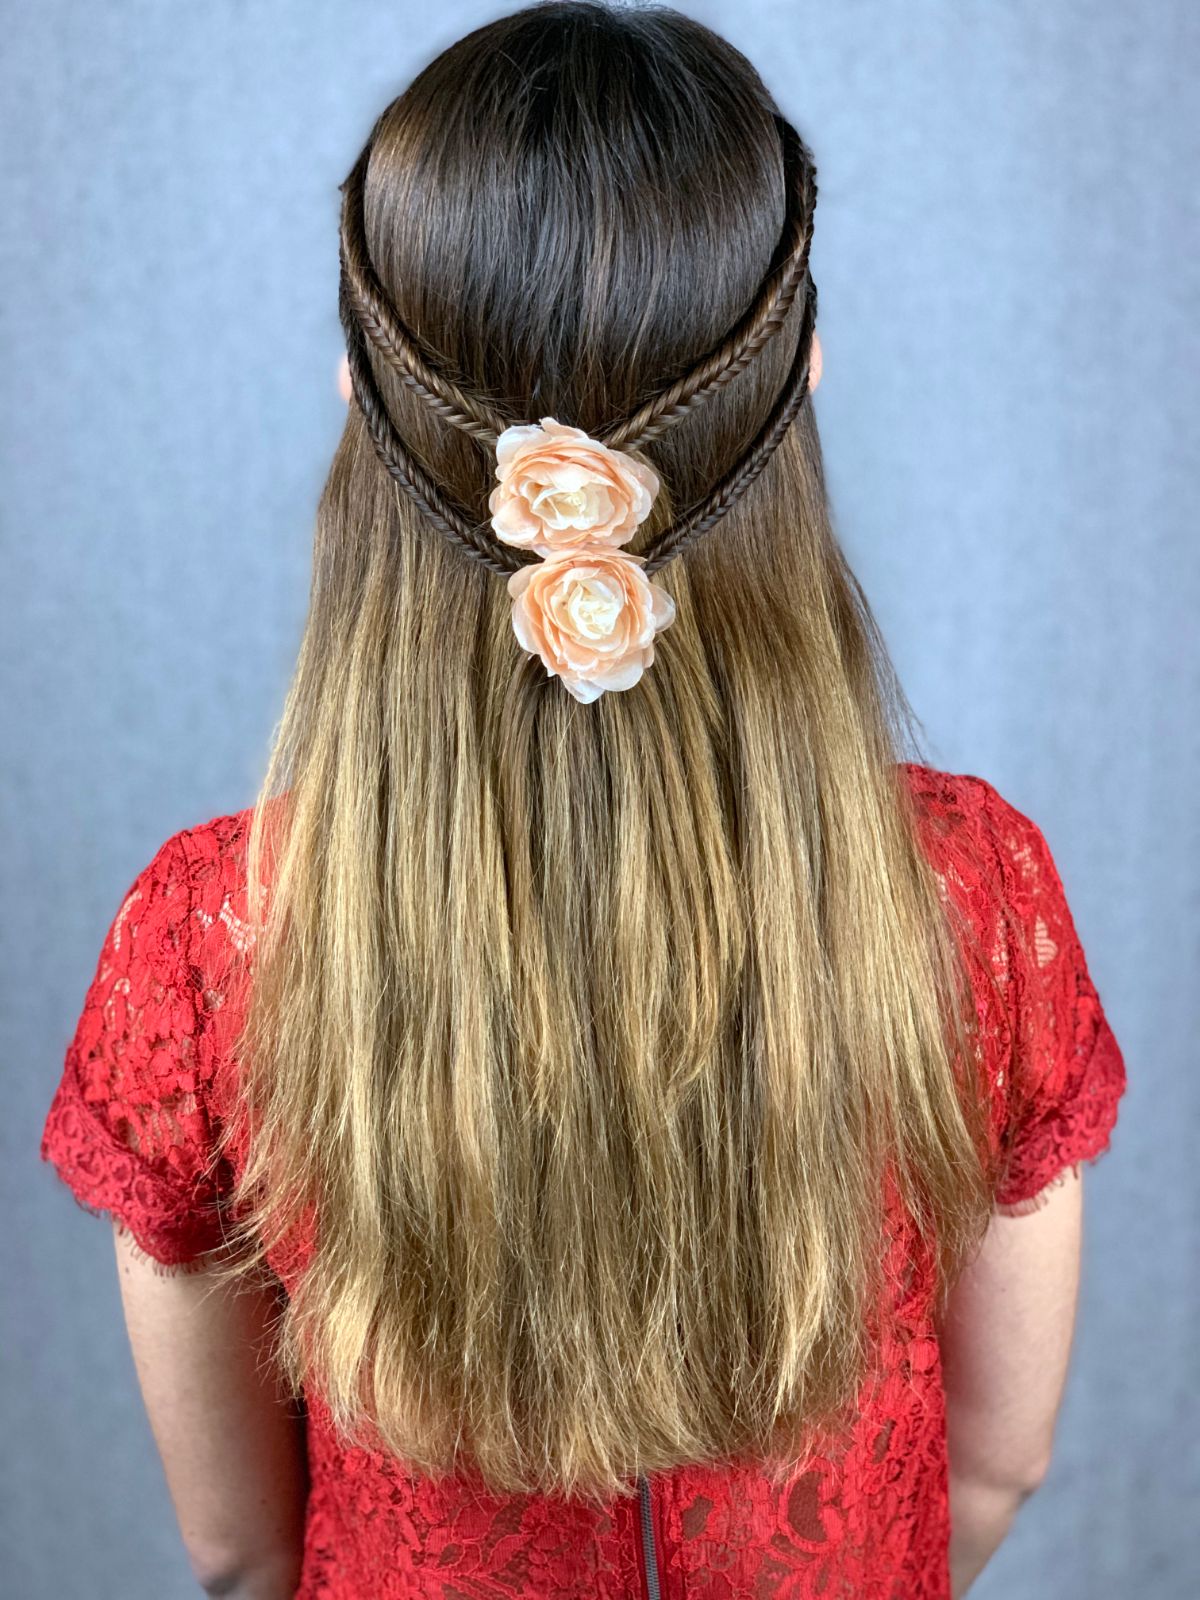
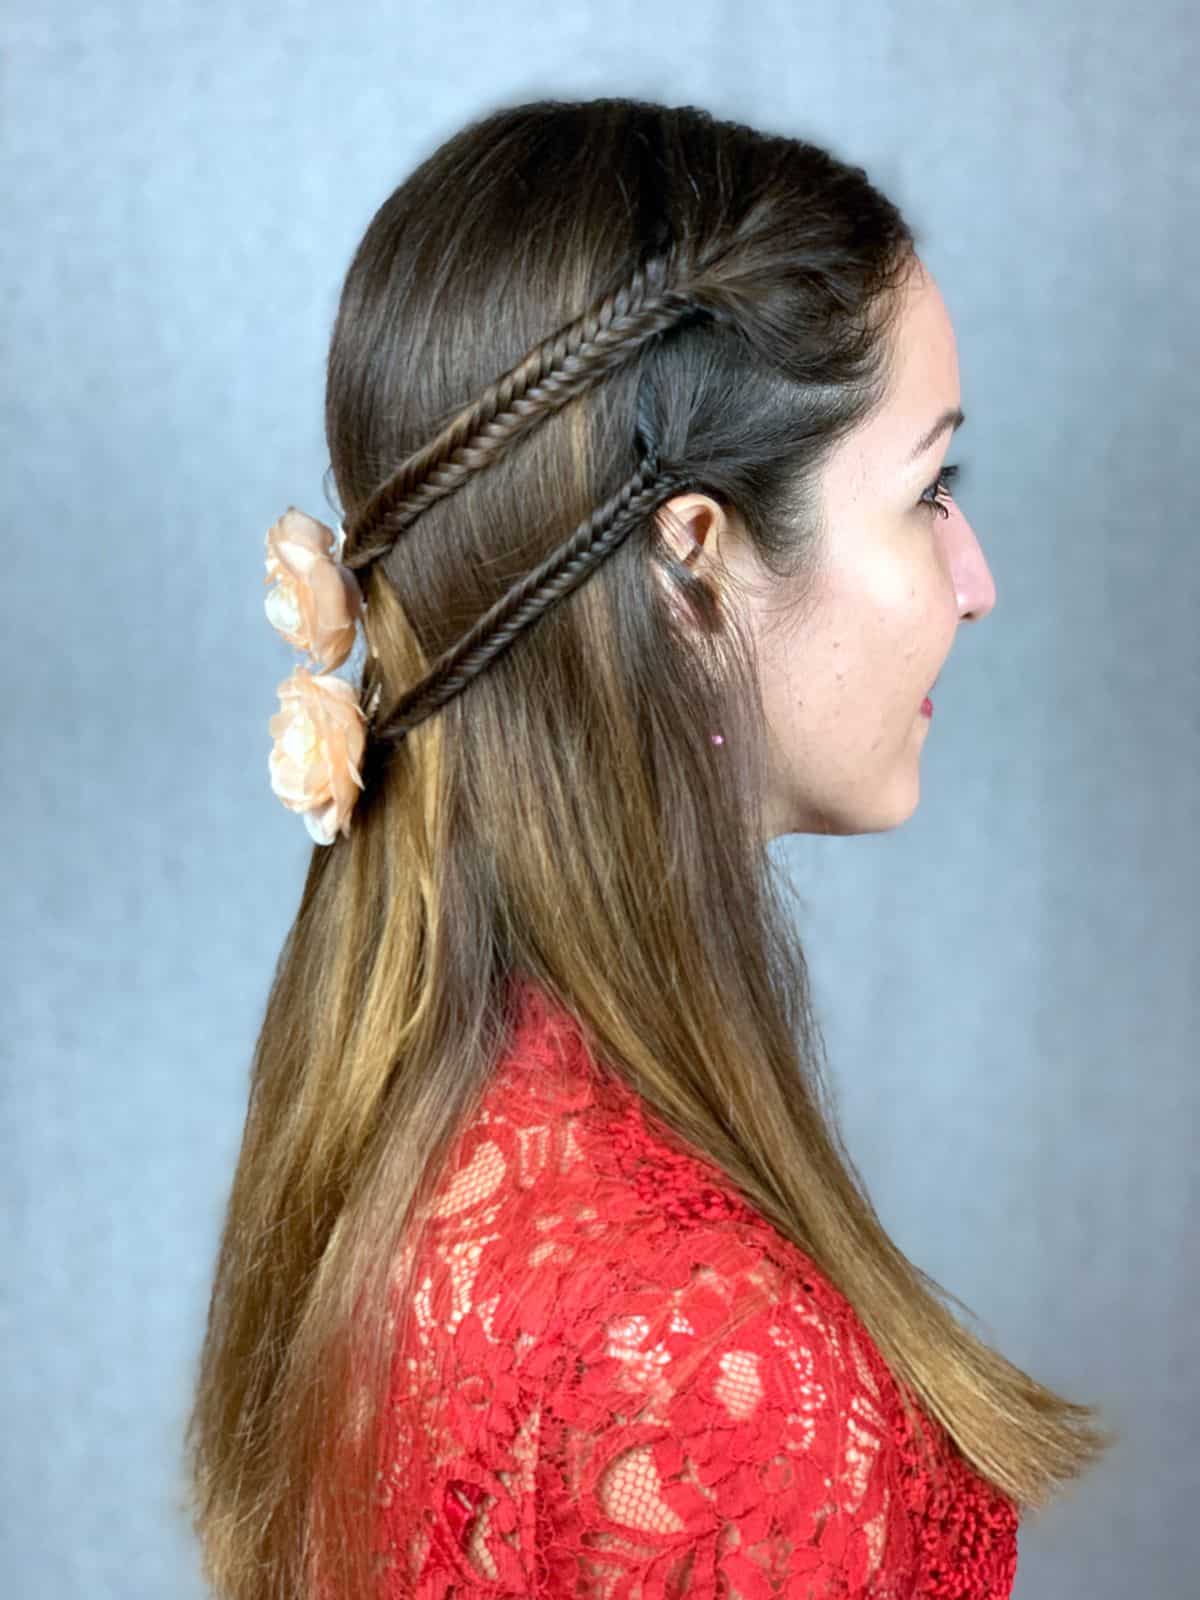
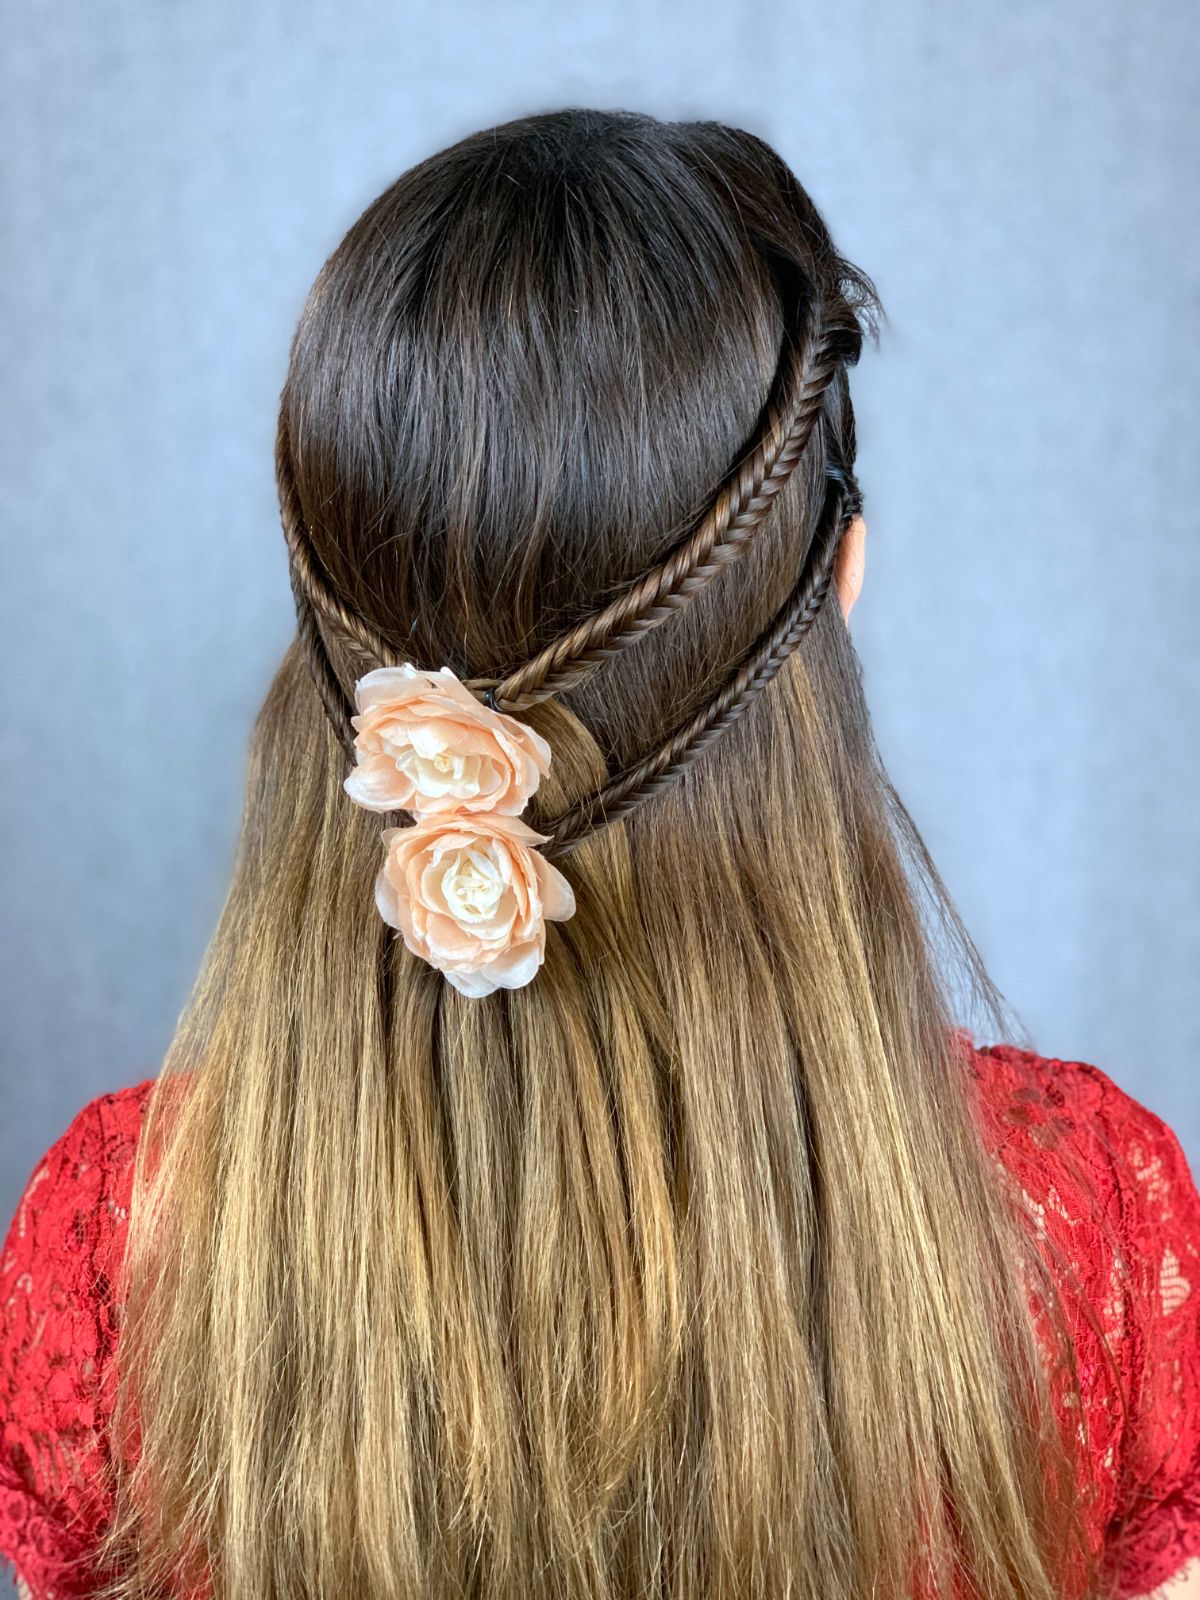
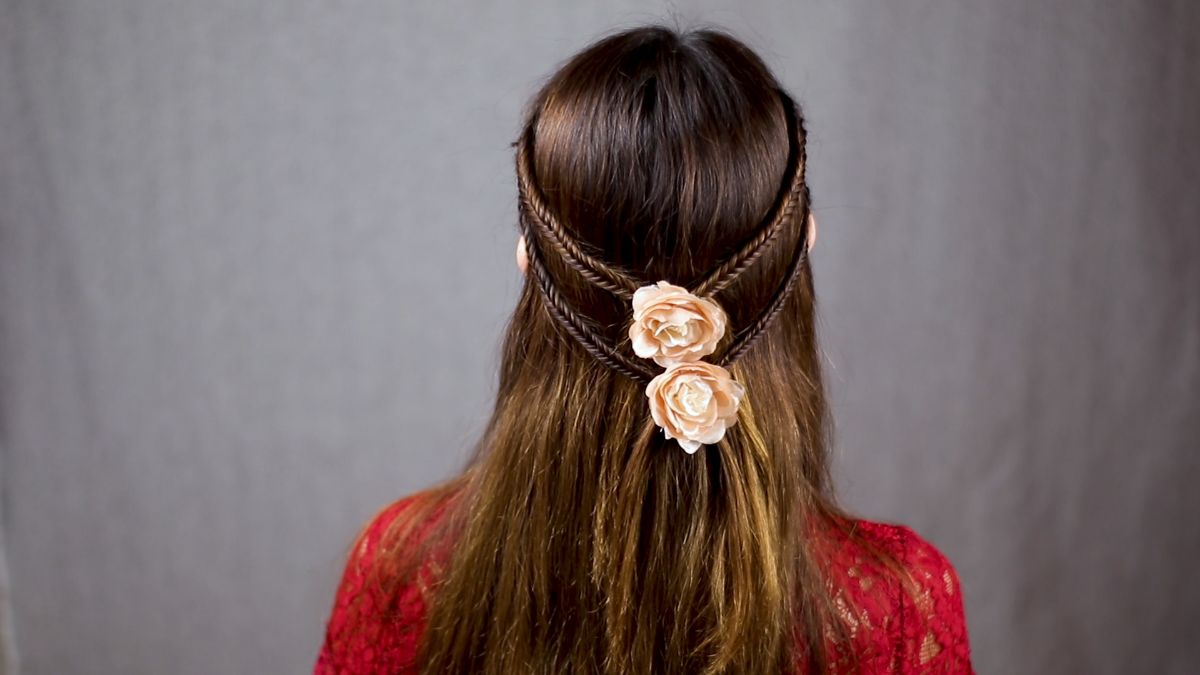
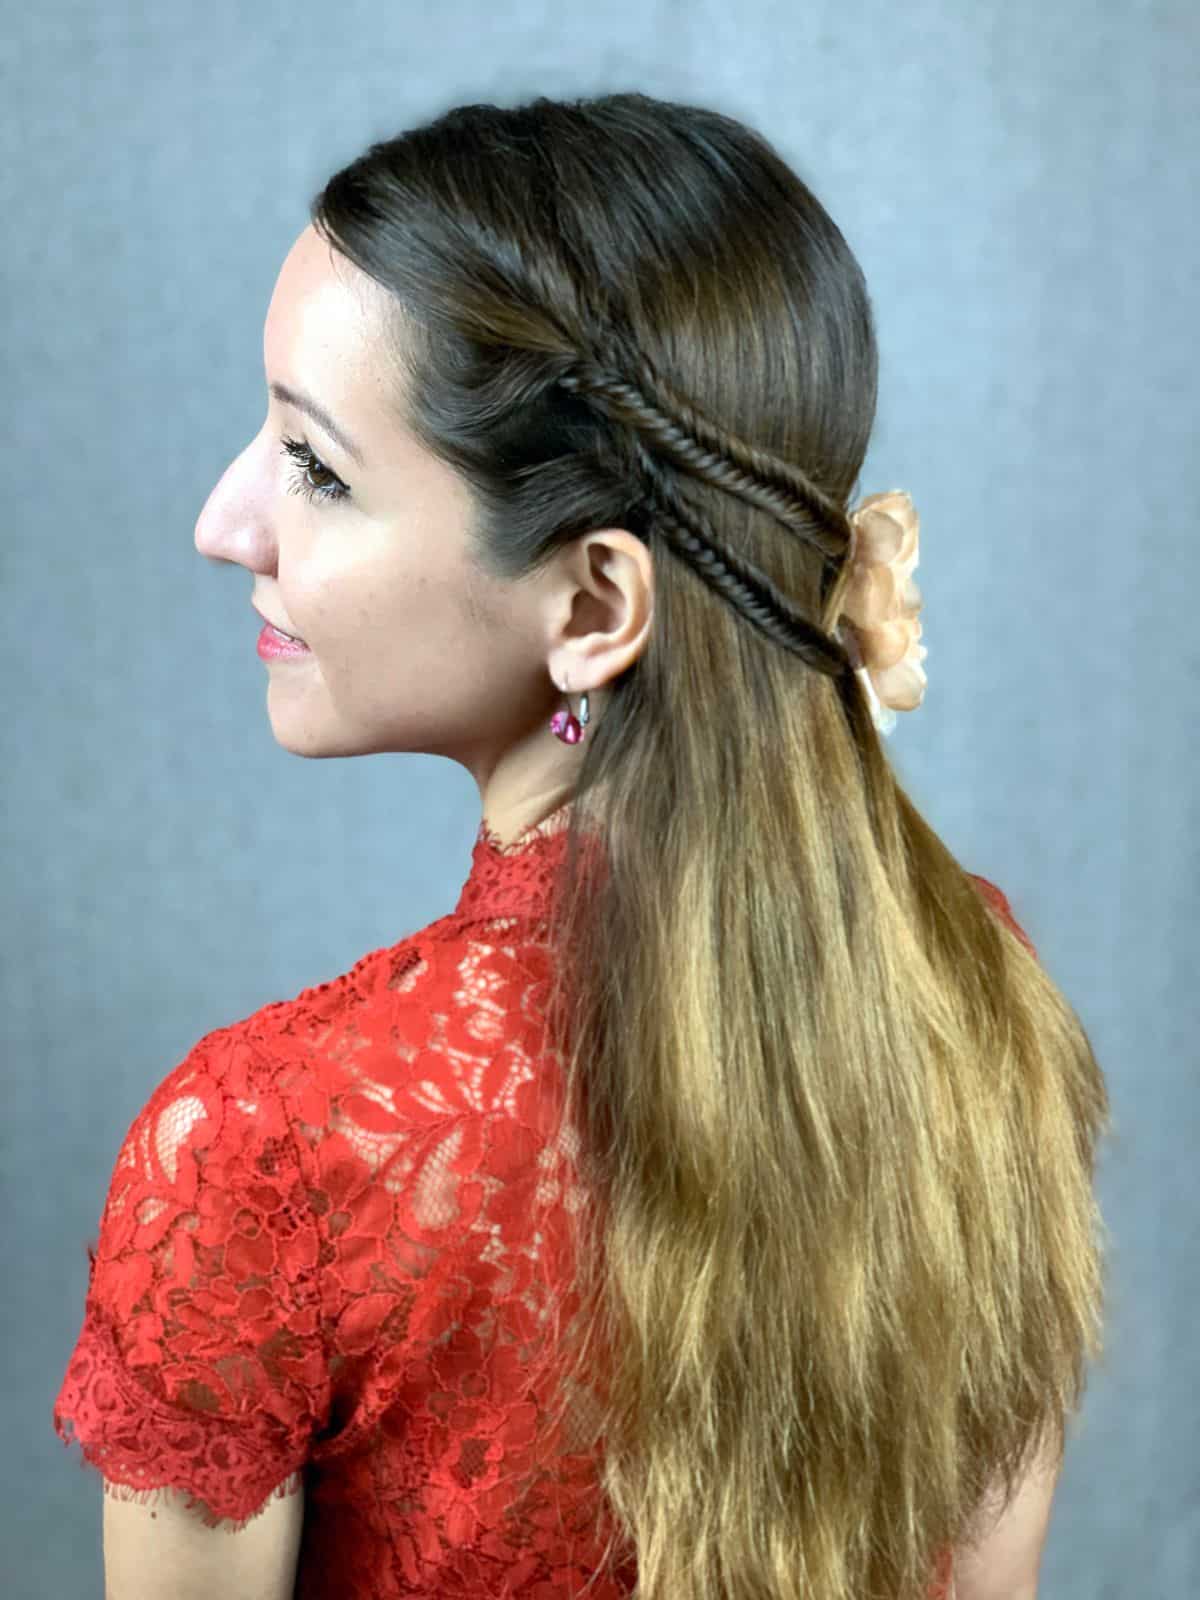
Springtime is always a favorite time of year with fresh flowers everywhere, and this simple half-up half-down hairstyle with braids is a great way to celebrate a favorite season. This style is ideal for any length of hair and is accented with a flower clip to make it look pretty while not being overly flashy. If you want something just a bit different than your basic style, this is the one to try!
Spring Inspired Hairstyle
Sometimes you just want to look pretty, but don't have a ton of time to work with your hair. This is one of those styles that pulls the hair away from your face but isn't boring. The two braids on each side are beautiful and intricate, but surprisingly easy to create. If you want to do something special, this is the look.
I love that this little half-up look can so easily go from everyday work or even school for a teen, all the way to the event after work. It's simple but with a few beads or decorative pins can turn into something elegant. Add a few extra curls at the bottom and you've got a romantic style ideal for a wedding!
What Do I Need to Create This Half Up Half Down Hairstyle?
This hairstyle is super simple and really only has to have a comb and hair tie. However, I added a simple flower clip on mine to add some accent. You can do the same with a bow, ribbon, barrette, or even a decorative comb strategically placed on the side.
Below are some of my favorite hair tools for creating pretty braids and styles with longer hair. Check them out and add them to your haircare arsenal to use next time for other styles. And, if you like this look, you might also like our fabulous list of 5-minute hairstyles. They are ideal for those busy days when you are short on time but still want to look pulled together.
Tools I Use
- Wide-tooth comb
- Detangling brush
- Hair rubber bands
- Satin hair ribbon (optional)
- Topsy Tail braiding tool (optional)
Other Items I Love:
How to Create the Half Up Half Down Spring Hairstyle
One great thing about this style is it works great for freshly washed or unwashed hair. So, if you are on day 2 or 3 after a wash, this is a perfect choice to use to make your hair look fresh and new. Just make sure to start by combing out all tangles and parting your hair down the center before you begin. If you want a bit of volume at the root, you can always use a little dry shampoo and fluff it a bit before braiding the sides.
Step 1
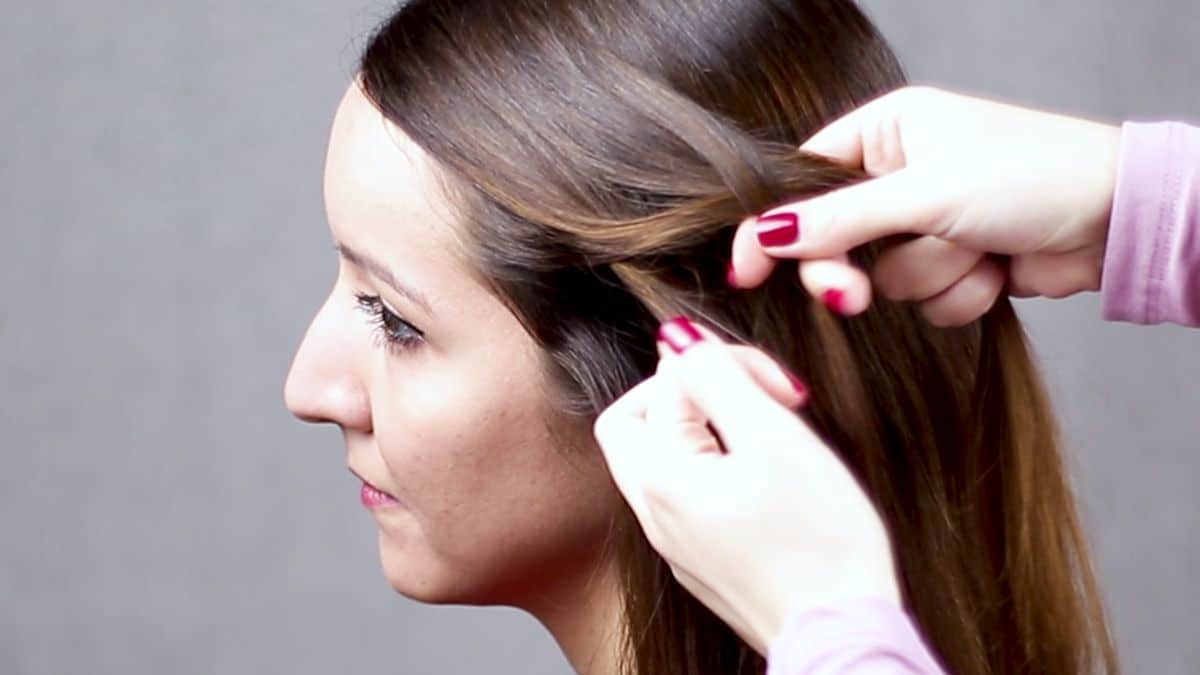
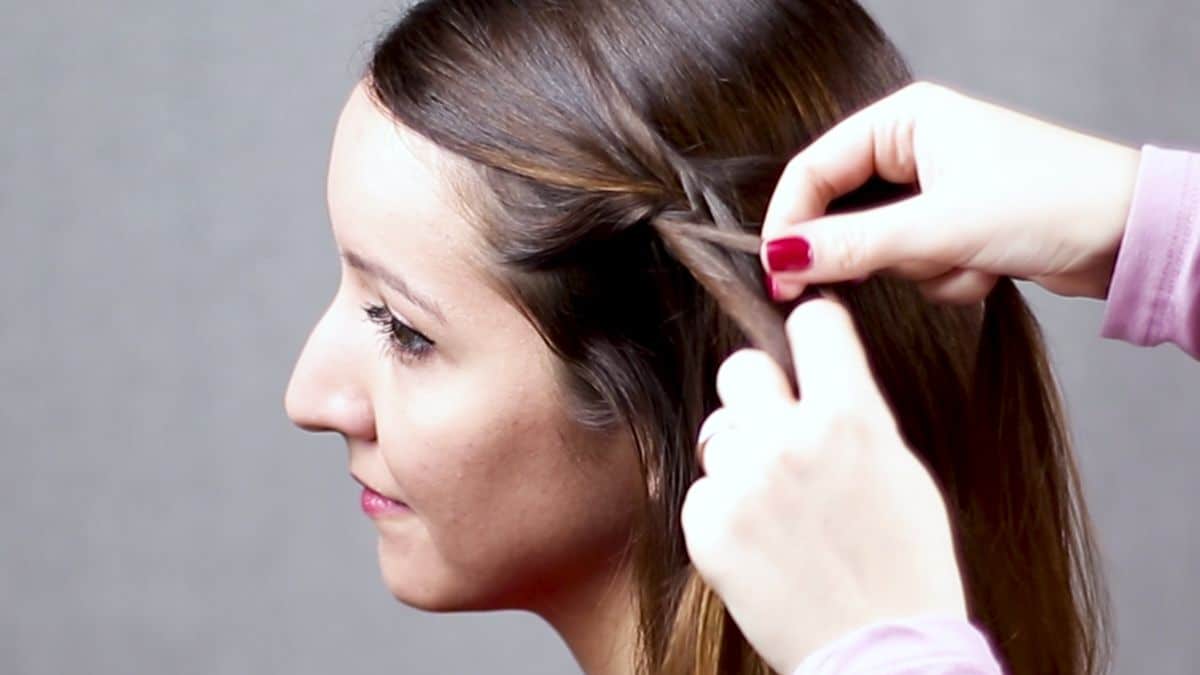
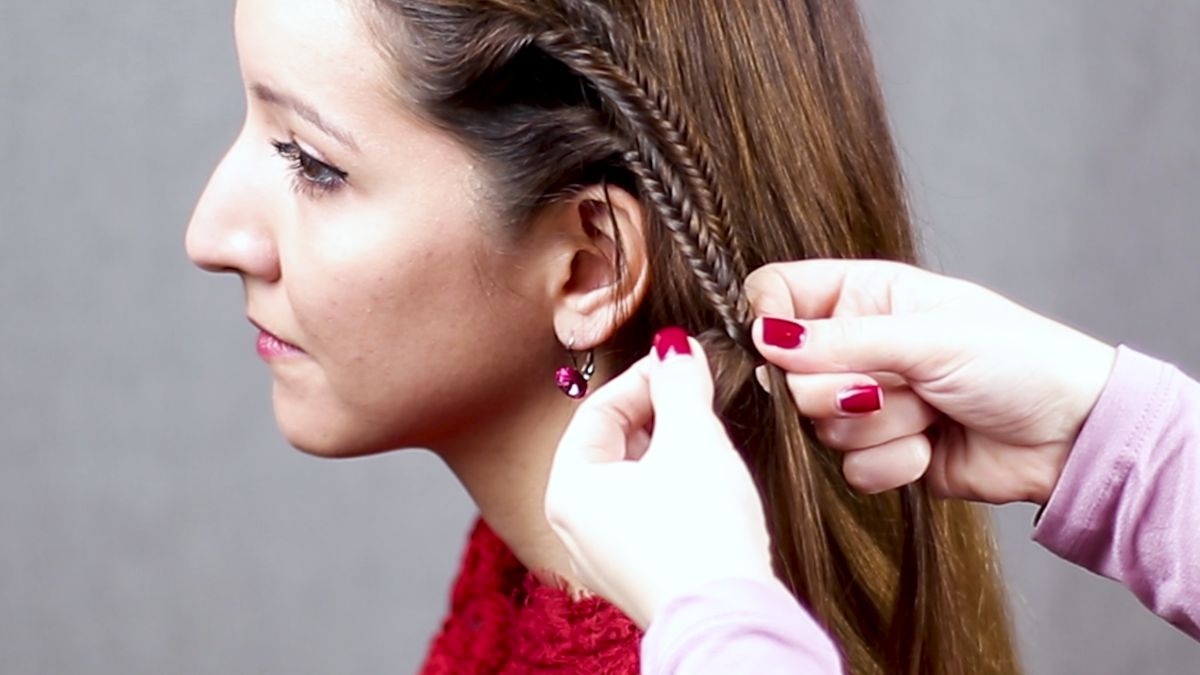
Start at the temple, and pull a small section of hair backward. Begin dividing this piece of hair into two sections. Now, to create the fishtail braid look, you want to take a smaller section of the left section and pull it from the outside over the middle. Then, you will pull a smaller section from the inner side to the outside.
You will start with two sections of hair but will be weaving the hair in smaller sections like a braid. Cross the piece of hair over to the opposite section of hair. Then, repeat this going in the other direction. Continue crossing the smaller section over, incorporating it into the inner edge of the main section of hair.
Step 2
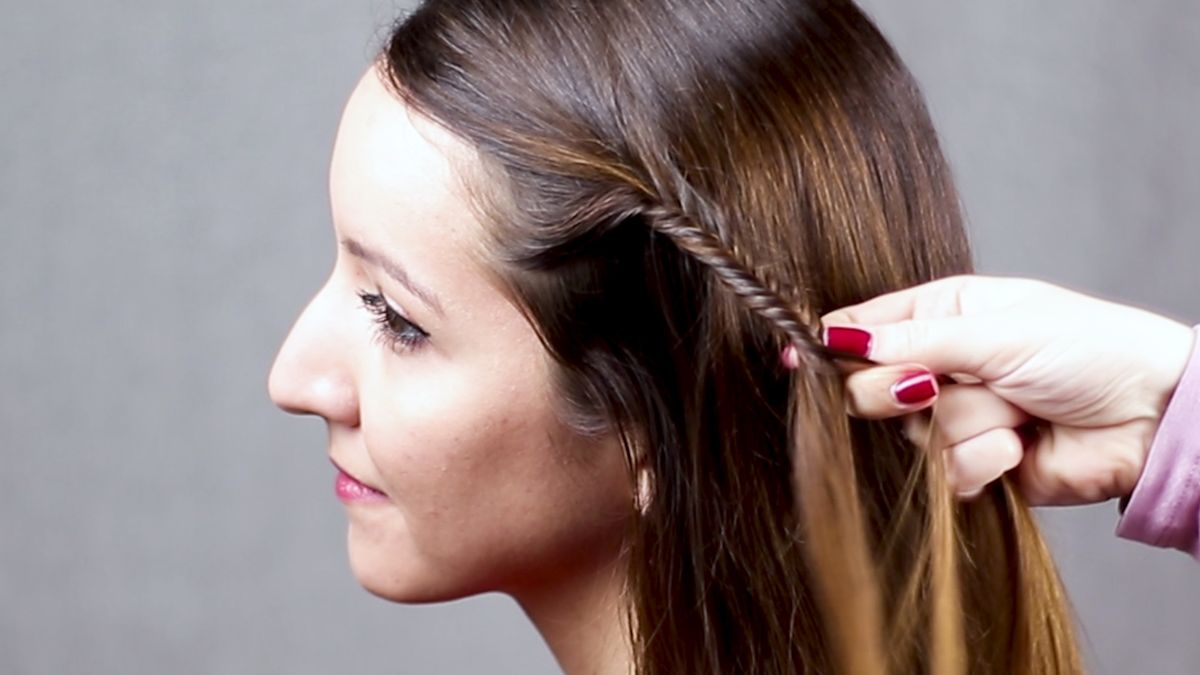
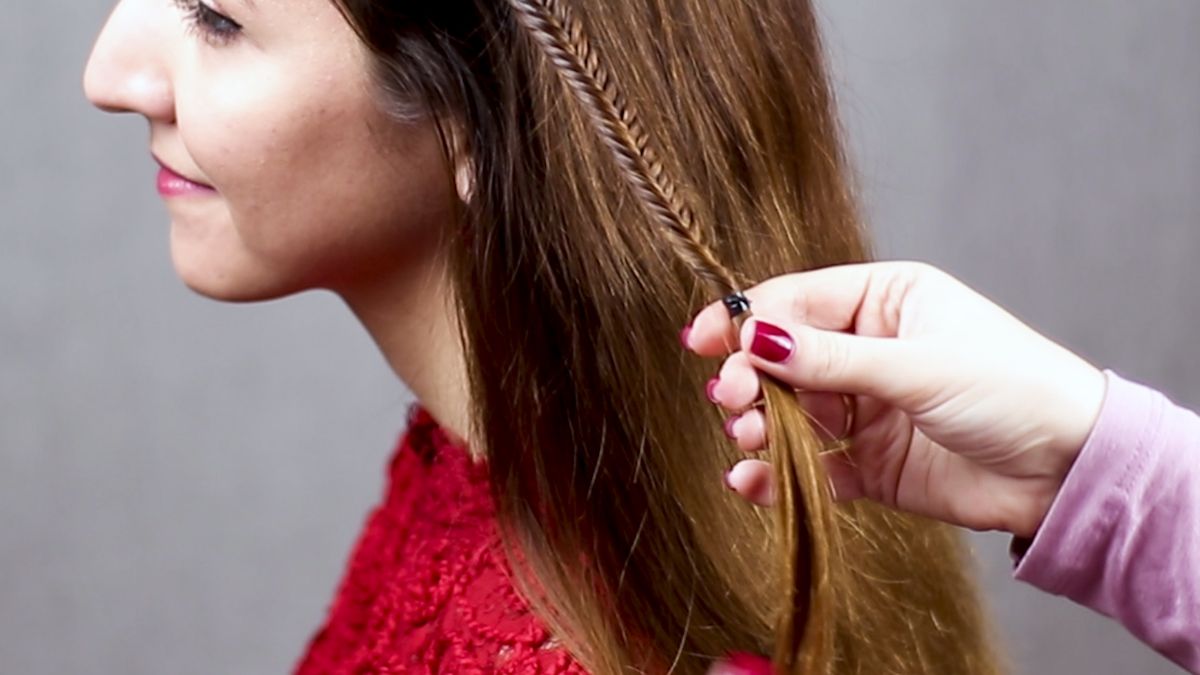
Continue this process of fishtail braid until you reach about halfway down the sections of hair and the middle of the back of the head.
Then secure this with a small hair tie. If needed, watch the video for a better idea of the process.
Step 3
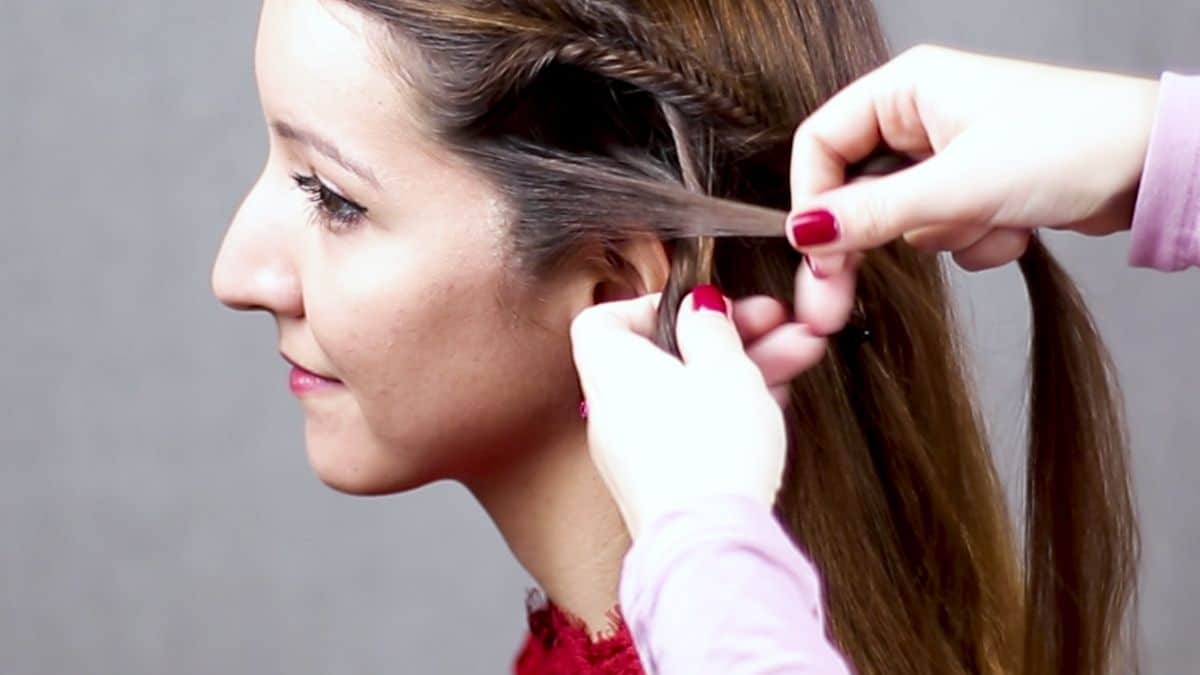
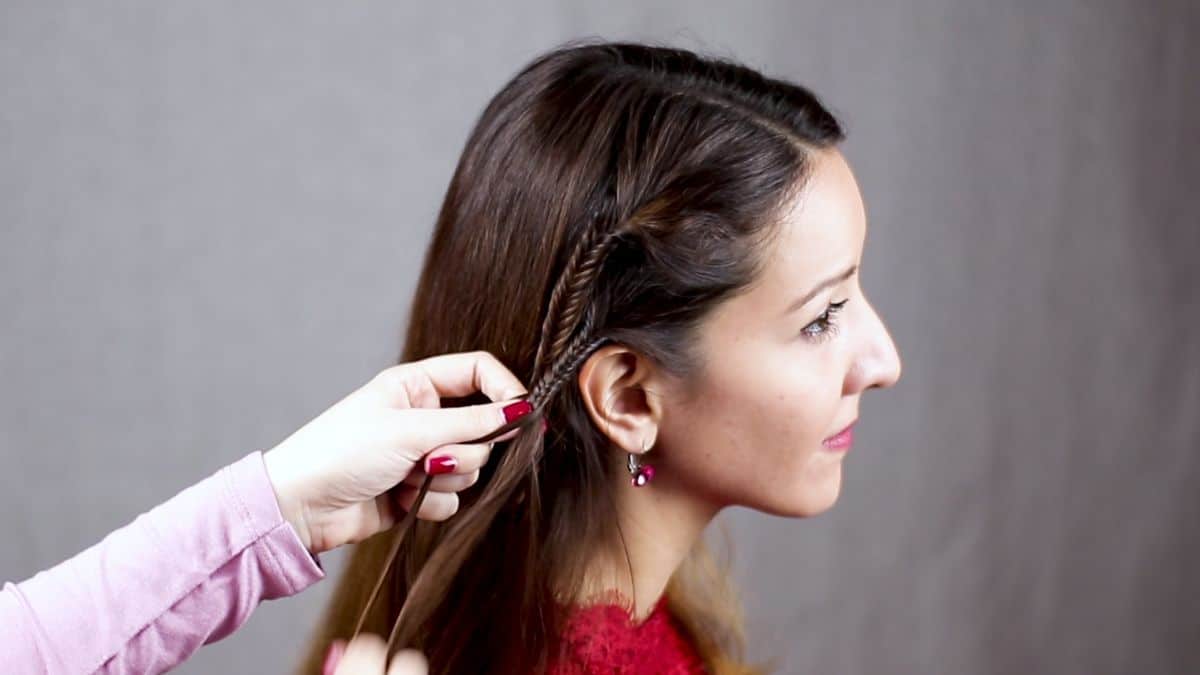
Now, repeat this process but pull the section of hair just above the ears to do your next braid, tying it off a bit lower than the first fishtail braid you did.
This will pull the hair away from your face, but leave the top and back hanging down.
Step 4
Now, repeat this same process on the other side of your head, creating two small fishtail braids with the bottom braid hanging down lower than the first.
Step 5
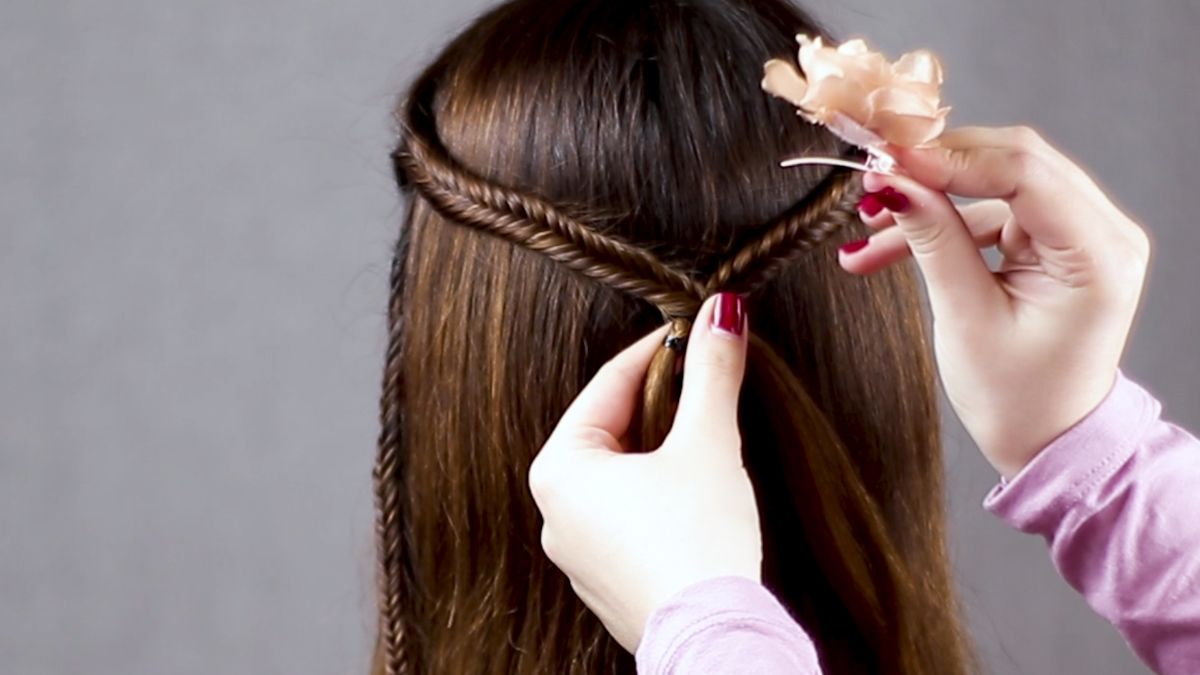
Pull the top two braids back to the crown of your head and connect with a hair clip or rubber band.
Step 6
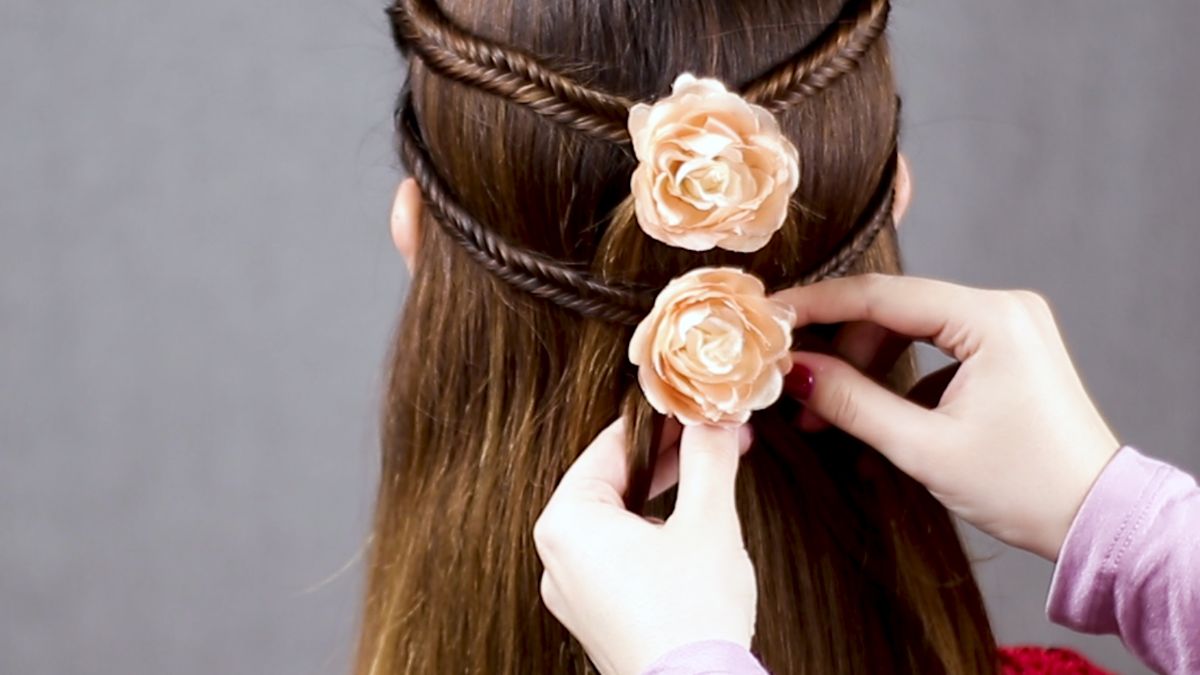
Now, pull the lower two braids back to the base of your head and connect them with a clip or rubber band. The look is best with clips or flowers to cover the hairbands.
Carefully arrange them so they are sitting above each other and even on the back of your head. Then spray the sides with a bit of hairspray to secure and smooth out any flyaway bits of hair.
What Ways Can I Make My Braids Unique?
While I love this style, you may want to make yours look a bit more unique. Below are some ideas that work great for making the half up half down braided style look different. This includes a combination of ways to make the look a bit fancier, as well as ways to dress it down a bit for a more casual look.
- For a simpler style, make the braids just a simple three-strand braid instead of the fishtail style.
- Weave a ribbon into the braids to match the outfit. This works especially well for little girls' hair.
- Tie a ribbon around the ends of the braids when you pull them behind your head to connect.
- Add beaded ribbon into the braids for sparkle that works for an elegant look.
- Decorate around the braids or on the braids with decorative picks, fake pearls, or beads that will add some accent to the look.
- Curl the ends of your hair to add a more elegant look and to add volume around the base.
More Easy Braided Hairstyle Ideas for Long Hair
Braiding long hair is one of the hallmarks of keeping it out of your face while still looking put together. The style above is beautiful and can be super versatile for your lifestyle. Below are some more fun ideas that include simple everyday looks as well as upscale ideas that can carry you to a wedding or a party and look fabulous. Check these out and make sure that you bookmark the ones that you like or pin them to a hair care board on Pinterest so they are handy when you are ready to do your hair!
- Simple Braid with Ribbon Hairstyle
- Fishtail Ponytail Pigtails with Bow Accent
- Braided Crown Princess Hairstyle
- Braided Dual Top Knot Buns Half Up Hairstyle
- Easy Half Up Side Braids Hairstyle
Spring Inspired Half Up Half Down Hairstyle
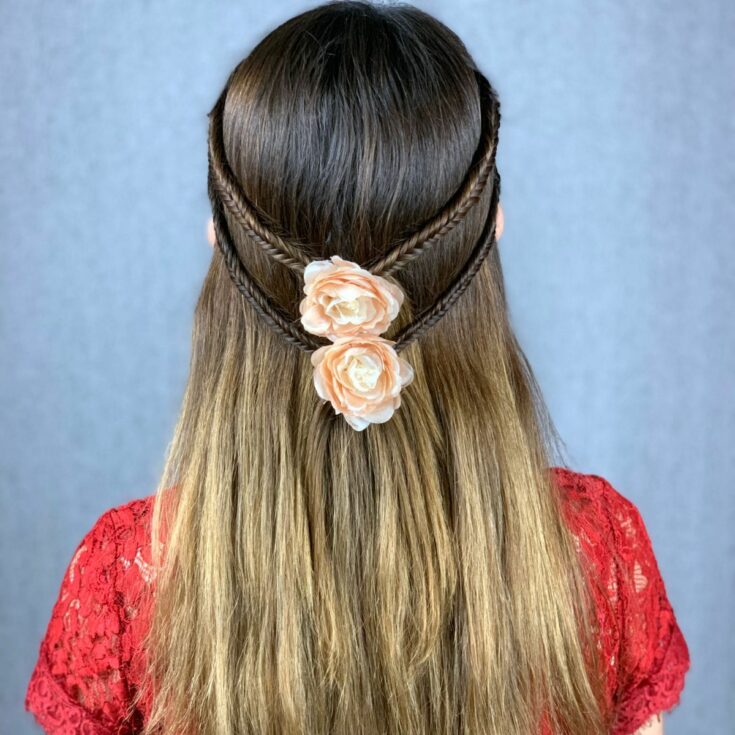
This lovely spring-inspired half up half down hairstyle is a great choice for a simple braided style that is flirty and beautiful!
Materials
Tools
Instructions
- Start at the temple on one side, pull a small section of hair back and divide this piece of hair into two sections. Now, to create the fishtail braid look, you want to take a smaller section of the left section and pull it from the outside over the middle. Then, you will pull a smaller section from the inner side to the outside. Continue this by incorporating the inner edge of the main section of hair.
- Continue this fishtail braid, holding it away from the rest of the hair, until you have reached around halfway down the head, then tie off the end with a hair tie.
- Now, repeat this just below the first section and tie it in place.
- Repeat this on the opposite side, making 2 fishtail braids.
- Then, pull first the top, then the bottom braids back to the back of the head and clip separately so they meet in the middle and are held together with a tie and clip.
Notes
Replace the hair clips with a preferred barrette, bow, or even ribbons.
Recommended Products
As an Amazon Associate and member of other affiliate programs, I earn from qualifying purchases.
-
 Crave Naturals Glide Thru Detangling Brush for Adults & Kids Hair - Detangler Hairbrush for Natural, Curly, Straight, Wet or Dry Hair (TURQUOISE)
 -
 OGX Refresh Revitalize Extra Strength Dry Shampoo, Argan Oil of Morocco, 5 Ounce
 -
 12pcs Topsy Tail Hair Tool, MORGLES Hair Braid Tools Hair Braid Tool Topsy Tail Maker,Hair Loop Styling Tool Topsy Twist Hair Tool Set, 6 Colors
 -
 Ribest ⅜ inch Solid Grosgrain Ribbon Set for Gift Wrapping and Bow Hair Accessories-60 Yards (2 Yards*30 Colors)
 -
 12pcs Hair Clips in 3 Colours Tiny Claw Clips for Girls Flower Hair Claw Clips for Women, Mini Clips for Hair Cute Flower Clips for Thin Hair, Decorative Hair Clips Hair Accessories for Girls
 -
 Onedor Handmade 100% Natural Green Sandalwood Hair Combs - Anti-Static Sandalwood Scent Natural Hair Detangler Wooden Comb (Wide Tooth)





Leave a Reply