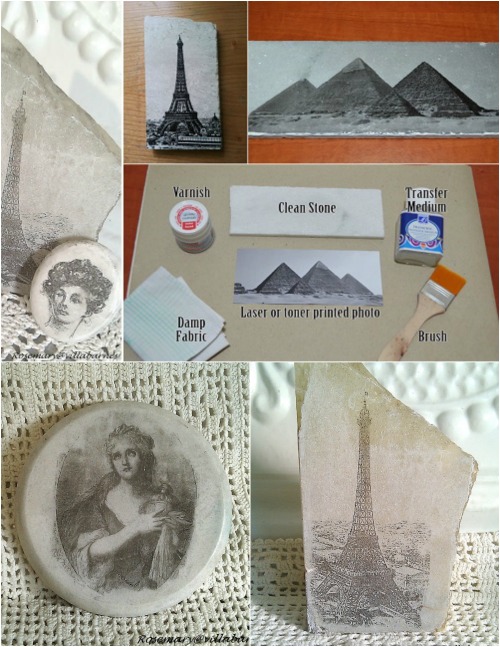
I love the natural yet industrial look and feel that you get from stone (much like the raw, industrial elegance of concrete block furniture). Although this video uses images that are exactly the same size as the stones, don’t feel the need to work it out quite so perfectly. You could take this to a much larger or smaller scale if you want, or even make a nice big collage of your family or all the places you’ve visited.
Video Instructions:

Video by
You will need:
- Clean stone
- Laser or toner printed photo
- Varnish
- Transfer medium
- Brush
- Damp cloth
Apply the transfer medium to the stone as well as the image and place it where you want it – make sure to push out all the air pockets. This then has to dry for about eight hours. Once time is up, get your damp fabric and use that to carefully rub the paper off of the stone, then simply seal your newly-printed stone with some varnish. It’s as easy as that! I suggest sticking with black and white images only as the colored ink may not transfer quite as well.
Another easy tutorial explains this technique here VillaBarnes – Playing With Rocks.


John Hoek
HELP! What is the “transfer medium”? Do you have a brand name? Where could it be purchased? Your creations are beautiful!
John