Ready to celebrate springtime and Easter with a cheap, fun, easy craft? In this video tutorial, you will learn how you can make an Easter bunny decoration out of cardboard and other basic supplies. This cute Easter project is easy to customize, so you’ll have a chance to let your creativity shine.

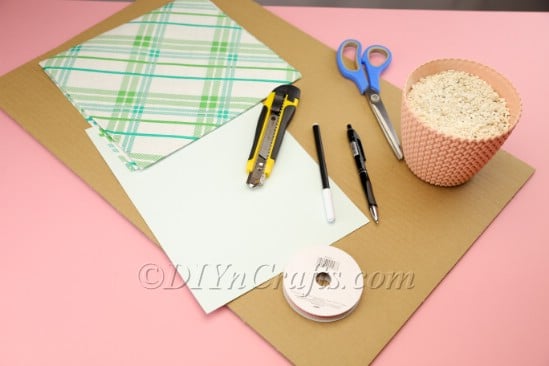
There are a number of materials and tools you’re going to need for this project, but most of them are pretty standard and likely already in your craft room.
You’ll notice that under the “materials” list, I call for brown cardboard and white cardboard or paper.
The brown cardboard is going to be the body of your bunny. The white is going to be used for the paws as well as the bunny’s hair.
Because you’ll be gluing the white cardboard on top of the brown cardboard, you’ll find that it is easiest if the white cardboard is thinner and flimsier than the brown cardboard you are using for the base.
Do you have to go with brown and white? Nope! I picked these colors because they were easy to come by and contrast well, but you can go with any color of cardboard you want. I’d pick natural bunny colors (i.e., brown, black, grey, white, etc.) or “Easter” colors (pastels).
You’re going to need fabric and a ribbon for this project, too. Here, you have full freedom as well to pick any colors or patterns you want. Once again, I recommend that you go with something light, cheerful, and suitable for springtime. But there are no rules with art, so go in any direction you want with this.
I used hot glue and a glue gun for this project, as I always do. But you don’t have to if you prefer to go with liquid glue or a glue stick. The materials you’re using for this project should glue together fine, regardless.
Finally, if you have thinner cardboard, you might get away with a pair of scissors instead of a precision cutting tool, but it’s up to you. You’ll get cleaner lines with a scalpel and make the steps that involve cutting a lot easier.
Now that we’ve talked about the materials and tools a bit, you can find the full list of both below. You’ll also find written instructions to go with the video. Let’s get started making our cardboard Easter bunnies!
Step-by-Step Tutorial with Detailed Instructions:
How to Make a Lovely Easter Bunny Out of Cardboard
Looking for a thrifty, fun craft project for Easter with satisfying results? In this video tutorial, learn how you can make a beautiful Easter bunny decoration using nothing more than regular cardboard and other cheap, simple supplies.
Materials
- Cardboard (brown)
- Cardboard or paper (white)
- Fabric
- Ribbon
- Flower planter with ornamental pebbles, glass globs, etc.
- Wooden stick
- Googly eyes
Tools
- Ruler
- Black marker
- Scalpel or other precision cutting tool
- Scissors
- Hot glue and glue gun
- Pencil
Instructions
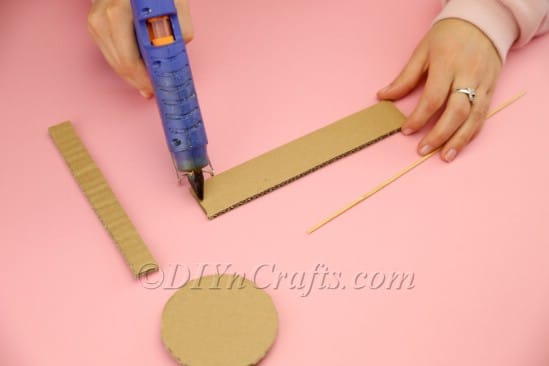
 To begin, you are going to need to cut out all of the shapes which will comprise the Easter bunny’s body. These need to be cut from the brown cardboard.
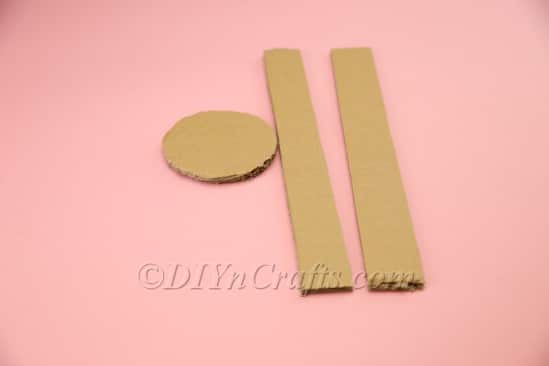
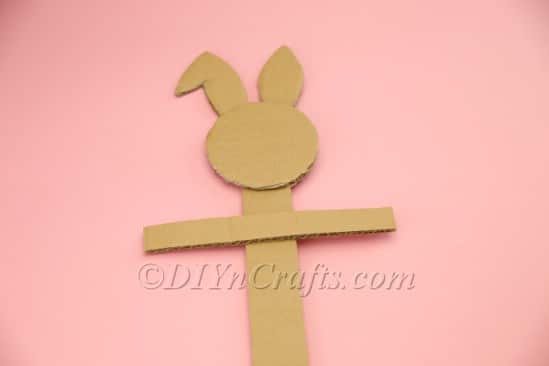
- You will need a long strip of cardboard to serve as the bunny’s neck and torso. You will also need a shorter, thinner strip to lay across it as the bunny’s arms.
- You can cut a round shape as the bunny’s head. You will need to make two ear shapes as well (I made one of the ears floppy).

- Once you have these shapes cut out, glue them together.
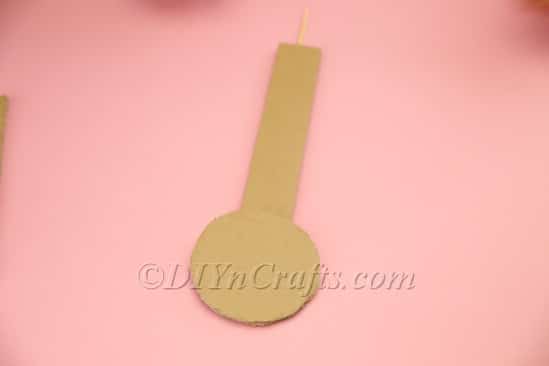
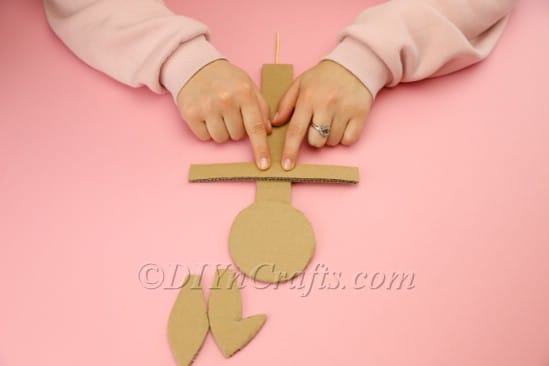
- Once all the pieces are attached, they should look like this:
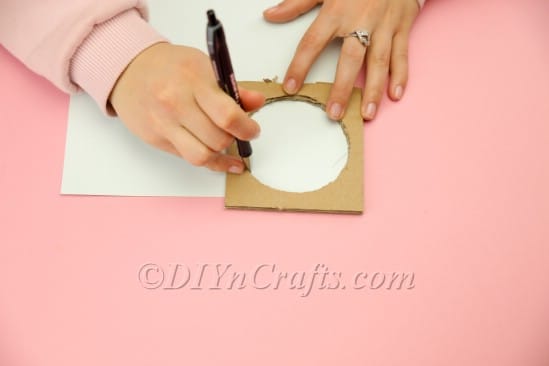
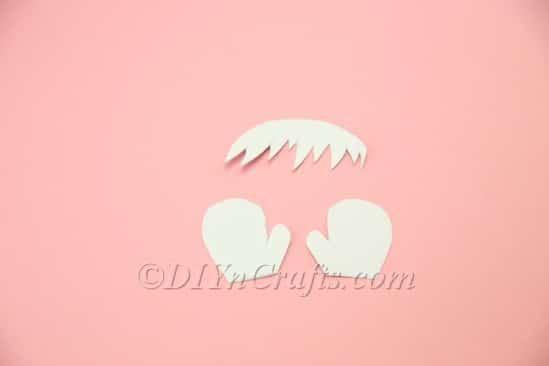
- We are making an anthropomorphic bunny, so our Easter Bunny is going to have hair. To cut out the hair, take the piece of cardboard that you cut the bunny's head from, and use what is left over as a stencil while you are sketching the hair. This will allow you to draw the curve of the head accurately. You can use your imagination for the rest.
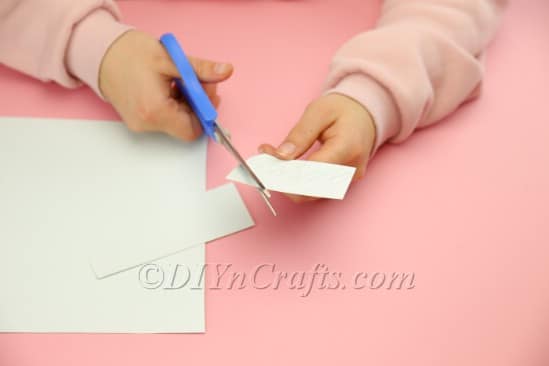
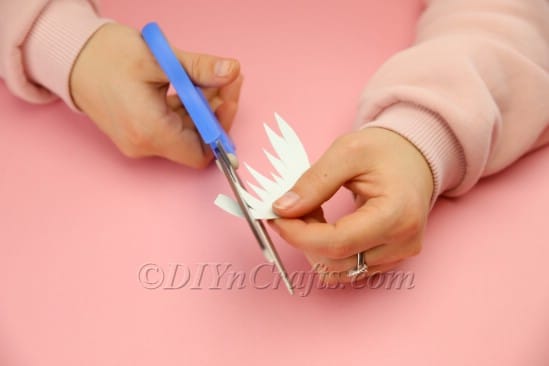
- Once you have finished sketching the outlines of the hair, use a pair of scissors or your cutting tool to cut the hair out.
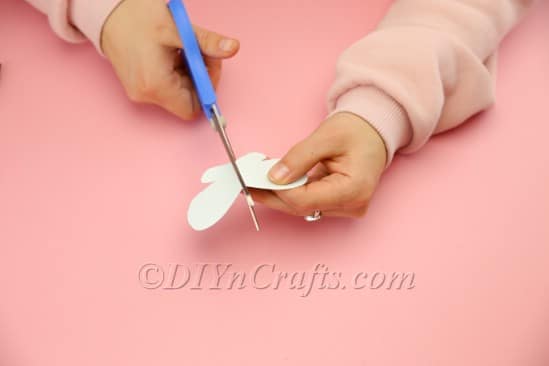
- While you are working with the white cardboard or paper, you also will want to cut out two matching paw shapes.
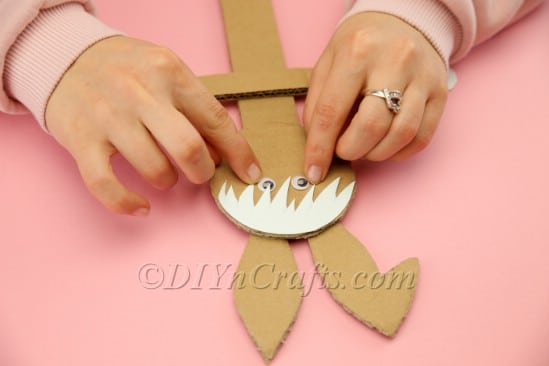
- Once you have completed the steps above, you can use glue to attach the paws to the ends of the arms, and you can attach the hair as well.
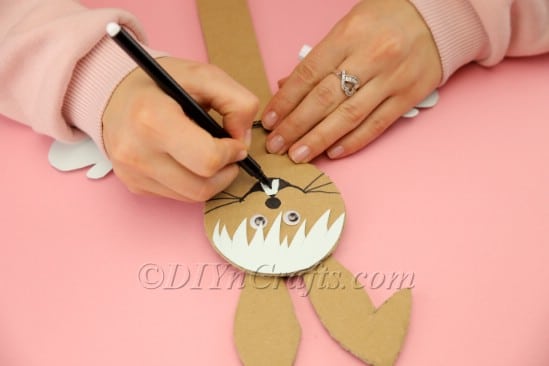
- Below the hair, glue on the googly eyes.
- Use a black marker to draw on the details of the bunny’s face.
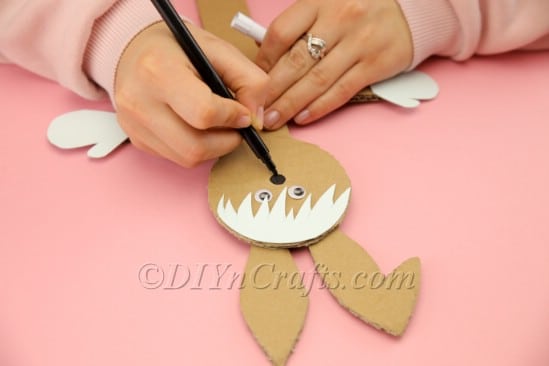
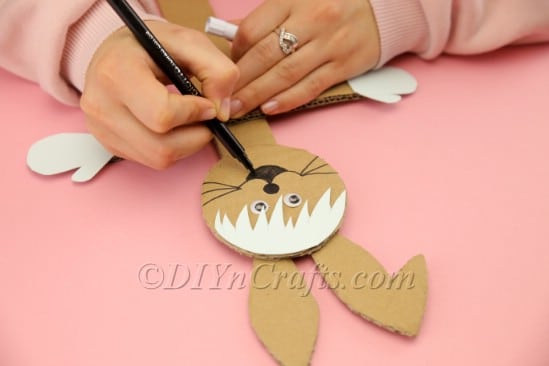
- Once you have drawn the nose, whiskers and mouth, cut out the shapes of the bunny’s two front teeth from the white cardboard or paper and glue them on.
- While you can cut out each of the teeth separately, a shortcut is to simply cut out a single larger white rectangle, glue that on over the mouth, and then use the black marker to sketch in the gap between the teeth. It should blend right into the mouth you have drawn underneath.
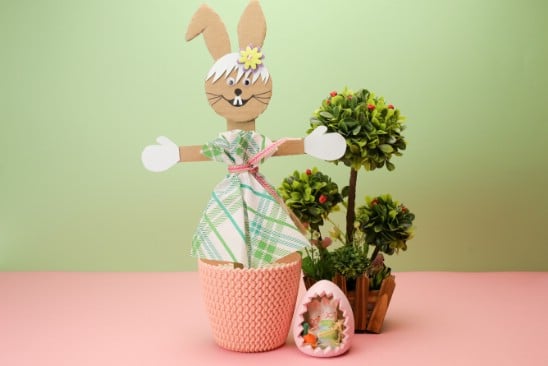
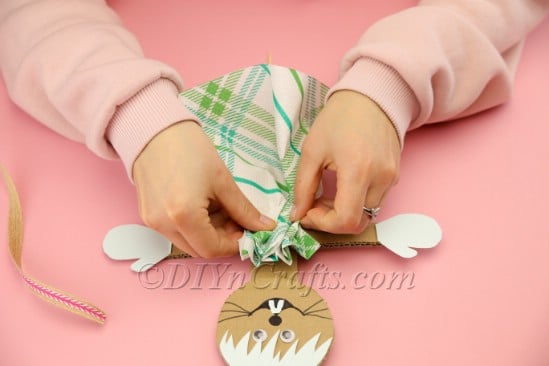
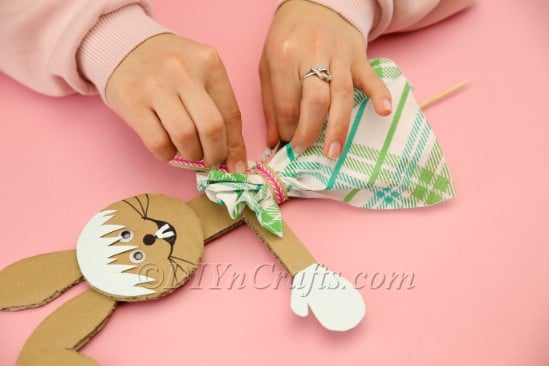
- Finally, it is time to make the bunny’s dress. Cut a piece of fabric to the right size, and scrunch up the top part of it. Right below that part, tie a ribbon around the bunny’s waist. This will hold the shape of the dress and also attach it to the bunny.
- Finally, you can glue or tape a wooden stick onto your bunny so that you can stand it upright in a planter full of ornamental pebbles.
- When your bunny is completed, it should look something like this:

Celebrate Springtime With Your Beautiful Cardboard Easter Bunny
You have now crafted a lovely Easter bunny decoration out of cardboard and other thrifty, simple supplies! As you can see, this project didn’t even take a lot of steps.
Because regular glue can be used for this project, it’s a good project for adults and kids of all ages. Even small children can enjoy it, so long as they are old enough to use scissors or a cutting tool safely.
It’s also a fun project for kids to express their personalities and imaginations. Children will have a great time creating lots of Easter bunny decorations with different clothing, body, and hair colors, expressions, and so on.
They may even enjoy playing with the bunnies as toys rather than just displaying them.
Easter Projects
Looking for more cute, fun, and easy Easter crafts? Here is a video tutorial that shows you how you can turn an egg carton into little Easter hens. In another video, I show you how you can decorate an Easter egg to look like a bunny.
Finally, if you have a small towel handy, you can make this adorable Easter bunny craft.
Take a look through our archives. There are a lot more Easter project tutorials available! We regularly update our site with more, too, so check back soon to see what we have added. Thanks for dropping by, and Happy Easter!


Leave a Reply