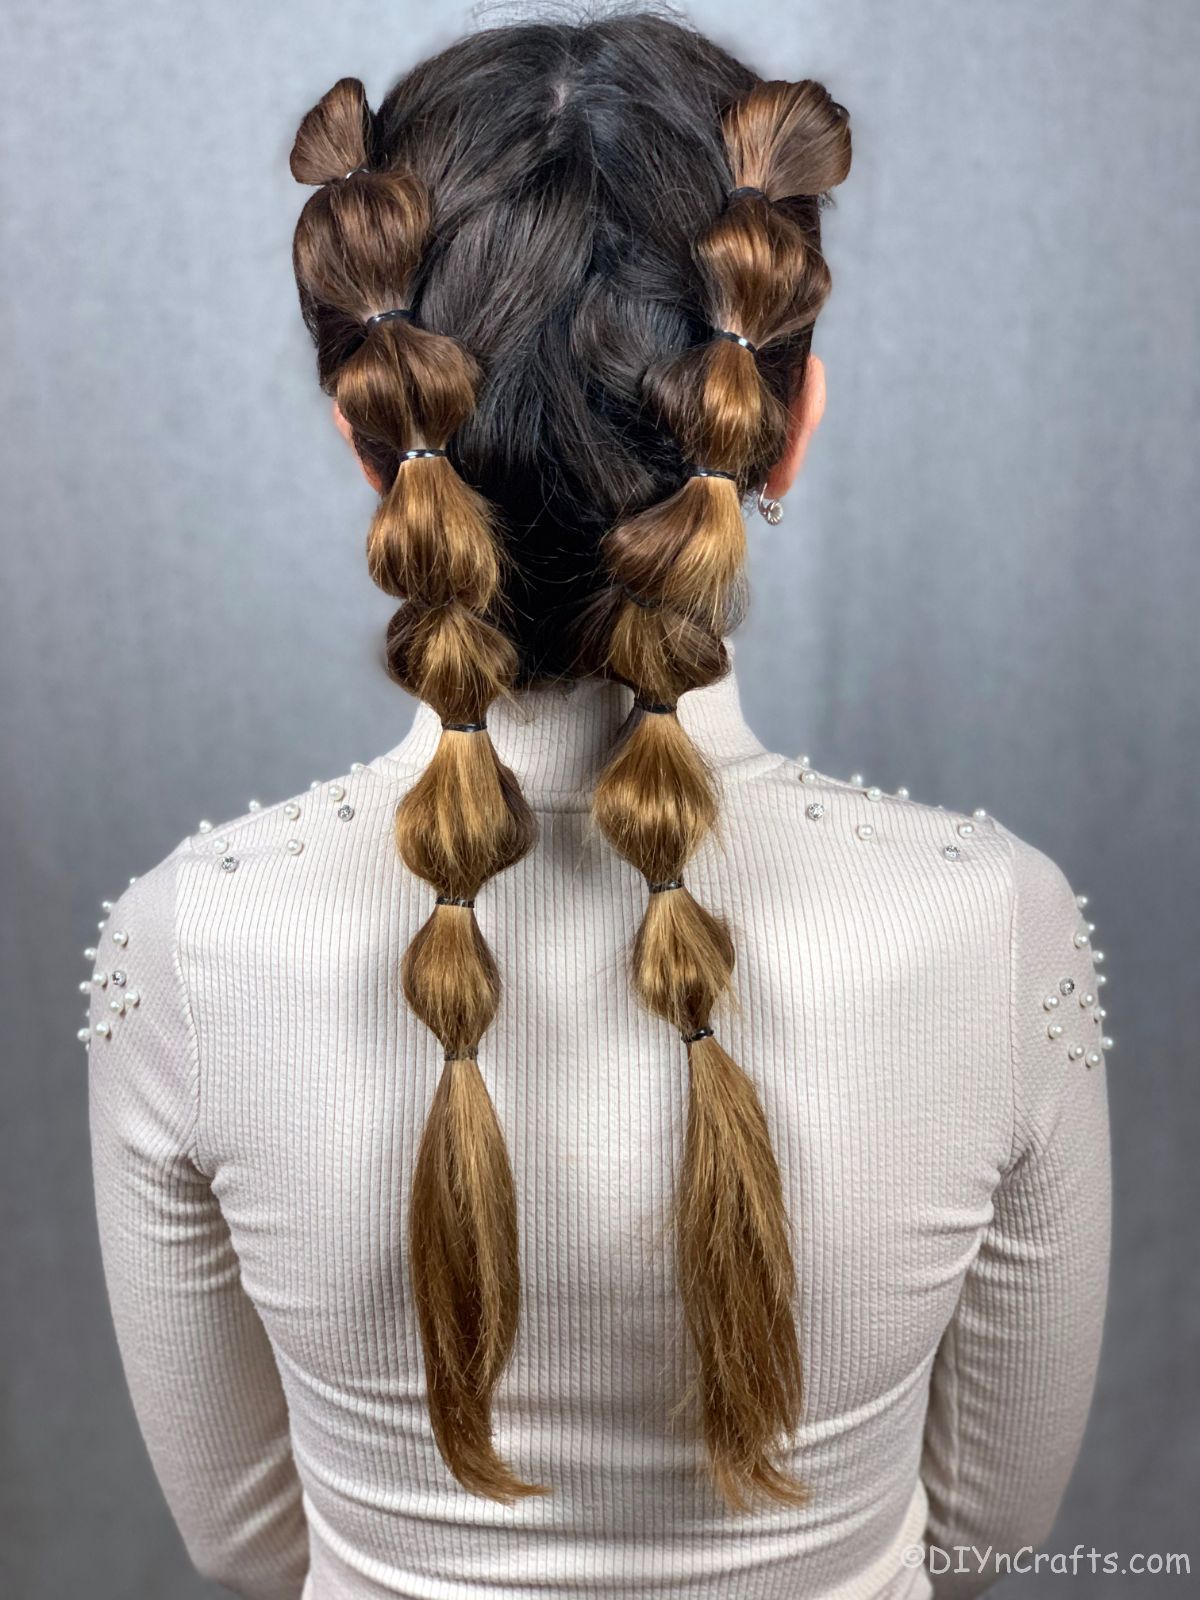
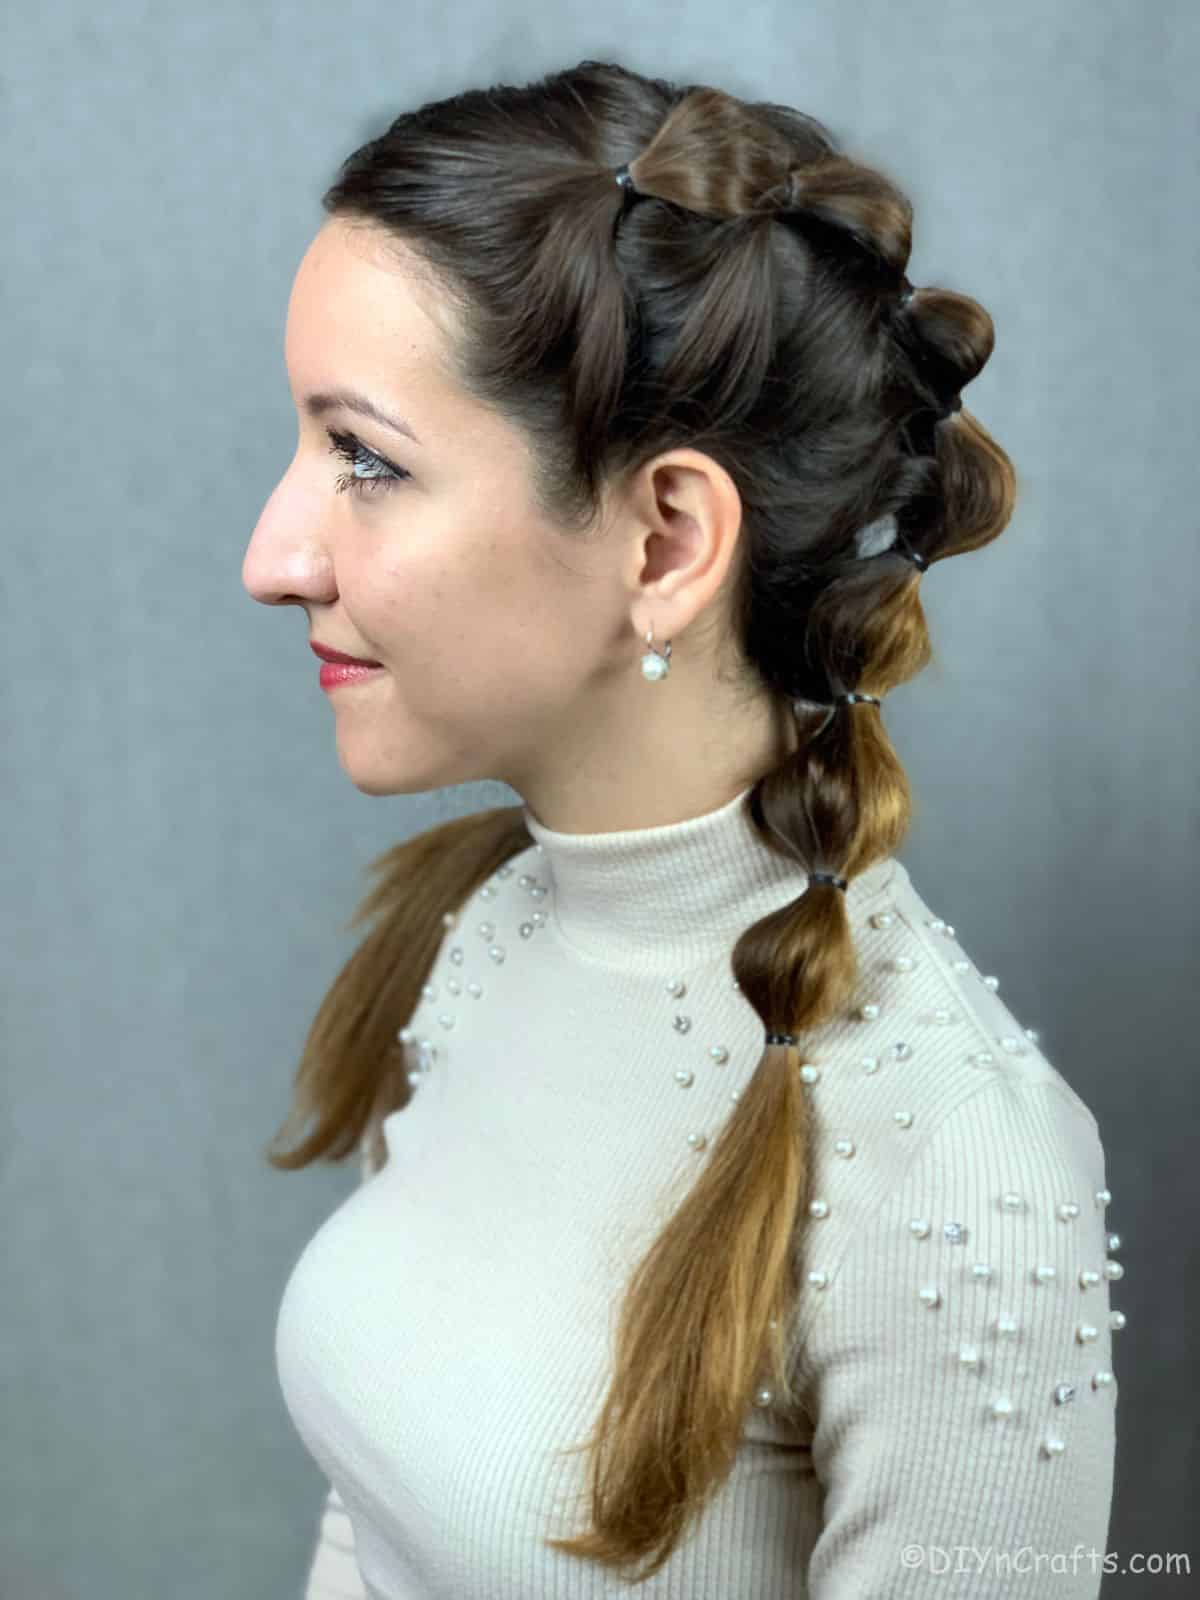
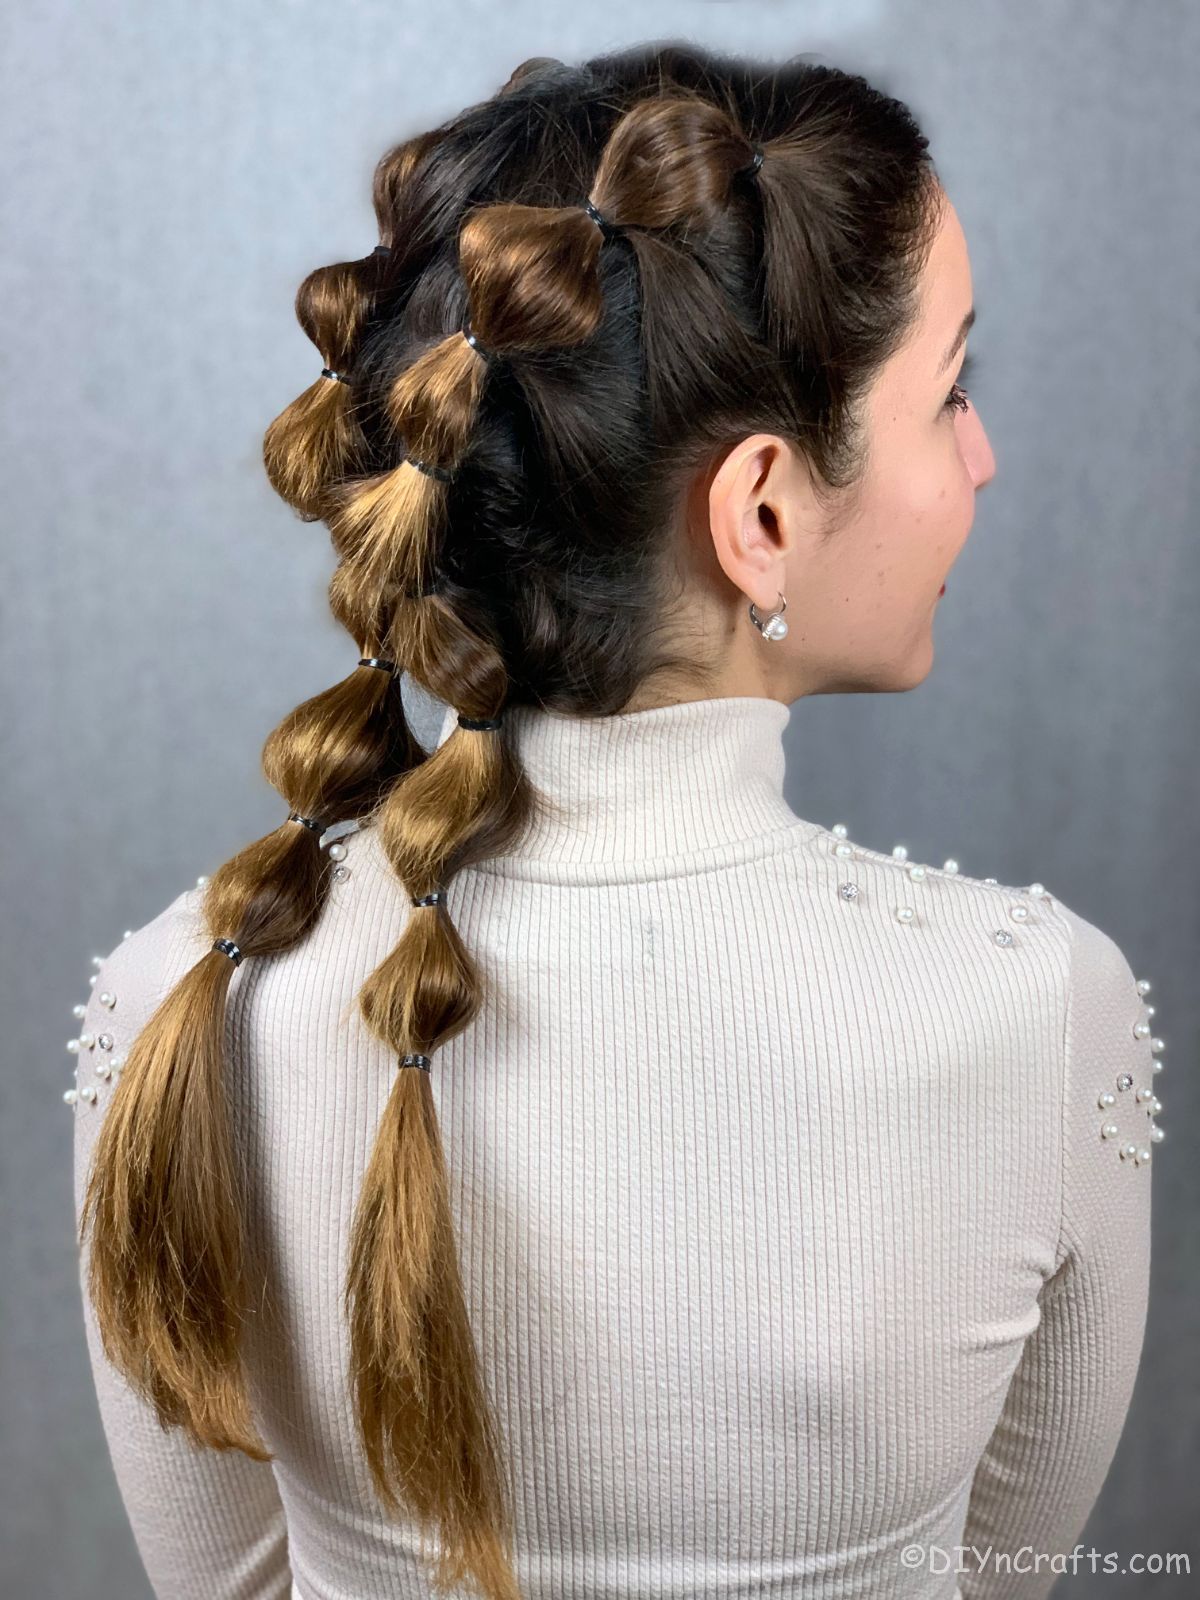
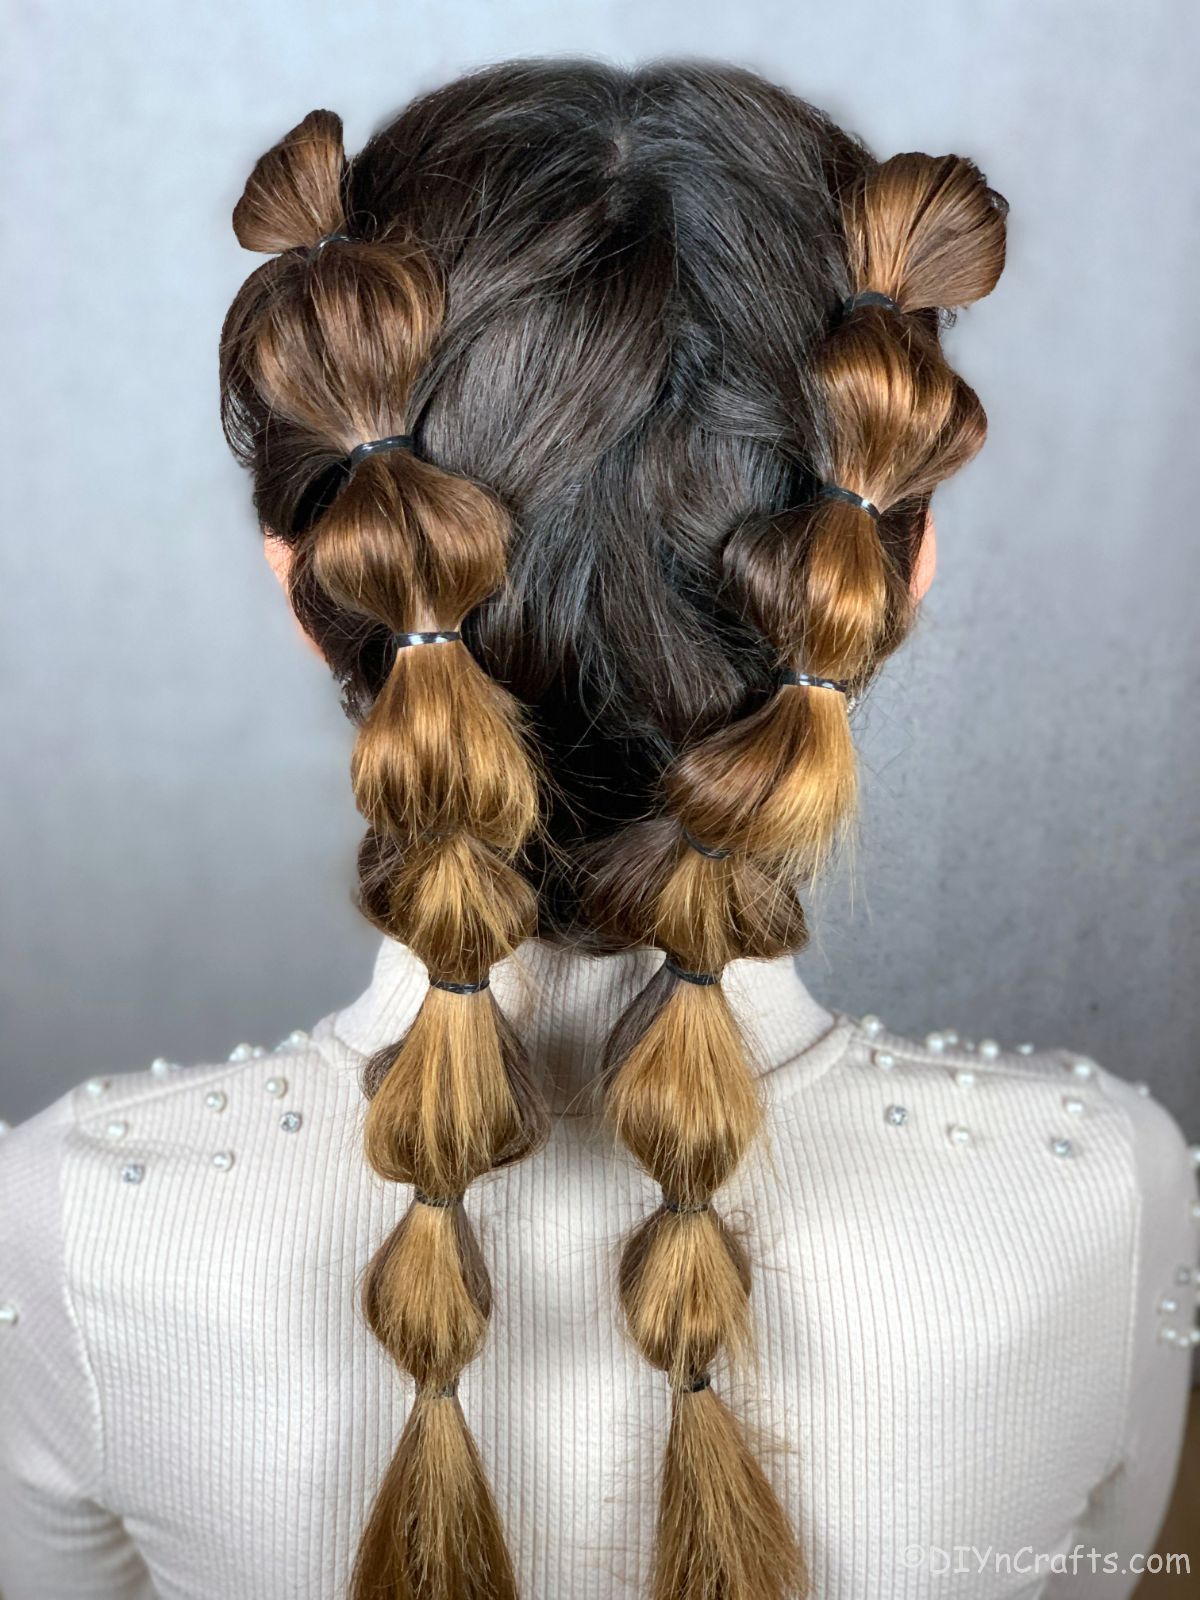
Bubble braids are so popular with the kids, but they can be a fun style for just about anyone to wear! I have seen them everywhere the last few years, and one of those places is the local Reinassance Fair. Something about these just screams festival, and since they are so easy to do, anyone can whip them up in minutes to tame their hair before going out for the day.
Easy Festival Hairstyle
Why should you worry about your hair at a festival? If you are like me, then they are usually in the summer months and long hair can just get so hot. Plus, long hair tends to catch on stuff easily, and the combination of hot weather, sweat, and long hair can end up in an ugly tangles mess. The solution? A cute bubble braids look that takes your boring ponytail and turns it into a fun accessory to your outfit.
This style is popular with all ages and for good reason. It is fun and adorable! Whether you leave the braids plain like I did, or you add a little something extra at the bottom with bows or ribbons, this look is sure to fast become a favorite on your list of easy hairstyles for long hair.
Want something a bit more elegant? Then you'll love these waterfall braid tutorials. So many gorgeous ideas on the list that can turn boring hair into a work of art.
What Do I Need to Create Bubble Braids?
The best part of this style is that you really only need the hair ties and a comb. I like using the small rubber band-style hair ties for this since they are so small and don't take away from the bubble look of the braid.
Before you begin this style, I definitely recommend combing it out, and as a bonus, it's a good idea to use a bit of mousse or argan oil to smooth the hair before you put it up. This will keep those pesky flyaways and baby hairs from poking out around the braids as badly.
Below are a few more tools that I recommend having on hand for this style and others. They are perfect for making sure your style comes out the way you want it to. Plus, these hair care items help to keep your hair healthy for future styles.
Tools I Use
- Wide-tooth comb
- Detangling brush
- Hair rubber bands
- Satin hair ribbon (optional)
- Topsy Tail braiding tool (optional)
Other Items I Love:
How to Create Bubble Braids
As always, you should begin by combing out any tangles in your hair and making sure it is ready to braid or put up. While this is easy to do with both clean and dirty hair, I like to do this when my hair is a few days after washing so the bubbles stay up better.
Freshly cleaned hair tends to be too soft and doesn't keep the bubbled look as nicely. If desired, a bit of dry shampoo can tame anything that is needed before you start working on your bubble braids.
Step 1
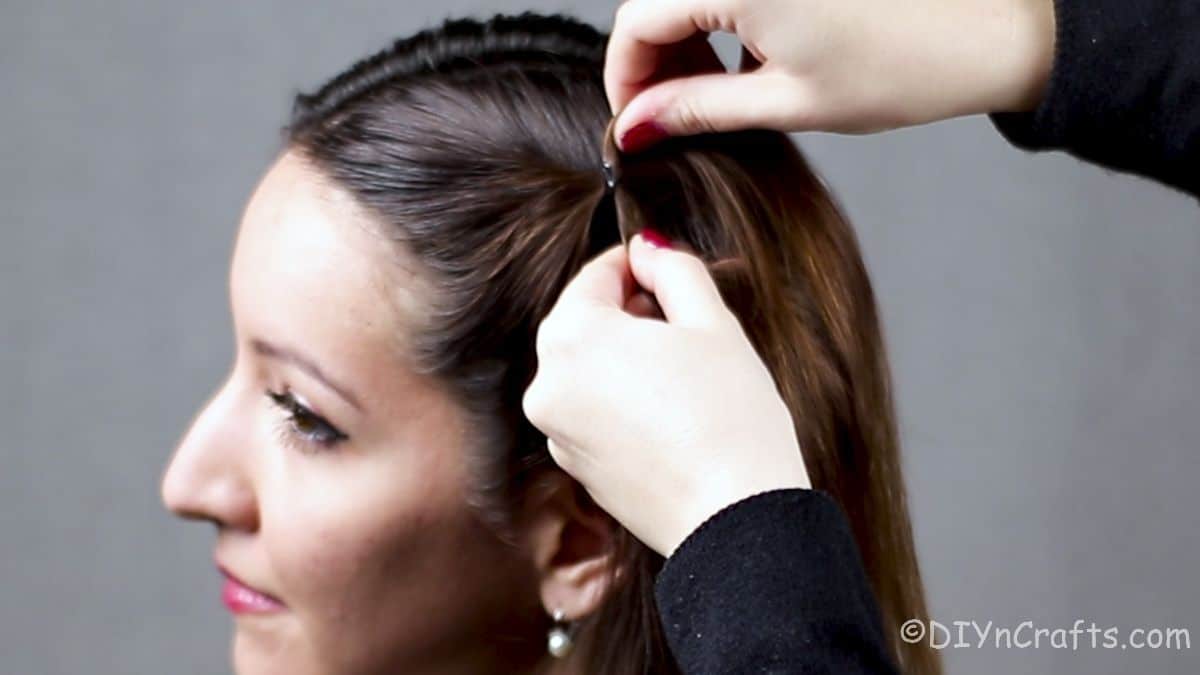
Start by combing out your hair, then parting it down the middle and all the way down to the base of your neck. Then, on the first side, begin by tying off the front section at the temple with a hair tie.
Step 2
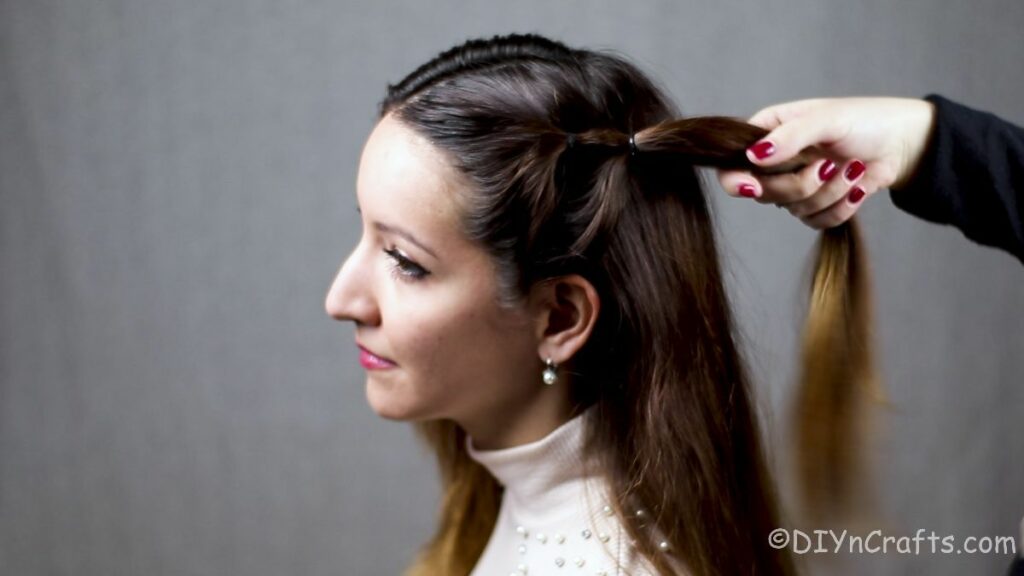
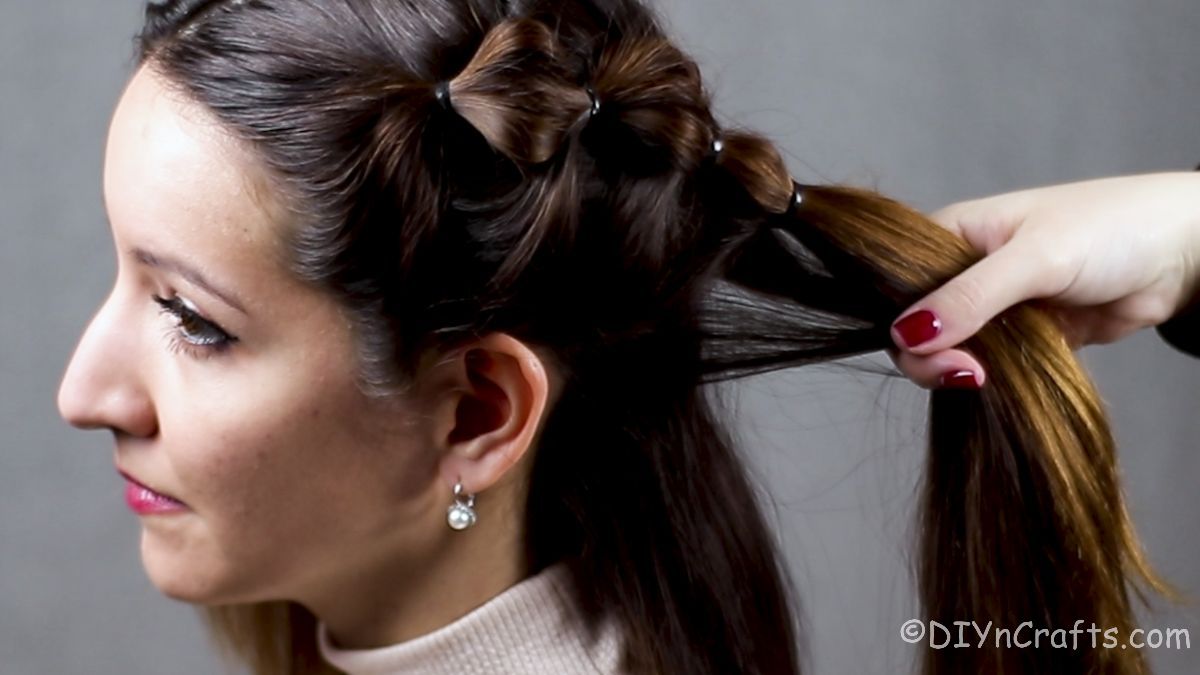
Then, move down and gather the next section of hair and tie it about 1" away from the first, but including the end of the first within it.
Step 3
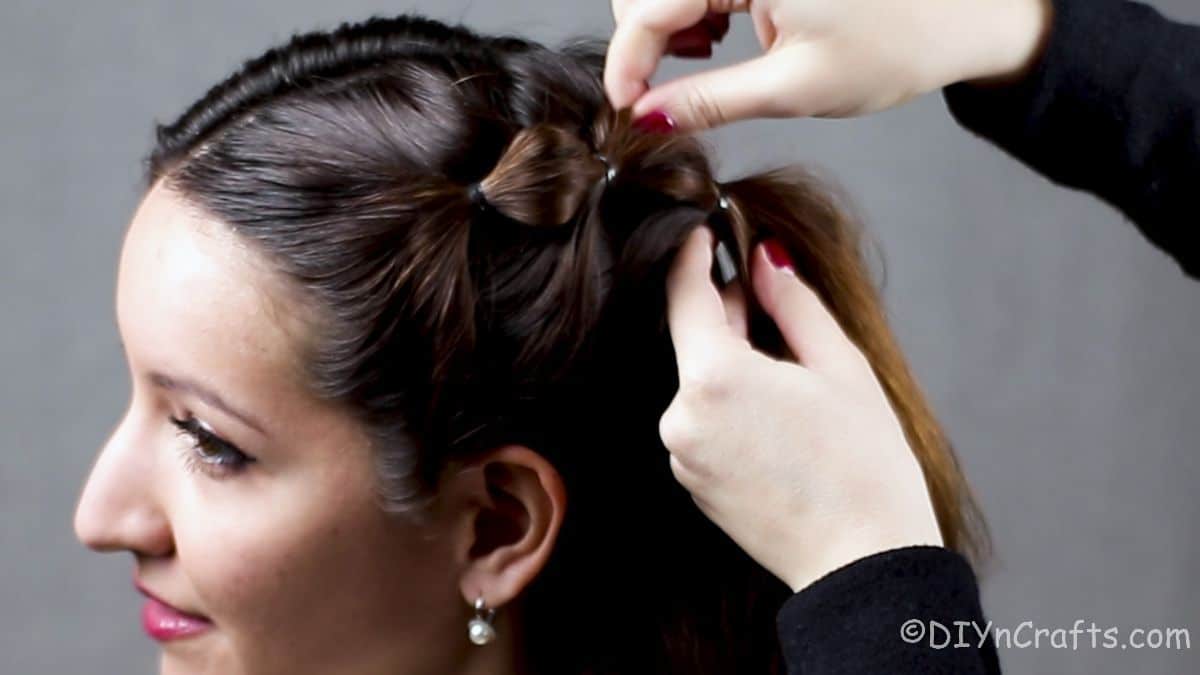
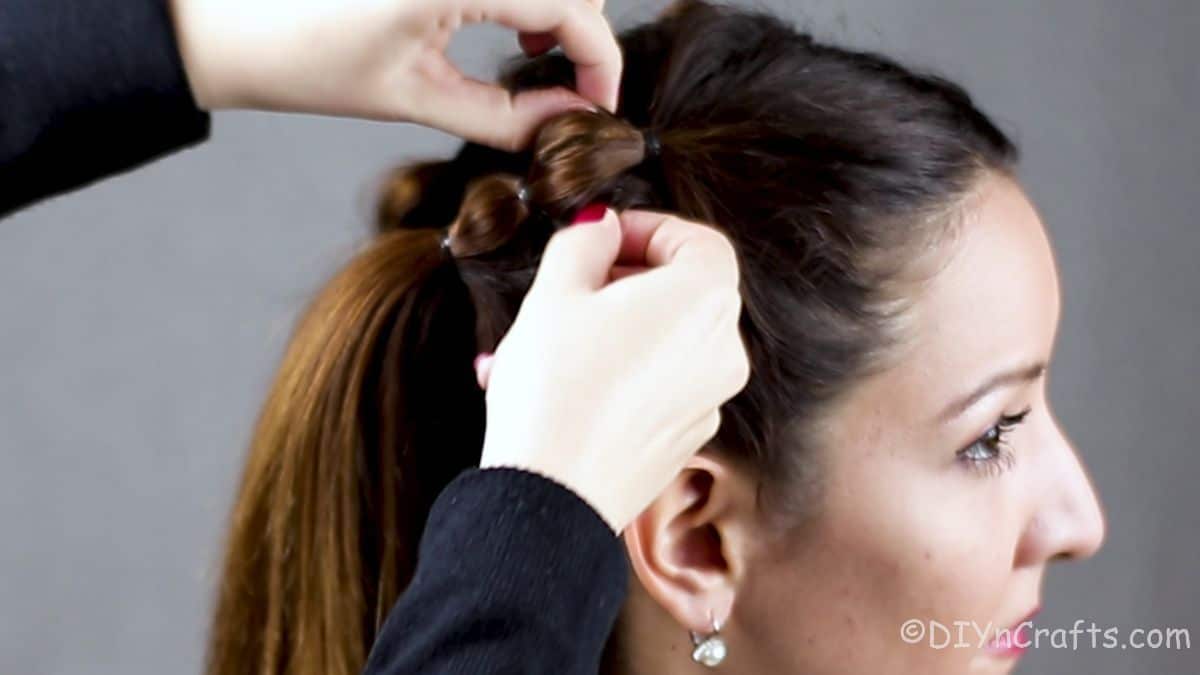
Continue this creating a third section, but when it is tied off, now go back to the first two bubbles and pull the hair up into the bubbled look, just a slight difference from laying against the head.
Repeat this process all the way down, gathering the remaining hair from that side of the head, until you have the entire length of hair in a bubble braid.
Step 4
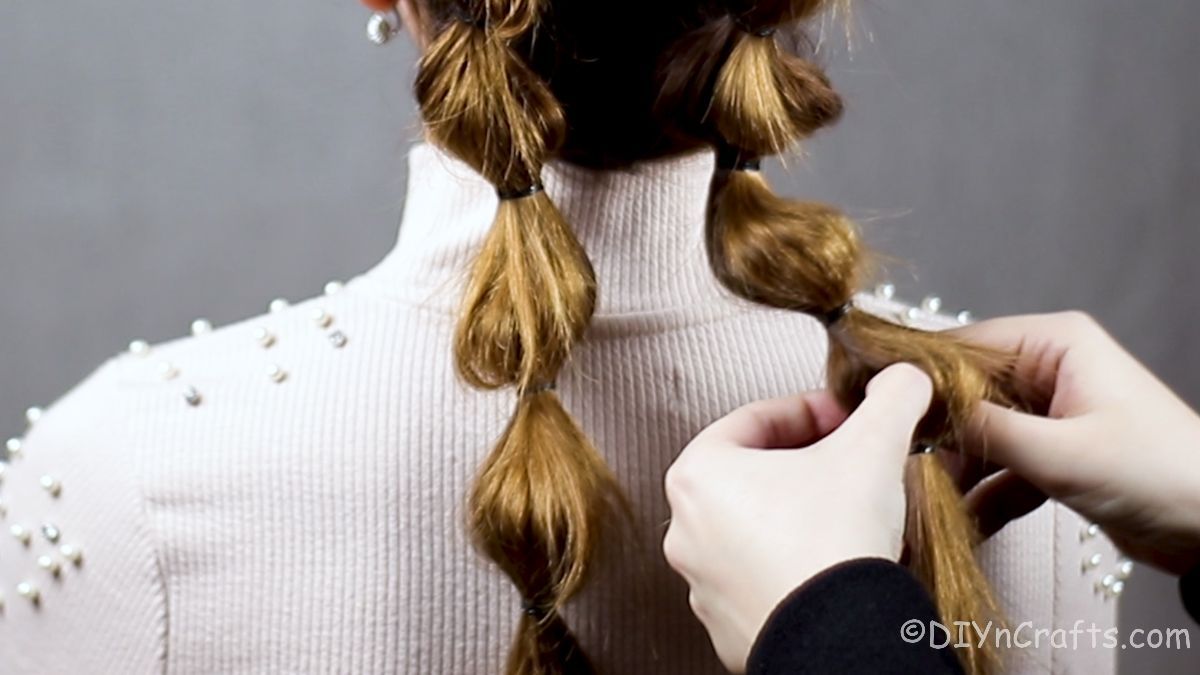
Repeat the same process on the other side, trying to keep the bubbles about evenly spaces to match the first side if possible. It doesn't have to be exact, but close will look best.
Step 5
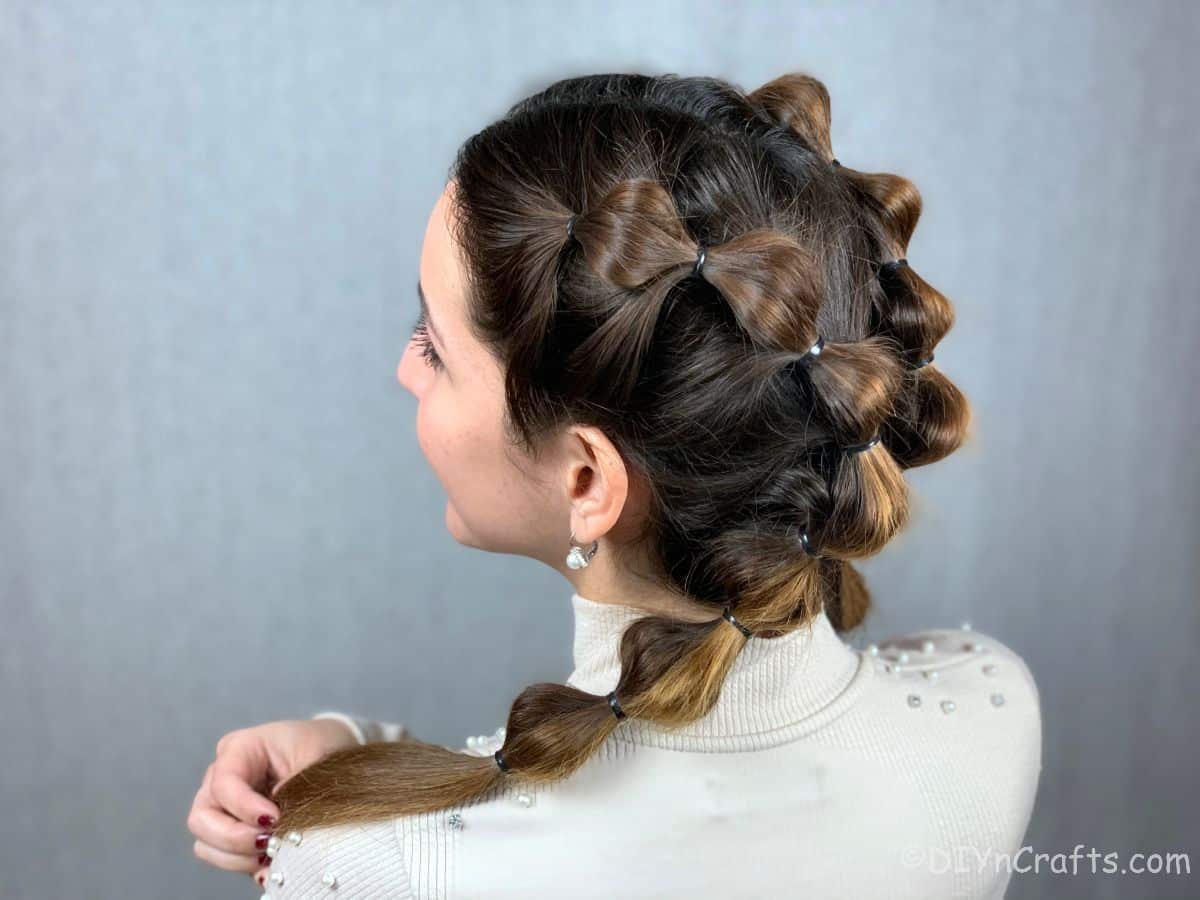
Once you have completed both sides of the braid, you can tie off the ends with a single hair tie, or add a bow or ribbon decoration if desired.
Go back over each section and make sure the spaces between the ties are pulled out into the classic bubble look. Add a bit of hairspray along the style to keep the flyways in place and the style pulled together.
How Can I Customize This Bubble Braids Hairstyle?
One of the things about these braids is that they are meant to be simple and let the braid speak for itself. That said, we often like to make a look a bit more unique and our own. In this case, a few ideas can really elevate your bubble braids a bit to make an even more beautiful long hairstyle. Below are some ideas I like that would look great with this.
- Use different colors of hair bands between each braid to create a rainbow look.
- Wrap the individual hair ties in a small ribbon for extra color.
- Do multiple braids on each side rather than just one per side for a bit more extravagant look.
- Weave ribbons through and over the top of the bubbles on each braid.
- Add a bow or ribbon to the end of each braid.
- Stop the braids at the base of your neck and then curl the remaining ends of hair with a curling wand for a simple look.
- Do bubble braids on both sides, but then bring them together in the middle at the base of your neck and make one single bubble braid the rest of the way down your hair.
More Easy Braided Hairstyles
Braids are a perfect way to get your hair up and out of the way but still look polished. If you want more ideas for adding braids to your routine, then check out some more of my favorites below. Create these in your own hair any day of the week and update them to make them a bit more casual or fancy as needed. Make sure that you bookmark the ideas you like or pin them to Pinterest to use soon!
- Simple Braid with Ribbon Hairstyle
- Fishtail Ponytail Pigtails with Bow Accent
- Braided Crown Princess Hairstyle
- Braided Dual Top Knot Buns Half Up Hairstyle
- Easy Half Up Side Braids Hairstyle
Easy Bubble Braids Festival Hairstyle
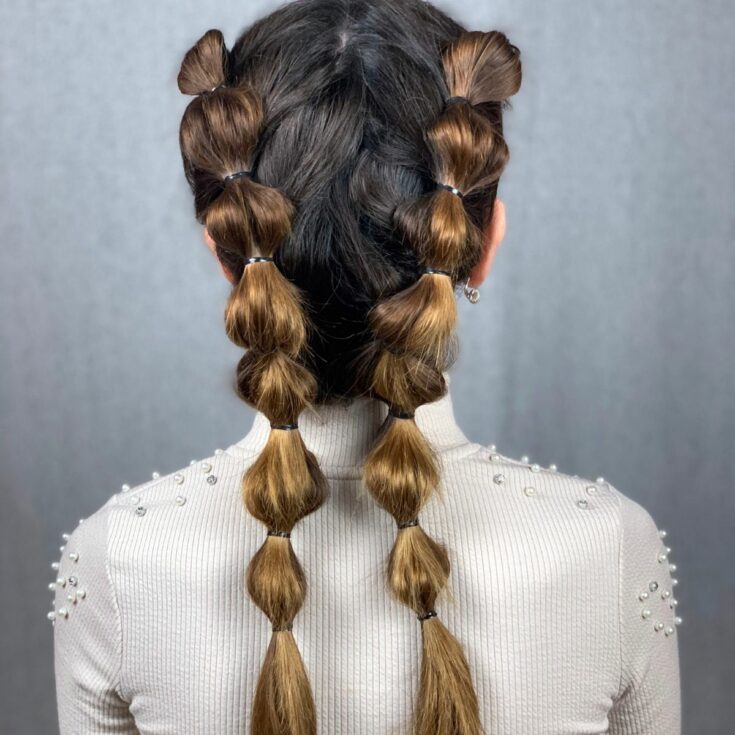
Make bubble braids in minutes! This fun idea is perfect for a festival but is also a huge hit with the kids. Ideal for any hair length!
Materials
Tools
Instructions
- Start by combing out your hair, then parting it down the middle and all the way down to the base of your neck. Then, on the first side, begin by tying off the front section at the temple with a hair tie.
- Move down and gather another section of hair, about 1" away from the first. Tie it while including the ends of the first.
- Continue making another section the same by pulling the first strands through along with additional hair. Do this and then pull gently on the hair between each tie to create the bubble look.
- Continue this process all the way down to the end of the hair. Then, repeat on the other side.
Notes
Add ribbons or different colored bands to each section for a fun look.
Recommended Products
As an Amazon Associate and member of other affiliate programs, I earn from qualifying purchases.
-
 OGX Refresh Revitalize Extra Strength Dry Shampoo, Argan Oil of Morocco, 5 Ounce
 -
 12pcs Topsy Tail Hair Tool, MORGLES Hair Braid Tools Hair Braid Tool Topsy Tail Maker,Hair Loop Styling Tool Topsy Twist Hair Tool Set, 6 Colors
 -
 Ribest ⅜ inch Solid Grosgrain Ribbon Set for Gift Wrapping and Bow Hair Accessories-60 Yards (2 Yards*30 Colors)
 -
 1000 Mini Rubber Bands Soft Elastic Bands for Kid Hair Braids Hair
 -
 Crave Naturals Glide Thru Detangling Brush for Adults & Kids Hair - Detangler Hairbrush for Natural, Curly, Straight, Wet or Dry Hair (TURQUOISE)
 -
 Onedor Handmade 100% Natural Green Sandalwood Hair Combs - Anti-Static Sandalwood Scent Natural Hair Detangler Wooden Comb (Wide Tooth)



Leave a Reply