
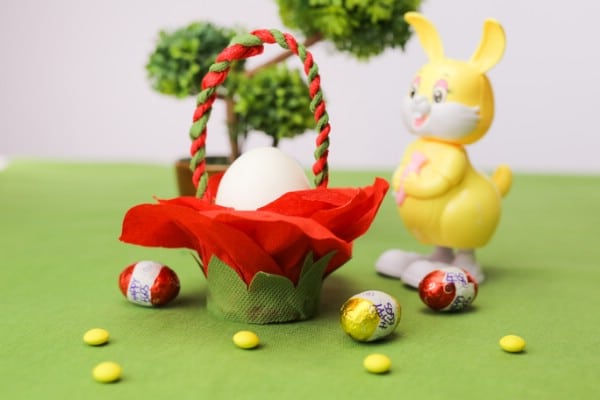
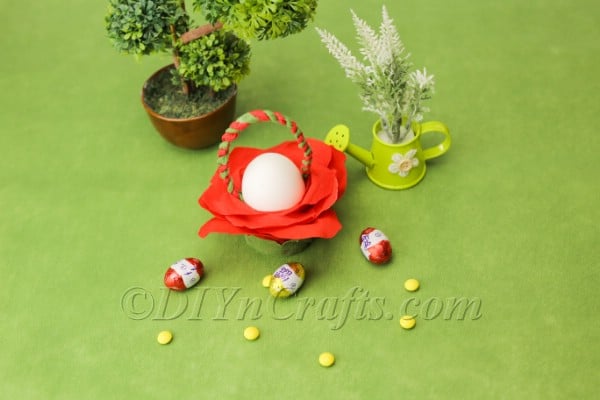
If you're looking for a cute and simple idea for DIY Easter decor, you are going to want to check out my newest video tutorial. In this video, I teach you how you can make a DIY Easter basket to hold a single egg that looks like a flower.
Even though the finished result looks fancy, it is quite easy to make using tissue paper and a few other simple supplies.

Jump to:
Recently, I have been looking into different ways to craft DIY Easter baskets using simple materials. For example, here's a way that you can make an Easter basket out of ordinary paper.
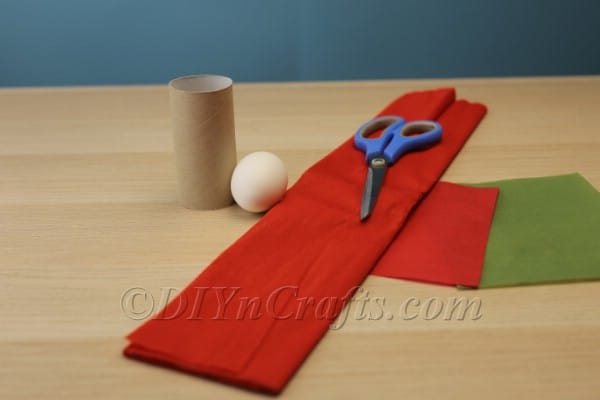
This is also a paper craft, but instead of using construction paper or origami paper, we will instead be using tissue paper as well as an old toilet paper roll.
You will need two different colors of tissue paper for this project. At least one of them should be green because we are going to be making our Easter basket resemble a flower.

You need the green to represent the sepals (those are the little pointy bits of green that you see around the base of a flower blossom).
I chose to make my flower red, but you could pick any other color that you wanted for the petals. Keep in mind that the finished result will look most like a rose.
If you are ready to begin, see the full list of materials and tools you will need below. There are written instructions to help you follow along with the video tutorial.
Step-by-Step Tutorial with Detailed Instructions:
How to Make a Gorgeous Flowery One-Egg Easter Basket
If you love DIY Easter basket projects, you are going to be amazed by what you can do with some tissue paper, a toilet paper roll, and a few other simple supplies. Watch this exclusive video tutorial from DIYnCrafts to learn how to make a one-egg Easter basket that looks like a flower.
Materials
- One egg
- A toilet paper roll
- Tissue paper
Tools
- Scissors
- Hot glue and glue gun
- Ruler
- Scalpel or other precision cutting tool
Instructions
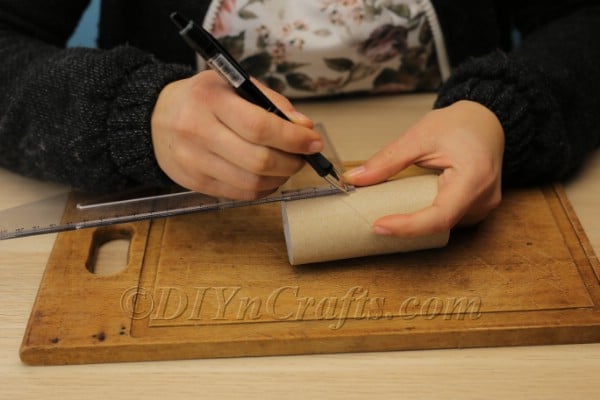
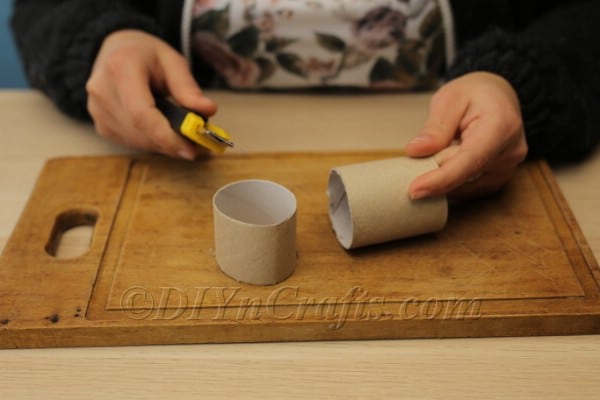
 The first step is to cut the toilet paper tube down to the proper size. While you can make it as tall or short as you wish, I found that 4 cm in height seems to work pretty well.
- To make a nice clean cut, you are going to want to use a ruler to draw marks around the toilet paper tube at that 4 cm height. Then, you will want to connect those dots. Once you do that, you have a line to use to guide the cut.
- A precision cutting tool such as a scalpel will make it much easier to get that clean cut you are after, but careful work with a pair of scissors may also do the trick.
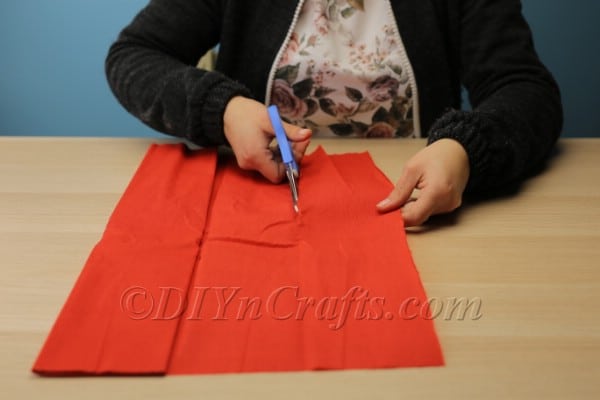
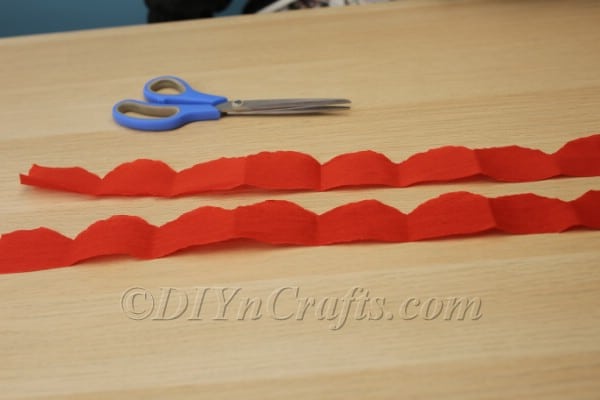
- Next, you will need to make the flower petals. To do this, you will need to cut a very long strip of tissue paper in the color that you have chosen (this is what I used the red tissue paper for).You are going to end up wrapping this strip of tissue paper around and around the toilet paper tube, so it is going to need to be a little bit taller than the tube itself.
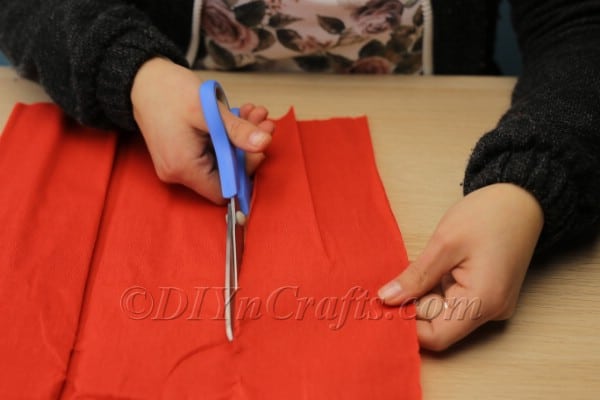
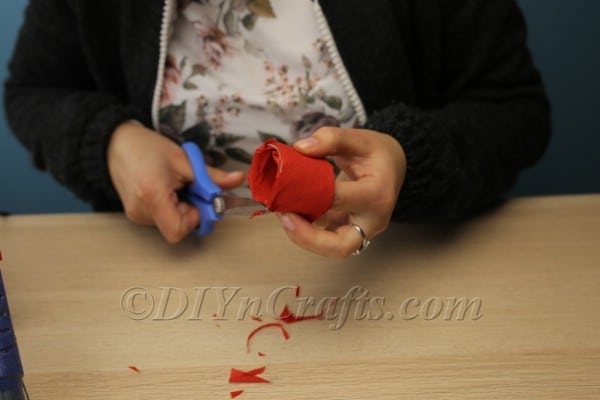
- Once you have that strip cut out, you're going to need to cut a wavy pattern across the top edge. To be more precise, it should look like a series of petal shapes all connected together.
- If you want to save time doing this, you can fold up the strip of tissue paper over and over again and then cut a single petal shape. When you unfold it, you will have that shape duplicated over and over again along the length of the strip of paper. You can watch me do this in the video.Once you are done with this step, set this piece of tissue paper aside for now.
- You are now going to need to get another piece of tissue paper which is the same color as the petals you just created.You need to wrap this tissue paper around the outside of the toilet paper tube and over the top of it and down inside. Your goal is to cover up the toilet paper tube completely, concealing its true nature. You can use hot glue (or another type of glue) to secure it in place.Some of it may be sticking out along the bottom edge. If that is the case, use a pair of scissors to trim it off.
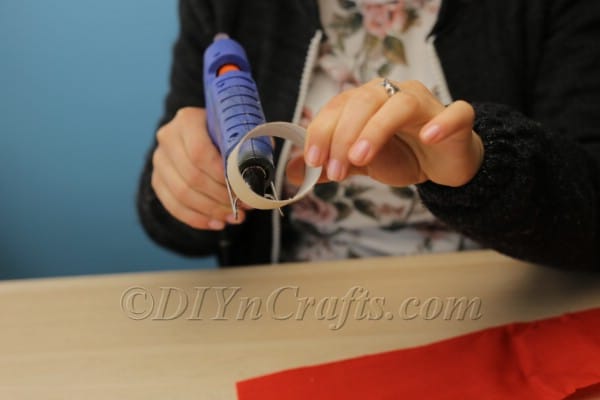
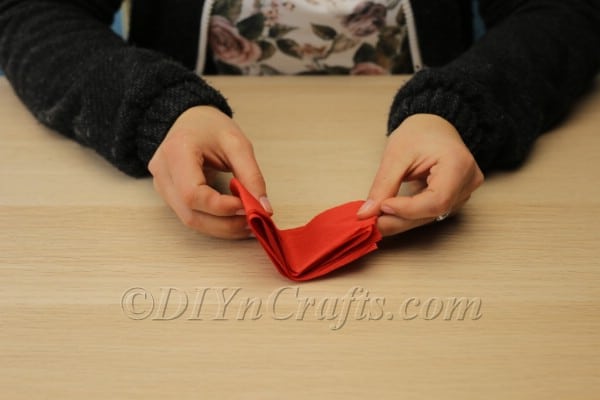
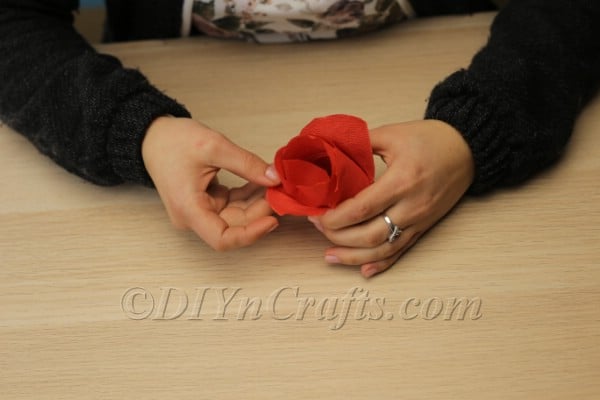
- Next, as discussed before, wrap the tissue paper petals that you made around and around the outside of the toilet paper tube, gluing them as you go. Keep the glue along the bottom edge. You do not want the petals to stick flush against the paper roll. You want to be able to fluff them out.
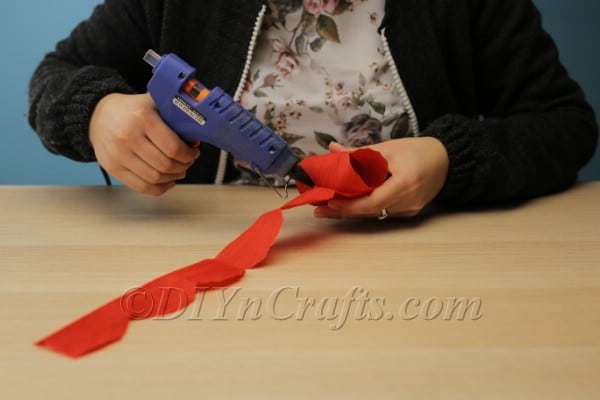
- After the glue has dried, carefully pull the petals away from the tube, fanning them out so that it looks like a flower blossom.
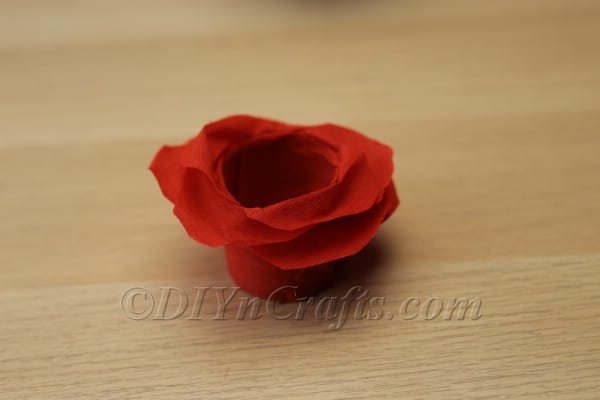
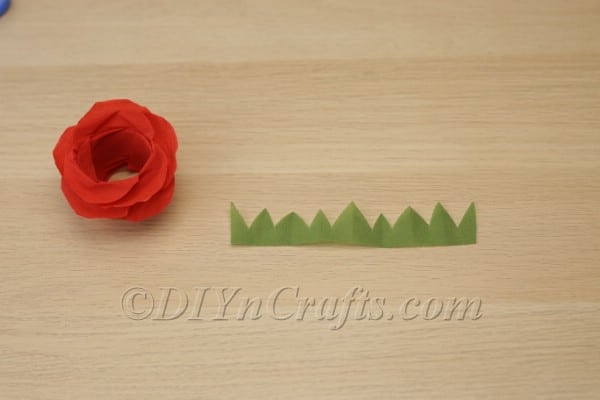
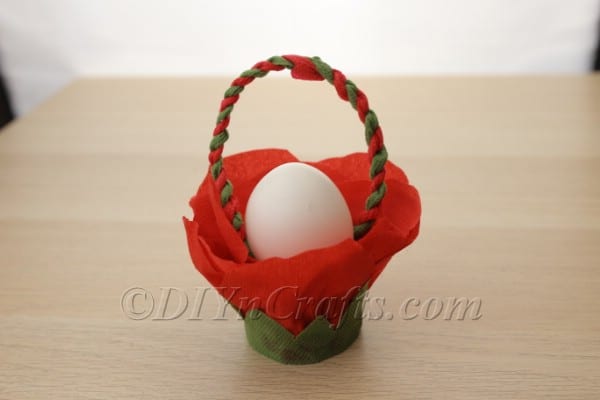
- Once this step is complete, your basket should look like this:
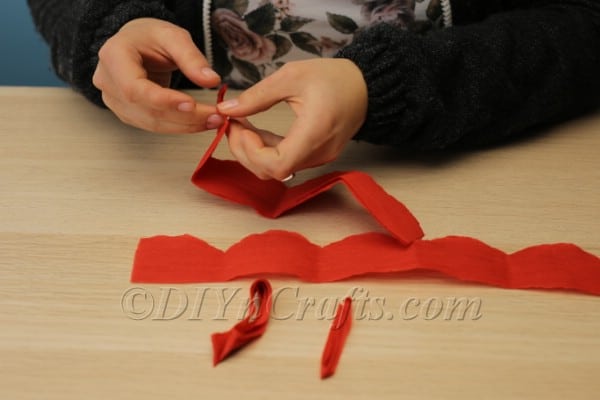
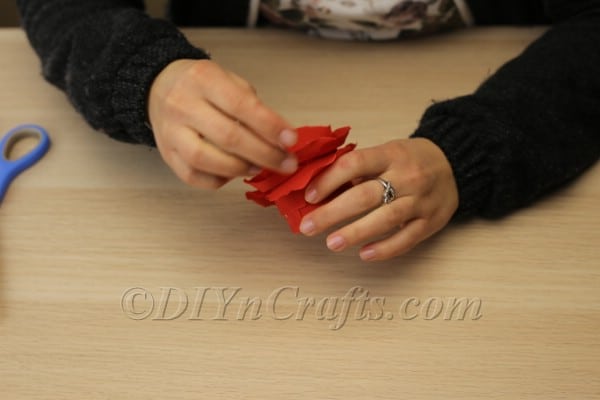
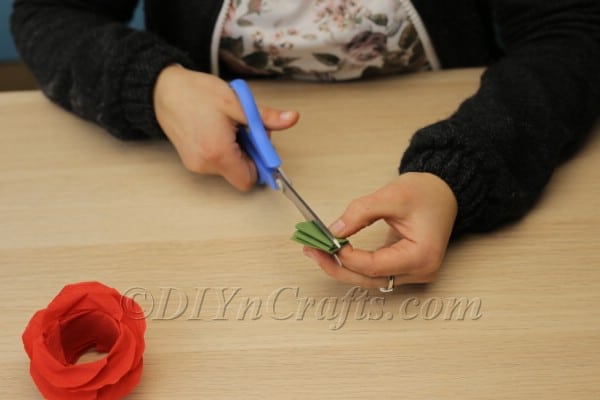
- You will create the sepals the same way you did the flower petals. Simply cut a strip of green tissue paper, and then cut a zigzag pattern along the top.
- Use hot glue to attach the sepals just as you did the petals, working your way around the toilet paper tube.
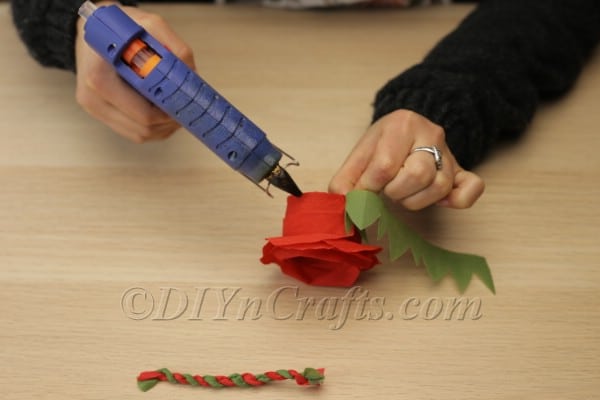
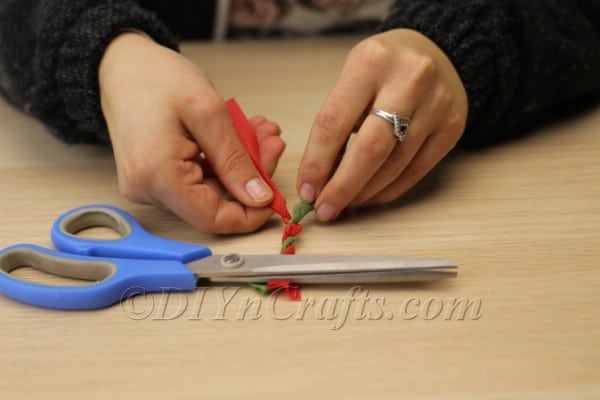
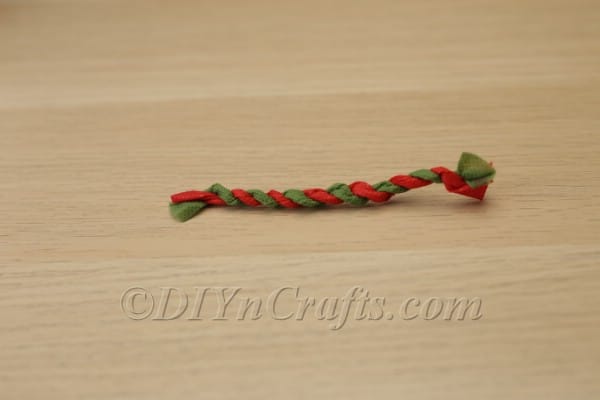
- Finally, it is time to make the handle of the Easter basket. You can do this by cutting two small strips of tissue paper. I recommend using alternating colors (I used red and green to match the rest of the basket). Wrap them around and around each other to create the handle. Make sure that you make the handle long enough that you can push the egg under it to get it into the basket or remove it later.
- Use the hot glue to attach the handle and complete your basket. Now all that is left to do is put the egg inside, and it is ready to display.
Notes
You will notice that I did not bother to create a bottom for this Easter basket. This is because an egg fits quite snugly inside a toilet paper tube. So long as it is going to be resting in one place most of the time, a bottom is probably not required.
Nonetheless, if you would like to add one, you can just cut a small piece of circular cardboard and glue it to the bottom. This also opens up the possibility of putting something other than an egg inside the basket.
Recommended Products
As an Amazon Associate and member of other affiliate programs, I earn from qualifying purchases.


Display Your DIY One-Egg Easter Basket With Pride
You have now successfully created a stunning Easter basket for just one egg using a toilet paper tube and tissue paper. Since it looks like a colorful blossom, it is a perfect celebration of springtime. You could easily create a whole "garden" of these to spruce up a room.
Easter Projects
Still in search of more fun and creative Easter DIY projects? We have you covered with a whole bunch of Easter craft video tutorials here at DIYnCrafts. If you enjoyed this project, you may also like making cute Easter bunnies out of clothespins or have fun discovering how to make an adorable Easter bunny decoration out of DIY pom poms.
We are always adding new video tutorials to our site, so make sure that you continue checking in with us. With easy craft and recipe ideas, we make sure that you are ready for this and every Easter holiday!


[…] Find detailed Instructions on DIYnCrafts – Decorative One-Egg Easter Basket […]