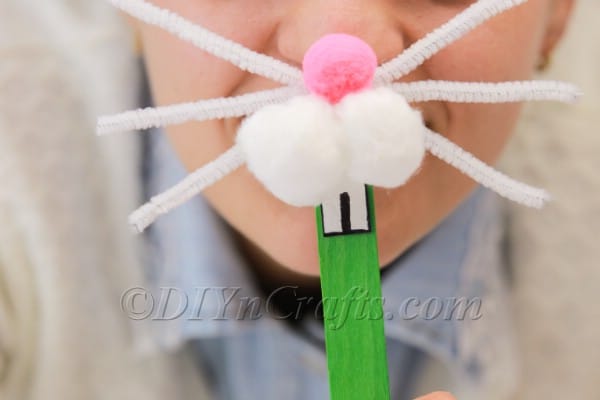
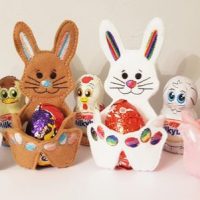
Every year, my children like to wear bunny ears on Easter. This year, I came up with a fun, fast, and easy way to make them bunny noses as well. Find out how to do it yourself in my new exclusive Easter craft video tutorial!

Easter is not only a time to celebrate spring, but it is also a great time for games of make-believe. My kids ask me to craft them new Easter bunny years every year, and this year, they were wondering if I could also make them bunny noses, whiskers and teeth.
I played around with a number of different materials before I came up with something that worked. Below, I have listed the supplies and tools that I eventually ended up using for the video tutorial.
You are going to need one craft stick for this project, but you can also get away with using a tongue depressor, popsicle stick, or similar item. If you want, you can paint it in a color of your choice (I went with green to represent springtime).
If you're ready to get started, you need all the materials and tools required below, and find the written instructions to follow along with the video tutorial.
Jump to:
Step-by-Step Tutorial with Detailed Instructions:
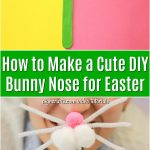
How to Make a Cute DIY Bunny Nose for Easter
Need to make an Easter bunny nose for your child, but only have basic materials to work with? In this exclusive video tutorial, you can learn how to craft an adorable bunny nose the fast and easy way out of simple supplies.
Materials
- Craft stick or tongue depressor
- One pink pom pom
- Two white pom poms
- White pipe cleaners
- Piece of cardboard
Tools
- Black marker
- Hot glue and glue gun
Instructions
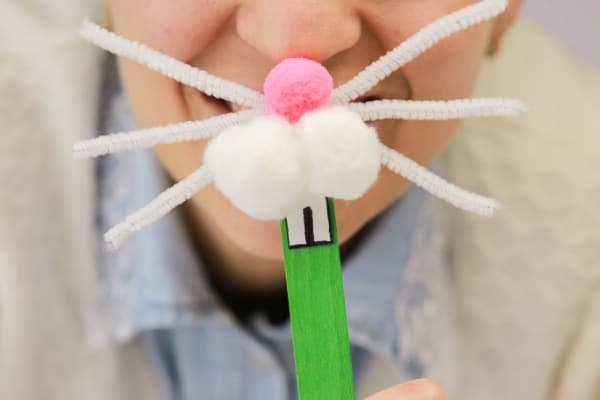
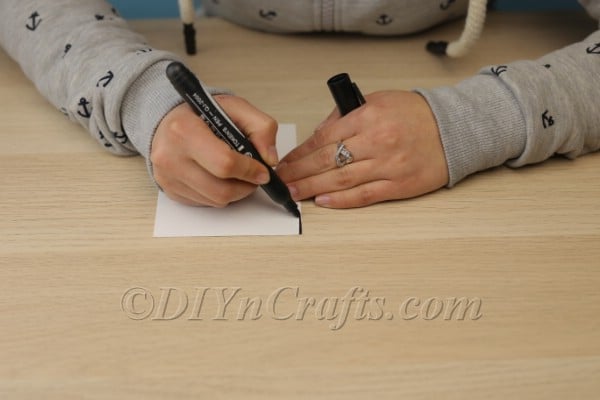
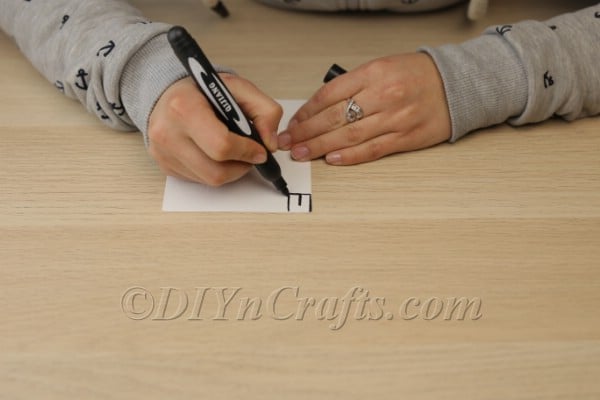
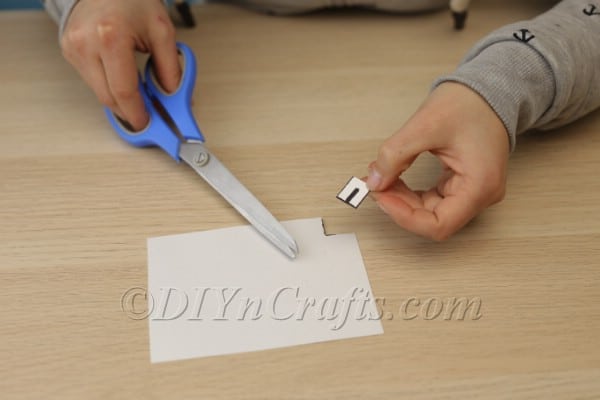
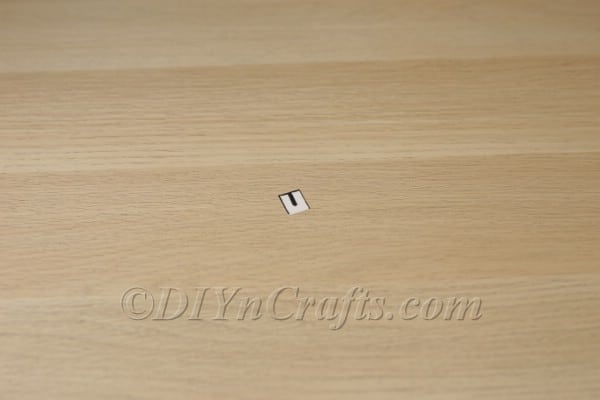
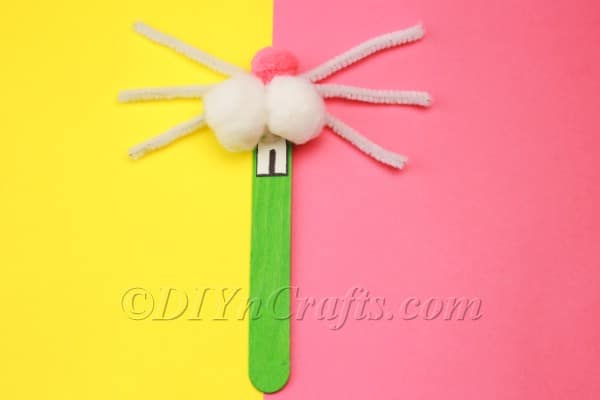
- To begin, you will need a white sheet of paper or cardboard. Use a black marker to draw two rabbit teeth. Then, cut these out and set them aside. Note that you do not need to cut them out separately. It is better to keep them combined as a single unit.
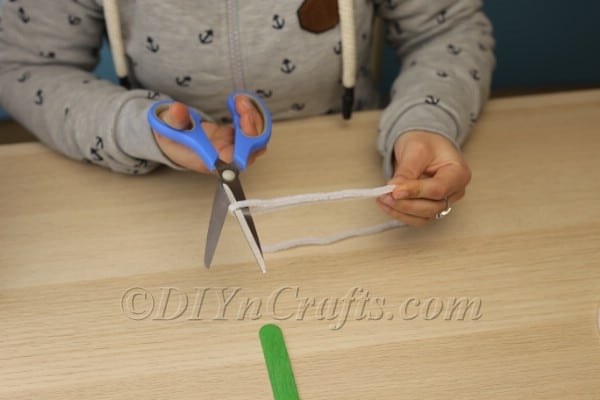
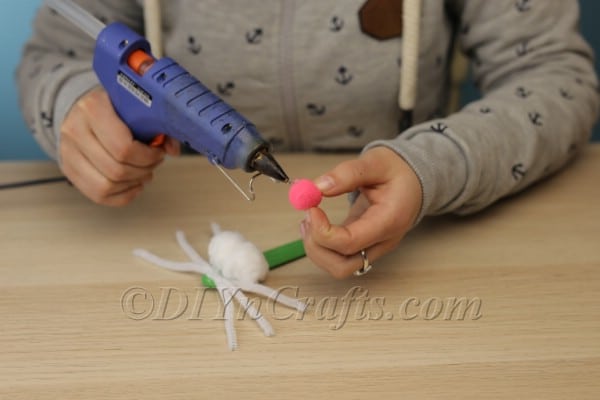
- Cut several white pipe cleaners to the same size to serve as whiskers. Use hot glue to attach them to the top of the craft stick. Crisscross them so that they look as much like real whiskers as possible.

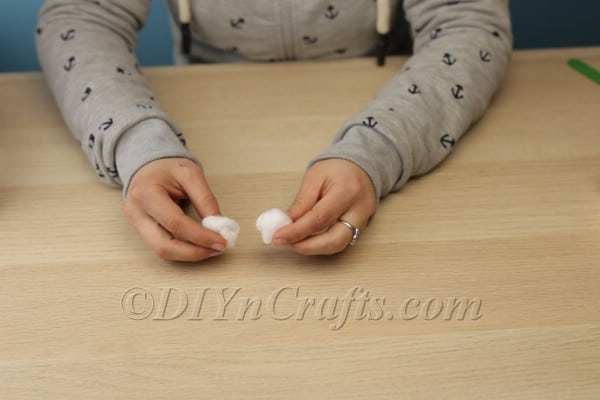
- Over top of the whiskers, you are going to attach two white pom poms or cotton balls (either work perfectly well). Use hot glue to do this.
- Hot glue on the pink pom pom right above the white cotton balls in the center as the bunny nose.
- Hot glue on the bunny teeth right underneath the cotton balls. The bunny nose is now complete and ready to enjoy!
Recommended Products
As an Amazon Associate and member of other affiliate programs, I earn from qualifying purchases.
It only takes a few minutes and a few steps to make this cute DIY bunny nose for Easter. Once it is all ready, you can give it to your child to play with.
Before you get started with the craft, you can even have your child choose the color for the craft stick to customize it. Kids who can work with hot glue guns should also have a fun time making this craft themselves.
For the full effect, you will want to make a pair of DIY bunny ears to go along with the bunny nose. Recently, I added a video tutorial to show you how to do this.
Like this project, the bunny ears project is also fast, fun, and easy, and it can be customized with any color.
Easter Projects
After you finish making these easy Easter crafts, explore some of the other video tutorials on our site. You will find plenty of exciting projects to fill your hours with crafting joy.
To get started, find out how to make a cute Easter Bunny from DIY pom poms. Also, check out how to make an adorable Easter bunny out of a clothespin.


[…] Easter Bunny Noses […]