Summer is filled with activities for kids but parents are still bound to hear the dreaded “I’m bored” from their kids from time to time. Especially when it’s raining or otherwise not fit for outdoors, you often need something for the kids to do to pass the time.
Summer crafts are not only fun but they can be very educational as well. If you like your little ones to continue their education during the summer (but in a fun way so they don’t really know that they’re learning) we have a great collection of summer crafts that they are bound to enjoy.
You can keep the list for reference and have something to do every week or just head to it whenever summer storms keep you from getting outside. We are certain that your children are going to adore these projects and you may just find yourself enjoying them as well.
Homemade Bubbles
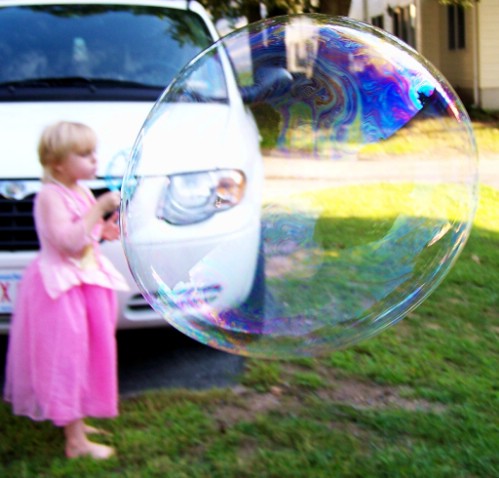
This is a great project when you need something in a pinch and chances are that you already have everything you need in the kitchen cabinet. You need water, glycerin or karo syrup and dishwashing liquid and you can create your own great bubble solution that kids will enjoy playing with. For colored bubbles, you just mix a bit of food coloring with soap powder and water. Oh, the fun that kids can have making their own bubbles and this is a project that won’t cost you anything if you already have the supplies. The best part is the bubbles are safe so they’re great even for little ones.
DIY Instructions and Project Credit - Babyparenting
Painted Rock Crafts
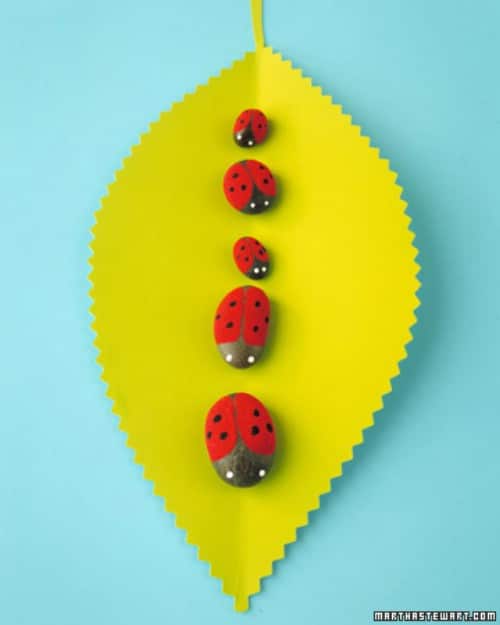
Kids love paint and most younger ones really like rocks so this is the perfect summer project. It combines both rocks and painting to give kids something that will keep them busy and help them to create a wonderful craft that you can proudly display. You just need a collection of rocks and some paints to create any number of little rock critters. Once finished, you can display their painted rocks in a number of ways from putting them in their own little jar to using them to create artwork that can be hung on the walls.
DIY Instructions and Project Credit - Marthastewart
DIY Party Poppers
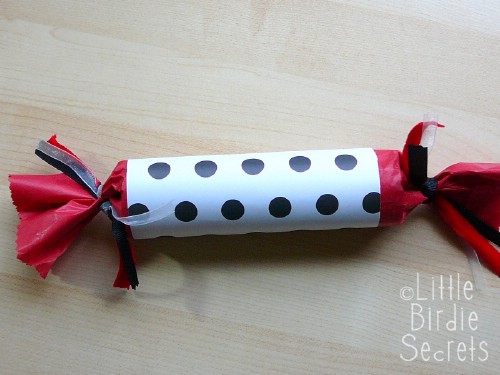
Whether you are planning a summer party or you just want a craft that your kids are really going to enjoy making, these party poppers are perfect. They will be great for Fourth of July cookouts and fireworks so have the kids make a few for those. In the meantime, they can practice by making some just for fun. You need empty toilet paper rolls, cracker snaps which you can buy for about $4 for 25, tissue paper for the outside, cardstock and ribbon for decorating and goodies to place inside. Kids will have as much fun making these as they do popping them open for the goodies inside.
DIY Instructions and Project Credit - Littlebirdiesecrets
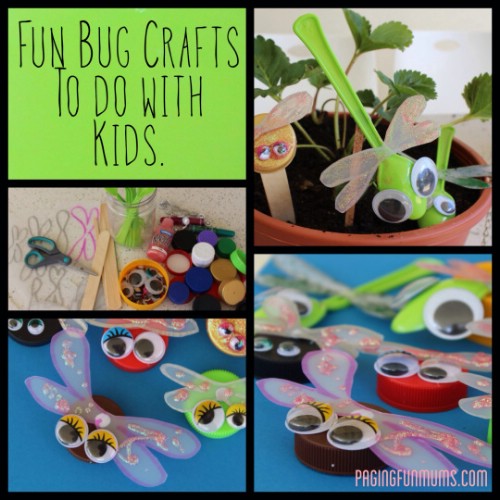
Bottle Cap Bugs
Turn those useless bottle caps into a summer project that will keep your kids happy and busy for hours. These bottle cap bugs are really cute, easy to make and can be used to decorate your garden or indoor plants. You need a few plastic bottle caps, some plastic spoons, glue dots, markers, plastic for the wings – you can use recycled milk jugs for this – and some decorating supplies for the wings. They can turn those old bottle caps into any bugs that they want and then proudly display their little creatures wherever they want.
DIY Instructions and Project Credit - Pagingfunmums
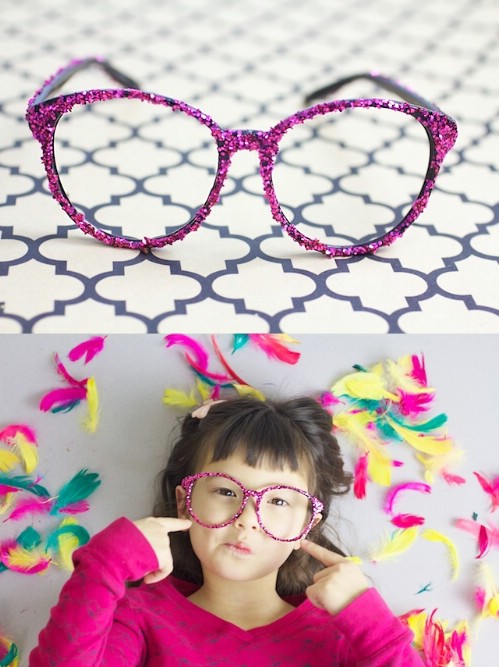
Embellished Sunglasses
Some cheap sunglasses that you can pick up at the Dollar Store for a buck and a few craft supplies will keep little ones busy for a while and give them a great pair of sunglasses for wearing on vacation, to the pool or just around the house. Just use mod podge or a glue stick to add glitter, feathers or any other type of craft embellishment to those ordinary sunglasses and kids will love wearing them. This is a great craft that serves a dual purpose. You get something that the kids will think is fun and when they wear their glasses they will block harmful sunlight from getting into their eyes.
DIY Instructions and Project Credit - Rufflesandstuff
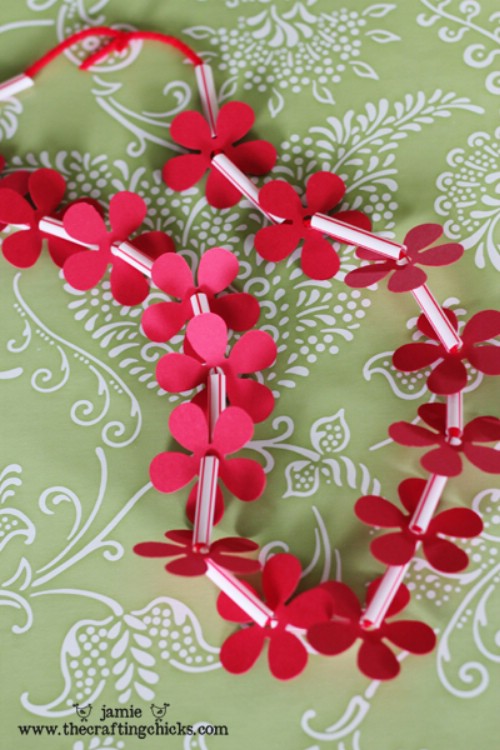
Homemade Hawaiian Leis
If you are planning on vacationing in Hawaii, or if you just really wish you were, you can help the kids to make these wonderful Hawaiian leis. These would be great for pool parties or any summer get together, even if you aren’t heading to the islands for your vacation. You need a few sheets of thick cardstock in whatever colors you want, a large flower punch, straws and some yarn or string for hanging the flowers. You could buy plain white cardstock and let the kids color it whatever color they want or paint it – just be sure to allow the paint to dry before assembling the lei.
DIY Instructions and Project Credit - Thecraftingchicks
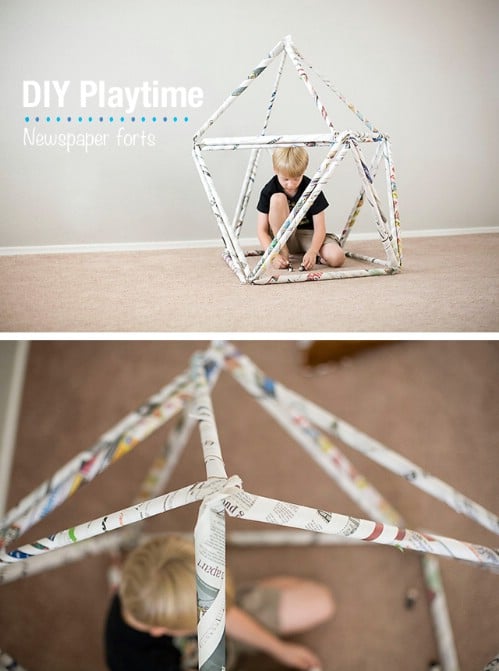
Newspaper Forts
On those rainy days (or really hot ones) when you just can’t get outside to play, help your little ones to create a wonderful newspaper fort inside. You can recycle those old newspapers and build a great indoor fort at the same time. You just roll two sheets of newspaper into a tight roll (do this multiple times) to create the structure. Keep in mind that the tighter the roll, the more support you will have. When you are finished with your structure, just cover with a light blanket or a sheet. Kids will have a blast playing in their fort and it’s just as easy to take down as it is to build.
DIY Instructions and Project Credit - Modernparentsmessykids
Yarn Letters
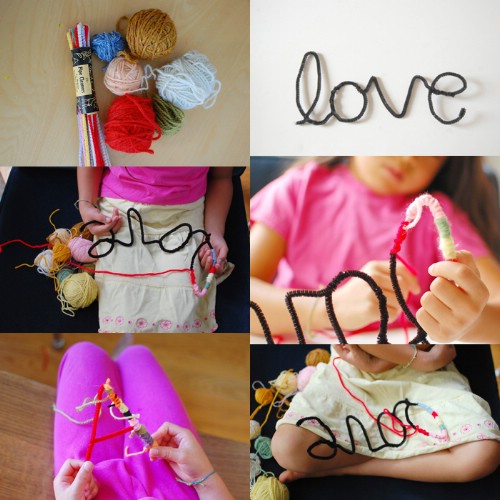
Even toddlers can help to create these wonderfully colorful yarn letters that you can actually use for home décor when they are finished. The basis for the project is to wrap yarn around pipe cleaners, although you could use other items if you don’t have any pipe cleaners on hand. Grab those old skeins of yarn and get ready for a fun project that the kids will love. They can create enough letters to spell out their names on their bedroom walls or you could do any number of other projects with these when they are finished.
DIY Instructions and Project Credit - Bkids
Seashell Gardens
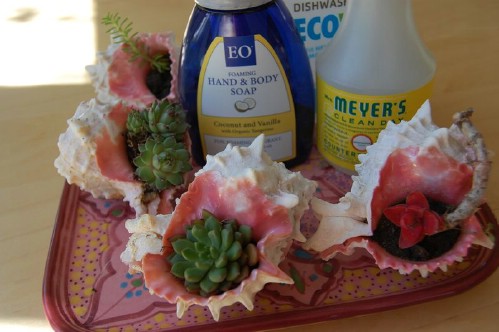
If you have a few old seashells on hand, kids can create beautiful seashell gardens with those shells and a few succulents. This is a relatively quick and easy project depending on the number of seashell planters you want to create. Kids just have to remove the succulents from their containers and transplant them into conch shells or other seashells large enough to hold them. This is a project that may take a bit of planning if you don’t have the supplies on hand but it’s one that they can enjoy all summer long while they watch their little gardens grow.
DIY Instructions and Project Credit - Urbanorganica
Lego Key Holder
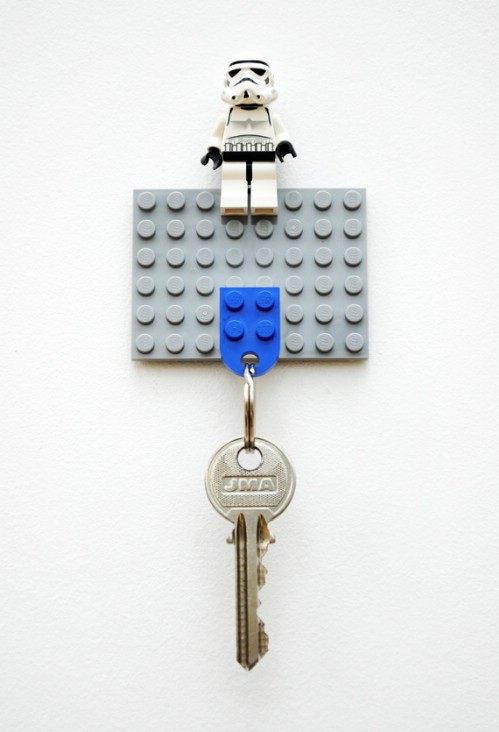
Kids will adore making key holders in their favorite characters and all you need for this is a few old Legos and a key ring, which you can probably find in the kitchen junk drawer. Just let them create whatever character they want and attach the key ring with a small Lego that has a hole. If you don’t have this particular Lego, you can drill a tiny hole in a regular Lego – note that this is a step for parents, not little ones. They can make key rings to hold their own keys or make them as gifts for grandparents.
DIY Instructions and Project Credit - Minieco
Handprint Stepping Stones
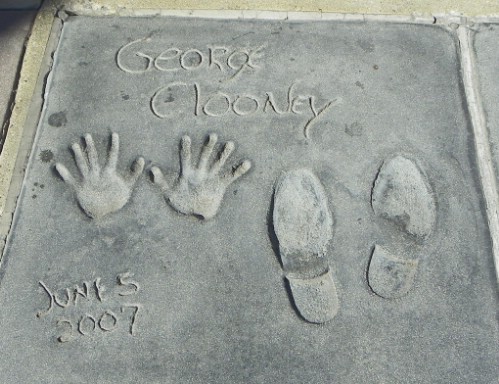
This is a project that parents will want to do with their children and you can do handprints, footprints or both. Imagine having stepping stones in your garden that capture the hand and foot sizes of your children when they are small. These are really easy to make and kids are going to love getting “dirty” with the concrete, which washes off easily by the way. Take a pencil or a stick and jot their names in before the concrete dries and the date or you can let them decorate the stones however they want.
DIY Instructions and Project Credit - Make-baby-stuff
Superhero Terrarium
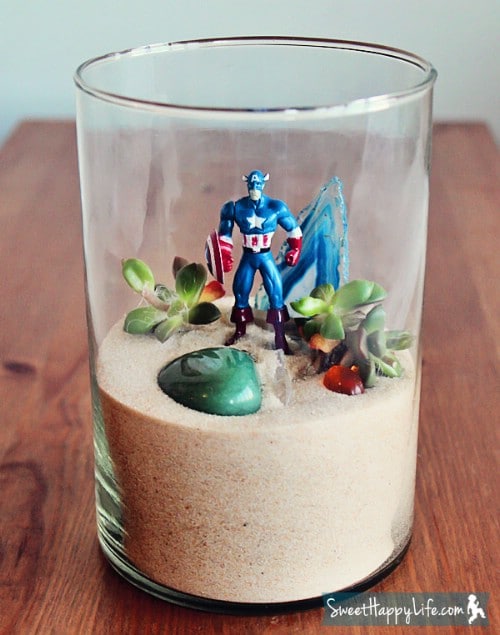
Little boys may not seem like they would enjoy gardening but they may actually surprise you – particularly when they have something that really interests them. If it’s rainy outside or your little one just wants something fun and creative to do, help him to make this great superhero terrarium. You just need a vase, jar or tall glass, some sand, a superhero and a succulent. This could also be done with girls’ action figures or small plastic dolls. Just let the little one decorate however they want and then they can display their terrarium in their room or give it away as a Mother’s or Father’s Day gift.
DIY Instructions and Project Credit - Sweethappylife
Shadowbox Collage
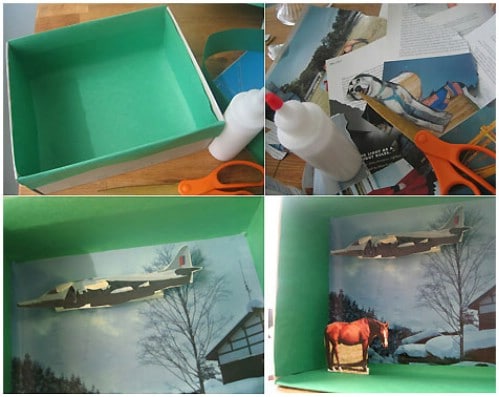
A shadowbox collage is the perfect way to allow your little ones to express their creativity. Just choose things that interest him or her (old toys are a great choice) and allow them to create their own box to display. You will need a shoebox, scrap paper, glue and scissors and some cardboard for adding backing to pictures. You may also need yarn to hang the box on the wall. Just cover the inside of the box with paper of some sort and then allow your little ones to add their favorite things. This is a great rainy day project.
DIY Instructions and Project Credit - Bkids
Sidewalk Chalk Stars
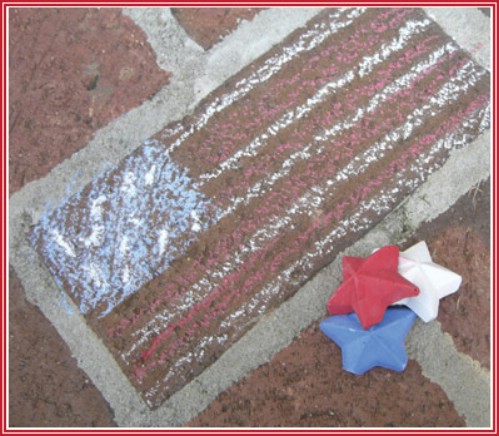
With some plaster of Paris, acrylic paints, a silicone mold and a few mixing containers, you and the kids can create shaped sidewalk chalk that is sure to be a huge hit this summer. Make stars for the Fourth of July or find other silicone molds to create different shapes. These are great and they work perfectly. The chalk washes away easily too so there are no worries of never having enough space for them to doodle. They can wash the sidewalk off and begin again tomorrow on a new picture.
DIY Instructions and Project Credit - Alphamom
Grass Head Monster
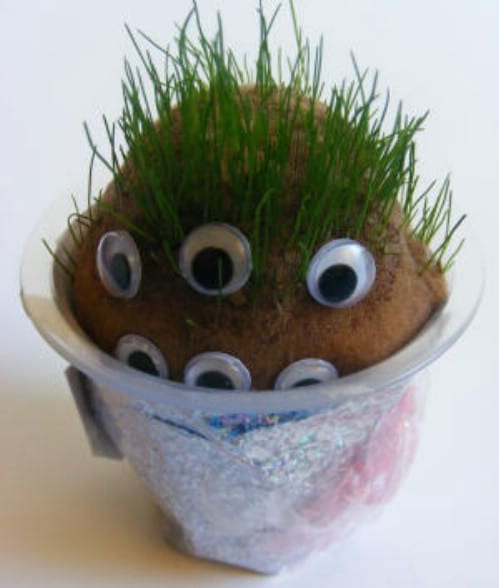
Little ones will absolutely love growing their own little grass head monster. This is also a great way to get in some nature education. You need a stocking, grass seed, a yogurt cup (empty of course), sawdust and some things for decoration. You fill the toe of the stocking or pantyhose with grass seed and then fill with enough sawdust to create a ball. Use a rubber band to secure the ball and then place it in the yogurt cup. Kids can decorate the ball however they want and in a week or so, they will begin to notice “hair” growing on their little monster. Be sure that you water your monster regularly so that the grass will grow properly.
DIY Instructions and Project Credit - Activityvillage
Homemade Kaleidoscopes
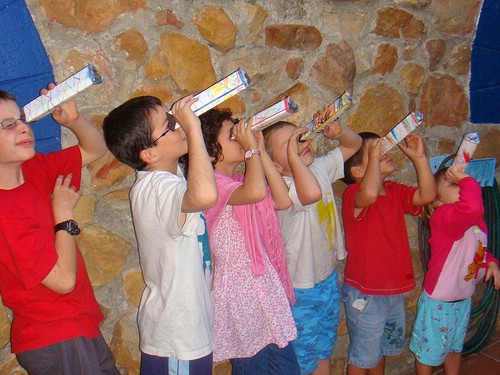
The fun of kaleidoscopes lasts from making them to using them. This is a project that can give your kids a thrill all summer and you only need a small handful of craft supplies. Kids can begin by decorating the outside of their kaleidoscopes and then attaching those papers to construction paper. Add cardstock with foil attached to make the inside and then fold. You can use glue or tape to keep them together and then you just need to add the sequins and glitter. The process is much easier than it sounds and kids will have a blast looking through them.
DIY Instructions and Project Credit - Se7en
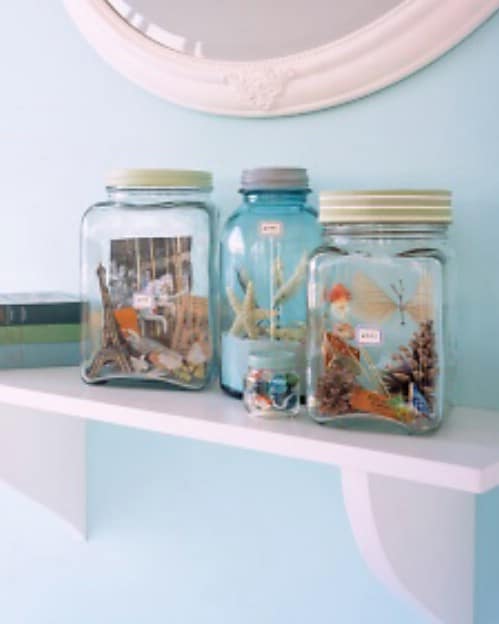
Vacation Memory Jars
After you get home from vacation, when most of the family is a little bummed over having to leave, you can help your little ones to create a beautiful vacation memory jar that will serve as a reminder of your great family togetherness. Just fill jars with things that are reminiscent of your vacation. If you go to the beach for instance, you can use sand and seashells. Kids can arrange or rearrange the items in the jar however they want and you can lower pictures of your family into the jar with bent wire.
DIY Instructions and Project Credit - Marthastewart
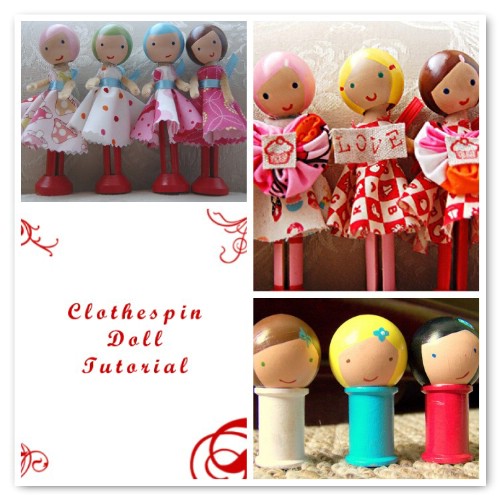
Clothespin Dolls
Little boys may not be as receptive to the idea of making clothespin dolls but little girls will absolutely love this craft. Actually, you could make the dolls into superheroes if you want to get your little boys involved. You need wooden clothespins and a few other craft supplies and kids can paint and decorate the dolls however they want. Once they are finished, they have a great little craft that they can play with so you can entertain them in two different ways with this one. They can make several of them and put on a little puppet show.
DIY Instructions and Project Credit - Goingsewcrazy
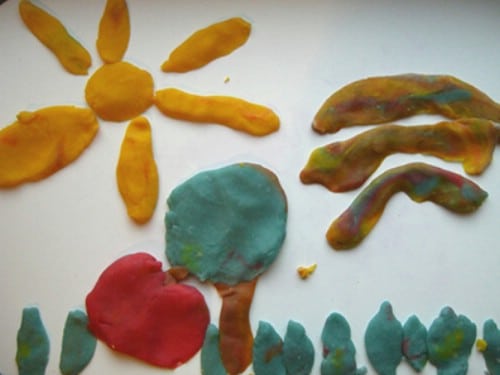
Homemade Play Dough
Remember playing with Play Dough when you were a kid? Well, your kids can play with it too and you don’t have to run out to the store and buy those expensive packs, either. You can make your own at home that is much more natural and less toxic than what you get in the store. You will need flour, warm water, cream of tartar, vegetable oil, salt and food coloring to make it into different colors. This recipe has to be cooked so you will need to provide some assistance but once it cools, kids can knead it and add the food coloring. You can also add essential oils if you want it to smell nice.
DIY Instructions and Project Credit - Thelongthread
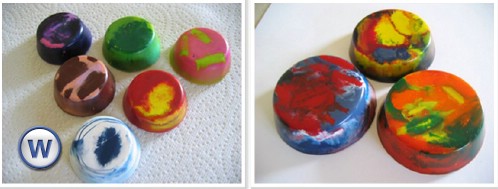
Chunky Crayons
A great summer craft (especially for those stormy days when outside play is not possible) is to recycle old crayons and make new ones. Kids will love turning their broken crayons into fun shapes and sizes that they can reuse over and over. You will need to melt down the old crayons and then form new shapes, which is much easier than it sounds. You can just put the crayons in a muffin tin or a silicone baking tray and stick them in the oven until melted. Mix different colors when you add them to the tin so that you end up with colorful and fun chunky crayons.
DIY Instructions and Project Credit - Makeandtakes
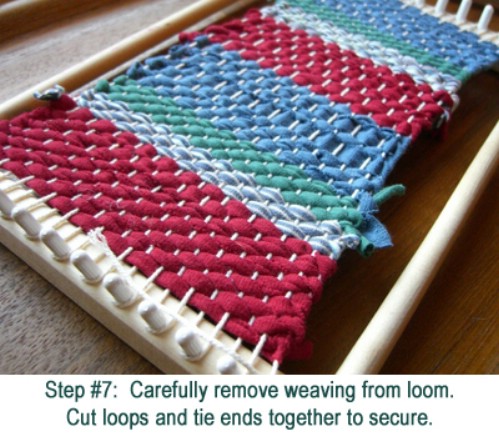
T-Shirt Weaving
If you have a weaving loom (if you don’t they are pretty inexpensive at your local craft store) you can help your kids to create all sorts of things from old t-shirts. They can create pillows, hot pads and just about anything else you can think of and this project is relatively easy so even littler ones can join in on the crafting fun. You basically just need some old t-shirts, a peg loom, masking tape and maybe a bit of string and your kids can be enthused in their craft for hours at a time.
DIY Instructions and Project Credit - Alphamom
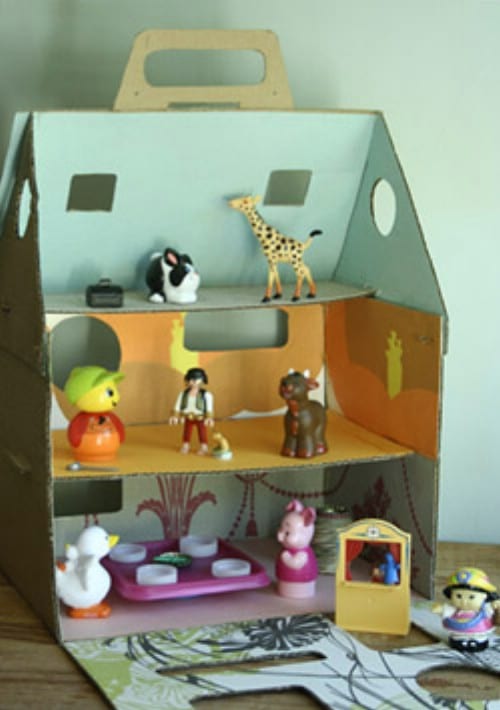
Cardboard Doll House
If you have a little girl that is a bit bored and you want something fun for her to do, help her to make this great recycled cardboard doll house. You will need a few cardboard boxes (the number depends on how big you want the house to be) as well as paper fasteners and scrap wallpaper for the décor. This takes very little time to actually put together and will last for quite a while. Instead of buying an expensive doll house, just make one yourself and your little ones will be thrilled for hours on end from making the house to actually playing with it.
DIY Instructions and Project Credit - Espritcabane
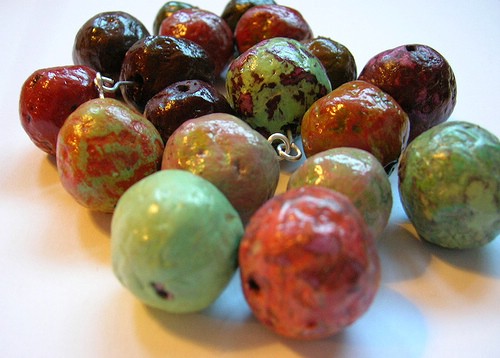
Recycled Newspaper Beads
You can turn old newspapers into beautiful beads that can then be used to make necklaces, bracelets and other items. Note that this project is much better for pre-teens and teens and there is some use of the stove required. Little ones can help to rip up the newspaper though and help to string up the beads when they are finished so it could actually be a project that the entire family can do together. Make grandma a necklace for Mother’s Day with recycled newspaper beads or kids can create jewelry to share with their friends.
DIY Instructions and Project Credit - Astorybooklife
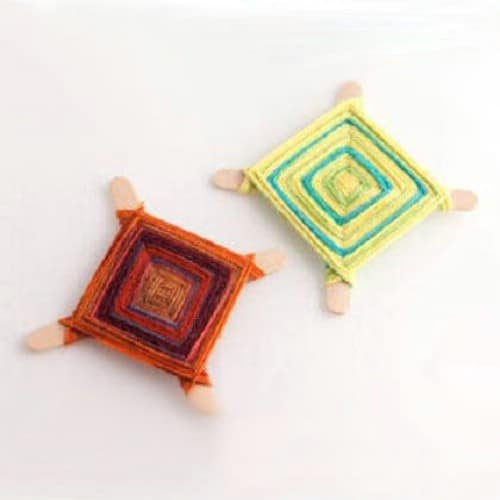
God’s Eyes
God’s Eyes are old school crafts that you may remember from your days at summer camp. Kids will love them even if they have never made them before and they are easy enough for even smaller children to do. To make them, you will need to have several colors of yarn on hand as well as craft sticks (you could use twigs if you wanted to make them a bit more natural), scissors and glue. Help smaller children with the cutting but the gluing and stringing are perfectly safe even for toddlers. Kids will basically create a cross figure and then fill in the figure with different colors of yarn.
DIY Instructions and Project Credit - Spoonful
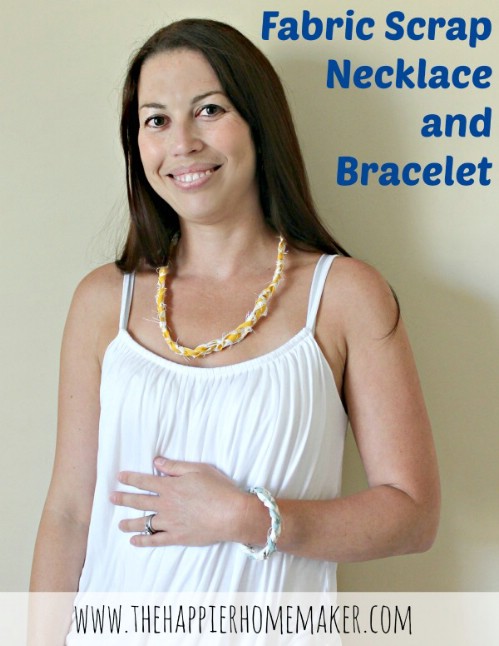
Fabric Scrap Friendship Necklaces
Preteen girls will love creating friendship necklaces and bracelets that they can share with their friends. If you have loads of scrap fabric, you have just about everything you need for your kids to create these lovely accessories. You just have to rip or tear the fabric into strips and then assemble the bracelet or necklace. There is no sewing involved although there is a bit of trimming needed to remove strings so for younger girls, make sure that an adult is available to handle the scissors. These can be done in different lengths and you can use any combination of colors that you have on hand.
DIY Instructions and Project Credit - Thehappierhomemaker
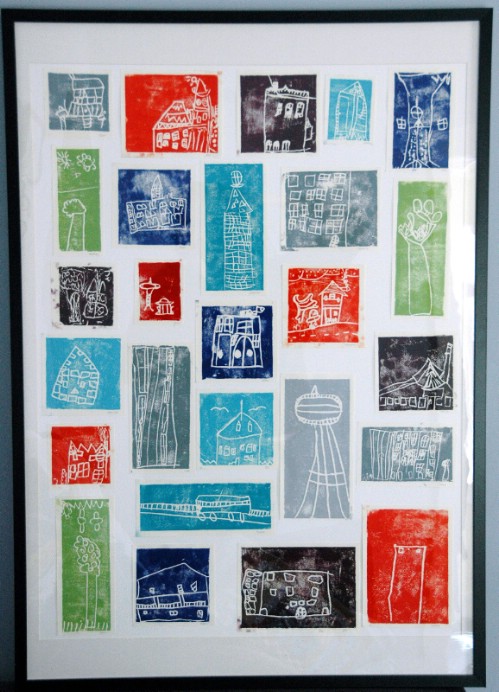
Scratch Foam Block Printing
For those stormy days or those uber hot days when you just really don’t want the little ones outside for long periods of time, keep them busy indoors with scratch foam block printing. This is a neat little craft and one that can be done with leftover craft supplies. Kids can create pictures to hang on the walls (or the fridge) and will be happy for hours making their own little images. Once you have the templates done, your little ones can create great pictures for home décor or something special for their rooms.
DIY Instructions and Project Credit - Glittergoods
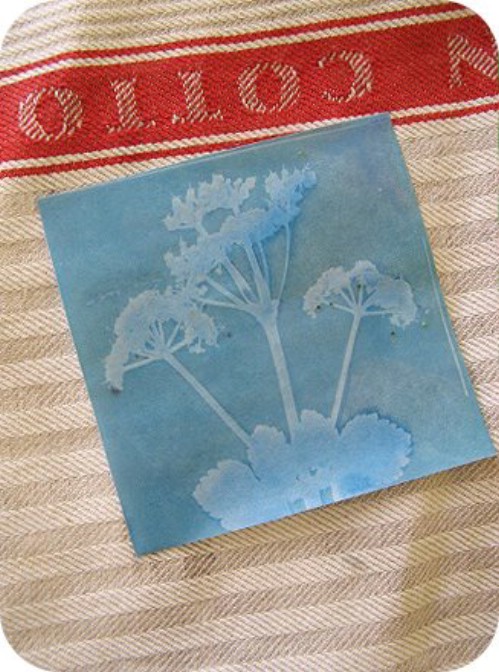
Sun Prints
When the sun is shining and you need a craft for the little ones, these sun prints are perfect. You will need sunlight to make these so this is not really a great one for rainy days, but it’s perfect for those super hot days when you need to spend some time indoors. You can take a little walk outdoors to collect things to make your sun prints from. Leaves, flowers and other natural items work really well. Then you’ll need to assemble the image and leave it outside in the sunlight for a minute or so, depending on how bright the sun is on the day you do it.
DIY Instructions and Project Credit - Thelightgarden
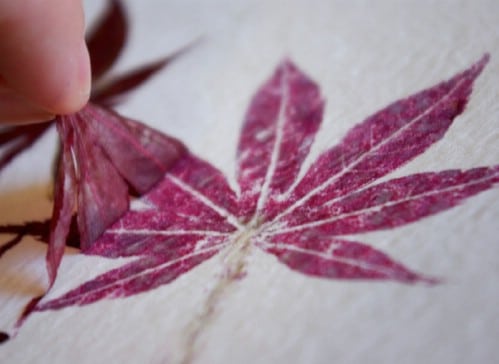
Hammered Prints
If your kids love doing this with nature, these hammered prints are an excellent choice. They can use leaves, flowers or other things that they found outdoors. You will need a few supplies for this one like hammers, scissors, tweezers, acrylic finishing spray (which is totally optional) and paper that is acid free. The prints are beautiful and can be framed and given away as gifts to the grandparents or kids may just want to frame them and keep them in their rooms. They’re relatively easy to make and even toddlers can help by gathering leaves and flowers.
DIY Instructions and Project Credit - Buildmakecraftbake
DIY Traditional Kite
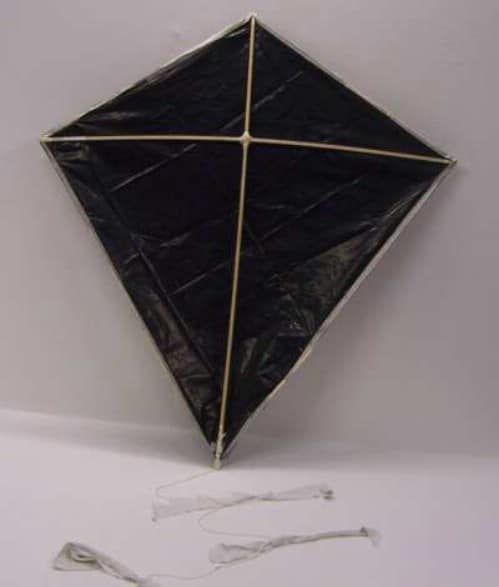
When the wind cooperates, a kite is the perfect way to pass the summer days. If you don’t have a kite for the kids, don’t worry. You can help them to make one themselves. This traditional kite is wonderful and kids will have a blast decorating it and watching it soar into the sky. You will need some old newspapers or a plastic bag as well as a few sticks for the base, masking tape, string for flying the kite, scissors and a few strips of fabric. This is a great project for kids of all ages and once you have all finished your own kite, you can make a day of flying them together.
DIY Instructions and Project Credit - Stormthecastle
Milk Carton Bird Feeder
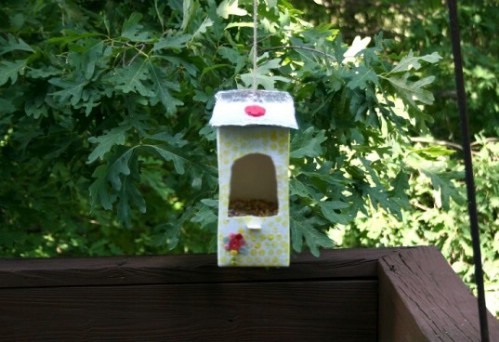
Before you throw out those empty milk cartons, clean them up and let the kids use them to create unique bird feeders. Not only does this give you a great project, it allows the kids to watch their bird feeder being used all summer long. They can decorate the feeders however they want and this is a great project for kids of any age so get the toddlers involved in the process. Once the feeder is finished, just hang it up and fill with birdseed and your little ones can watch the birds enjoying the feeder that they built for them.
DIY Instructions and Project Credit - Inhabitots
Homemade Edible Finger Paint
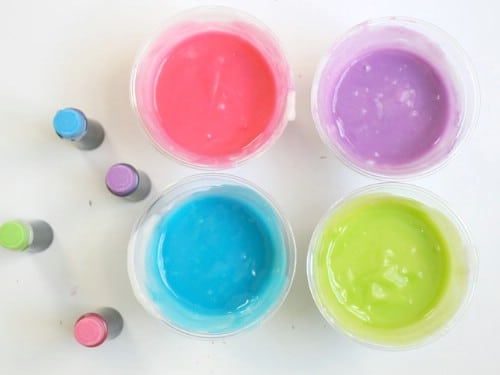
Let the kids have a blast making pictures with homemade finger paint that is completely edible. Instead of worrying over what ingredients may be included in store bought paints, make your own and even little ones can enjoy finger painting without you worrying over them putting the paints in their mouths. The paints only include flour, sugar, salt and food coloring so they are completely safe and non-toxic. Let toddlers go wild painting their favorite pictures and do so without any worries of what they may be ingesting during their art time.
DIY Instructions and Project Credit - Momtastic
Paper Boats That Float
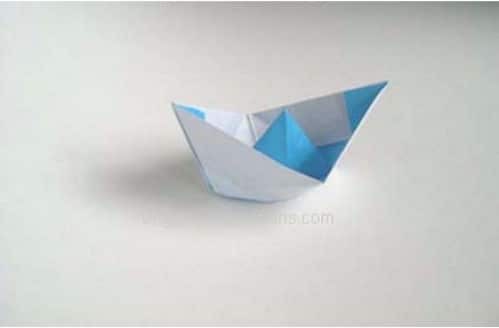
Paper boats are really fun to make and to play with, especially when they float without sinking. Kids will love these origami boats and they can decorate their little boats however they want before or after they are put together. Once done, you can fill up a kiddie pool with water and let them enjoy cooling off while they are floating their little boats. You only need paper for this craft and of course some water for them to enjoy floating their boats. If it’s a rainy day, fill up the tub and let them play with their boats while getting clean.
DIY Instructions and Project Credit - Origami-instructions
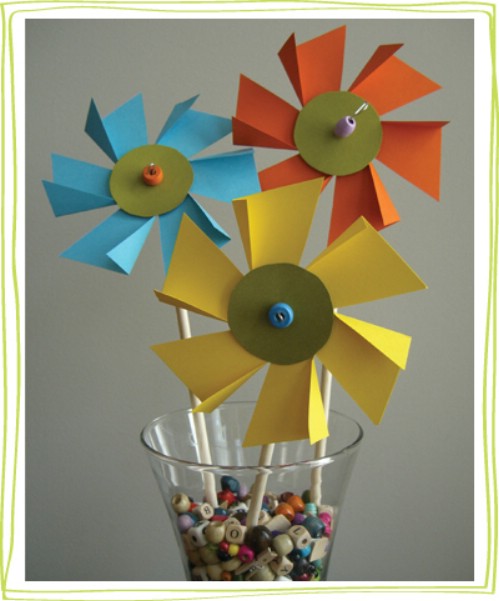
Flower Pinwheels
Kids can create these wonderful flower pinwheels for displaying in the garden and they are really easy to make. You need cardstock, large paper clips, scissors, beads and dowel rods for holding the pinwheels when they are finished. Kids can add any decoration that they want like coloring, glitter or just about anything else. You can use colored cardstock, plain cardstock and let the kids color it or you could recycle some cereal boxes and use the cardboard from that. They can display these outside or you can just put them all in a vase and use it to decorate the dining room table.
DIY Instructions and Project Credit - Alphamom
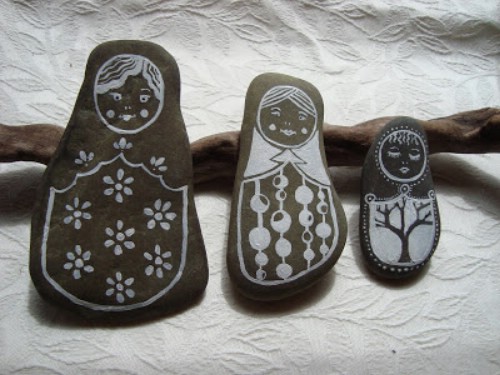
Rock Dolls
If you have a few rocks outside that you need picked up and you have kids that need a summer project, put them together and create these rock dolls. You need rocks that are relatively smooth on one side and some paints. Kids can paint the rocks into people and then you can use them to decorate outside or they can play with them until they’re tired of them. Let them create a little rock family from their dolls and display on a table for everyone to see when they visit.
DIY Instructions and Project Credit - Mayamade
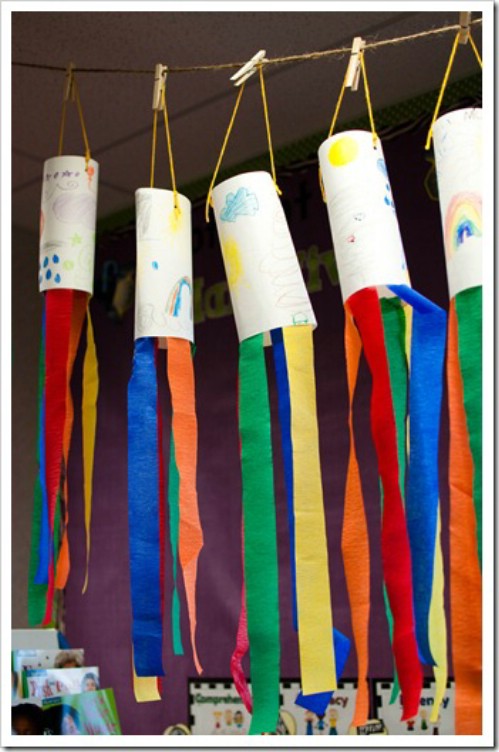
Paper Bag Wind Sock
You can proudly display your kids’ summer crafts and let them have a good time making them with these paper bag wind socks. You need a paper bag for each one and these are really inexpensive at the Dollar Store. Just pick up a pack of paper lunch bags. You also need a few streamers, some construction paper and your kids’ imaginations as they can decorate them however they wish. These are perfect for hanging on the deck or porch or you could have the kids make them as gifts for grandparents or neighbors. They’re as fun to look at as they are to make.
DIY Instructions and Project Credit - Canadianliving
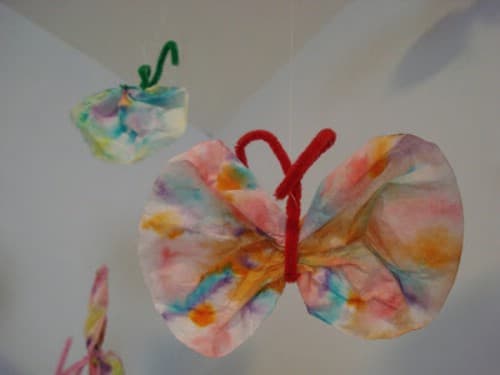
Coffee Filter Butterflies
Take a cheap pack of coffee filters, some imagination from your little ones and a few pipe cleaners and you have the perfect summertime project for little ones. These butterflies are super easy to make and kids will adore decorating with them when they are finished. This project is suitable for kids 18 months and older so it’s great for toddlers. You simply have to flatten out the coffee filter and let your little one decorate it however they want. Spray it with water, let it dry and then add the pipe cleaner and you have a very colorful butterfly that kids will adore.
DIY Instructions and Project Credit - Sycamorestirrings
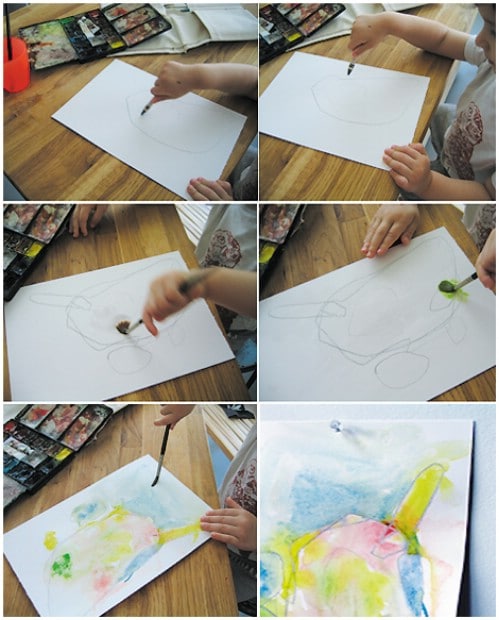
Watercolor Resist Paintings
These watercolor resist paintings are fun for kids to make and they are quite unique when they dry. The crayon stands out sort of like when you use crayons on Easter Eggs and then dye them. You need watercolor paper or heavy cardstock, crayons, watercolor paints and paintbrushes, and a cup for water. Just let the kids draw whatever they want on the cardstock and then cover the paper with water. Pour the watercolor paints over the entire paper surface and once dry, it will create a very unique piece of artwork. You can then frame or hang these on the fridge for display.
DIY Instructions and Project Credit - Bkids
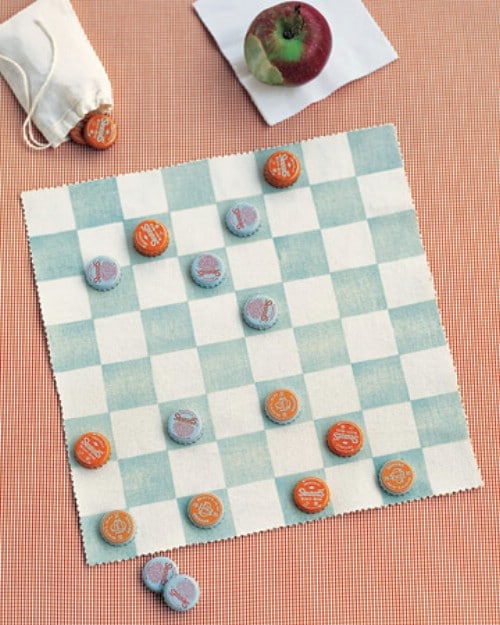
Homemade Canvas Checkerboard And Bottle Cap Checkers
Let the kids have fun learning to play checkers on those rainy days and if you don’t have a checkerboard, they can just make one themselves. You can create a great checkerboard from scraps of canvas fabric and the checkers can be old bottle caps so keep the caps when you recycle those plastic bottles. You can paint the caps if you don’t have several in two different colors. Your kids will love making this checker set and they will have hours of fun playing with it as well. This is a great game to take along on camping trips and other long rides.
DIY Instructions and Project Credit - Marthastewart
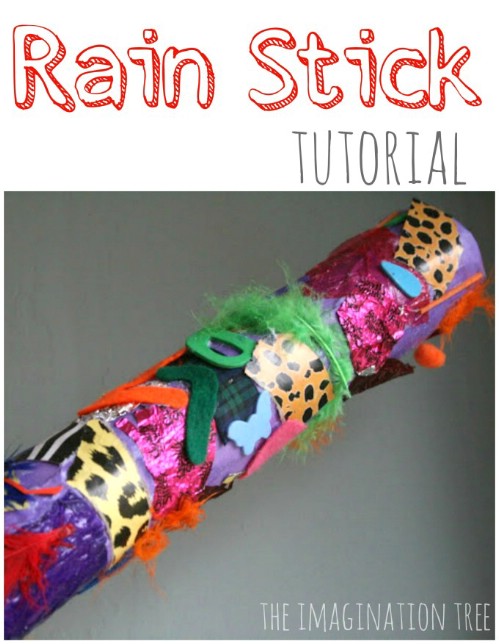
Rain Sticks
Rain sticks are great because they have the sound of rain when you shake them. Kids can make their very own rain sticks and decorate them in any way that they want. Note that this project does call for hammers and nails so be sure that your little one has your supervision while doing it. When they are finished, they can decorate the stick and have hours of fun listening to the sound of rain that they have made. This is a great project for teaching fine motor skills to toddlers and to let them express their creativity.
DIY Instructions and Project Credit - Theimaginationtree
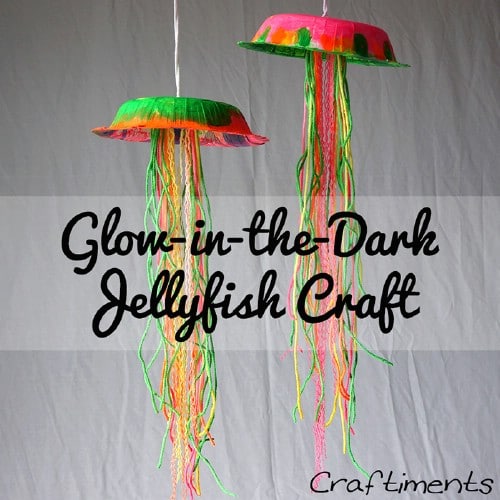
Glow In The Dark Jellyfish
Imagine the fun your kids will have making these jellyfish that glow in the dark. Once they’re finished, kids will adore hanging them in their rooms so that they can enjoy them every night. To make them, you need some heavyweight paper bowels which will be painted inside and out. You also need glow in the dark acrylic paints which you should be able to find at your local craft store. You need a few other supplies like yarn for hanging, scissors and paint brushes. This is a good project for kids of any age and everyone will love watching the jellyfish glow.
DIY Instructions and Project Credit - Craftiments
Firework Paintings
This is the perfect pre-Fourth of July celebration project but kids can do it any time during the summer. Kids make their “fireworks” from pipe cleaners and then dip them into glittery paint to create beautiful firework paintings that you can use to decorate for your Fourth of July parties. Cardstock is a great choice of paper for this one as it’s a bit sturdier than regular paper and you can frame these if you want and hang them throughout the house for a bit of added decoration. Or, just let the kids display them outside to decorate for your Fourth of July cookouts.
DIY Instructions and Project Credit - Jugglingwithkids
Butterfly Beach Bucket
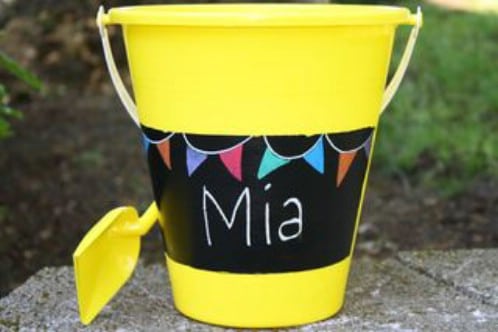
Whether you are heading to the beach, have a sandbox that your kids love playing in or you just want a project that is easy and inexpensive, this butterfly beach bucket is great. You just have to print out the butterfly template and cut it out so that the little ones can display it on their buckets. You could also do other decorations if you want. This is a great gift idea for summer birthdays, particularly for little ones who love getting sandbox and beach supplies. If you are headed to the beach for vacation, let the kids make their own buckets before you leave and fill with snacks and toys for the road.
DIY Instructions and Project Credit - Craftsandsutch
Character Baseball Caps
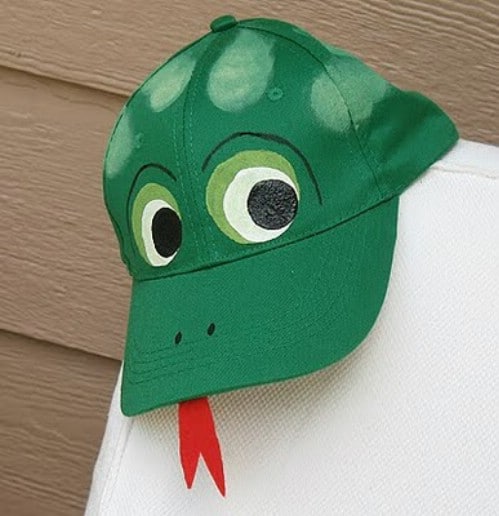
Bored little boys are never a good thing. When they need something to keep them busy, get them started on these frog baseball caps. You need a green baseball cap (red if you want to make a ladybug, which is great for little girls), some acrylic paints and a few other supplies. The hats are adorable and your little ones will love wearing them all summer – plus they help to keep the sun out of their eyes and off their faces so you have fewer worries of sunburn when outdoors. The hats are really easy to make and your little ones can customize them however they want.
DIY Instructions and Project Credit - Craftsbyamanda
Sunflower Marshmallow Pops
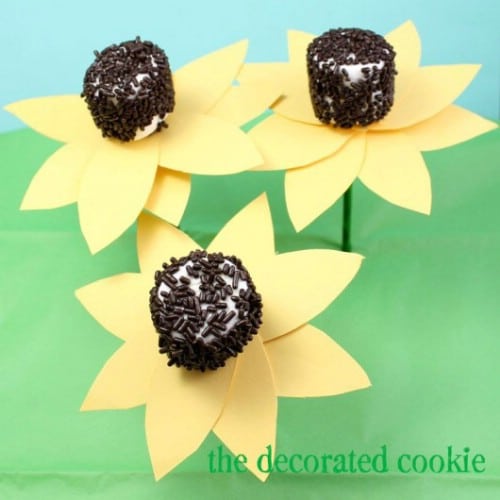
Satisfy their craving for fun and sweets at the same time when you help the kids make these delicious sunflower marshmallow pops. You need a few marshmallows – the larger ones work really well, as well as chocolate sprinkles and some construction paper or cardstock and lollipop sticks. The marshmallows are covered with chocolate sprinkles to create the inside of the sunflower and the blooms are actually made from yellow cardstock. This is a great project for rainy days when you need something to keep the kids busy and they can enjoy a great snack when they are finished. They’re also great for summer parties.
DIY Instructions and Project Credit - Thedecoratedcookie
Hanging Cheerios Bird Feeders
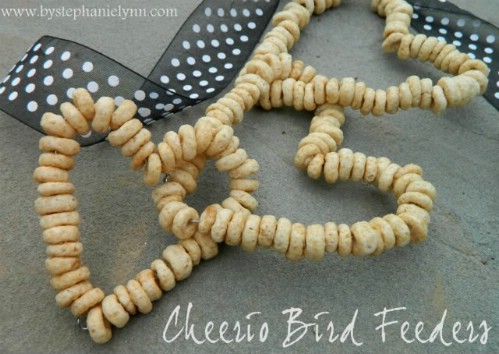
Cheerios are rather inexpensive, particularly if you buy the store brands at the Dollar Store, and you can use them to create wonderful bird feeders that are easy enough even for toddlers to make. You will need to pick up some floral wire if you don’t already have it or you can use pipe cleaners which is recommended if you are making these with toddlers. Just string the cereal onto the pipe cleaner or floral wire and then bend into whatever shape you want. Even toddlers can stick the cheerios onto the pipe cleaners so this is a great project to keep them busy and they’ll have a blast watching the birds around their feeders.
DIY Instructions and Project Credit - Bystephanielynn
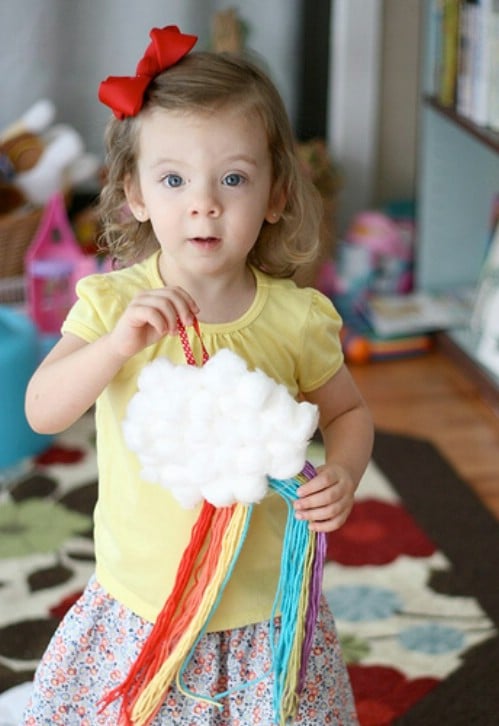
Cotton Ball Rainbow
Beautiful fluffy clouds and colorful rainbows will really thrill the little ones. They can make their own fluffy cloud and rainbow with a few cotton balls, some colorful yarn and a paper plate. For younger kids, you may want to have strips of yarn cut out for them which they can then glue to the back of the paper plate. The cotton balls cover the plate and look like a huge cloud. You can hang these anywhere with some yarn or ribbon and this is a great project for rainy days while they wait on the real rainbows to appear.
DIY Instructions and Project Credit - Raisingmytwogirls
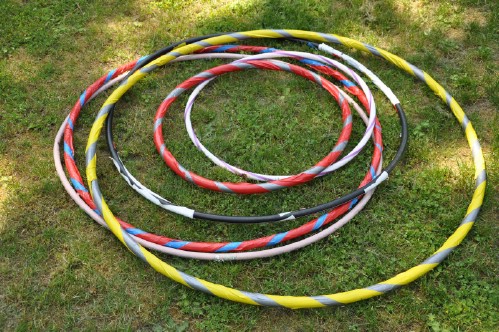
Homemade Hula Hoops
If your kids love playing with a hula hoop but you don’t have one on hand, let them make their own. Granted, you can pick these up at the Dollar Store for around a buck but what’s the fun in that? Kids will really love creating their own and making them totally unique. You will need irrigation pipe, which is really inexpensive, along with some duct tape to hold it all together. Kids can decorate their hoops with colored duct tape or colorful electrical tape which works perfectly. Just let them go wild adding different colors and designs and then they can get some exercise using their newly created hoops.
DIY Instructions and Project Credit - Hillbillyjillies
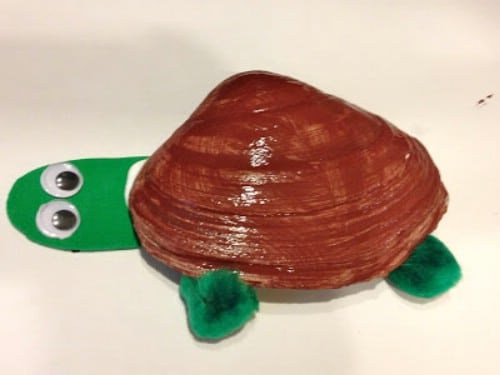
Seashell Turtles
Kids will really like these little turtles made from seashells and this is a great way to use up those shells that they collect on the beach while you’re on vacation. If you don’t have any shells, you can get them really cheap at a craft store. You need a large seashell for the turtle along with some googly eyes, pom poms, green paper or foam sheets, brown paint and some glue to hold the eyes on. They start by painting the shell brown and then while that dries, they can cut out the head from the green foam sheet or paper. Decorate the head with the eyes and add a tail and they’re all set.
DIY Instructions and Project Credit - Thechirpingmoms
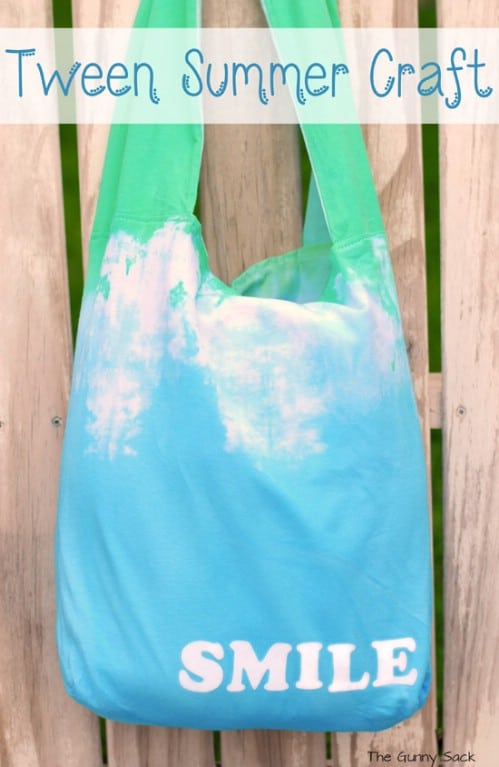
Tie Dye Tote
This is a great project for preteens or teens, particularly those who may want a new tote to take along on vacation. Just grab your tie dye materials or if you don’t have a kit, you can create one yourself with a few dyes. You will need a plain white tote which you can get at a craft store if you don’t have one on hand or if you sew (or if your teenager does) just make the tote yourself. Your kids can use whatever colors they want to tie dye the tote and create something completely unique. This is also a great gift idea for upcoming summer birthdays for their friends or for grandma on Mother’s Day.
DIY Instructions and Project Credit - Thegunnysack
Crazy Feathered Parrots
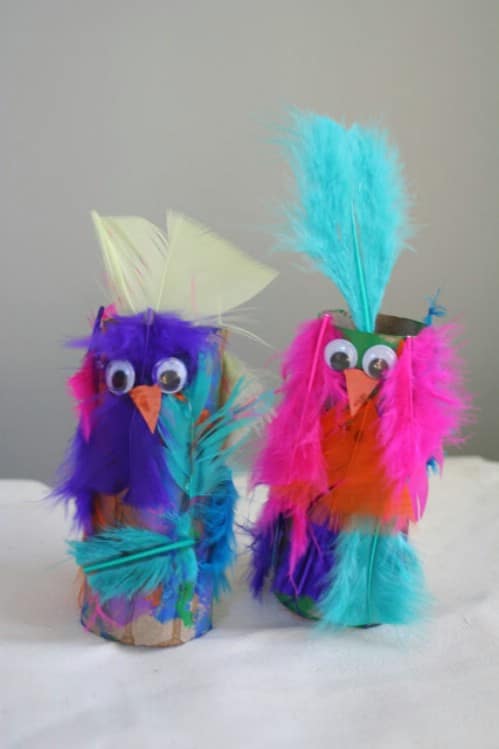
Crazy is a great word to describe these little parrots that your kids can make from toilet paper rolls. You need the empty rolls and a few colored feathers which are really cheap at crafts stores. Glue will hold the feathers on nicely and you can also add googly eyes and a beak. The kids will adore making an entire family of these little critters and they are so colorful and beautiful that you’ll love displaying them when they are finished. Note that they can use yellow feathers to make canaries, blue ones for bluebirds and so on so if they want something besides just parrots, you can let them create any number of lovely birds.
DIY Instructions and Project Credit - Littlepageturners
Homemade Window Clings
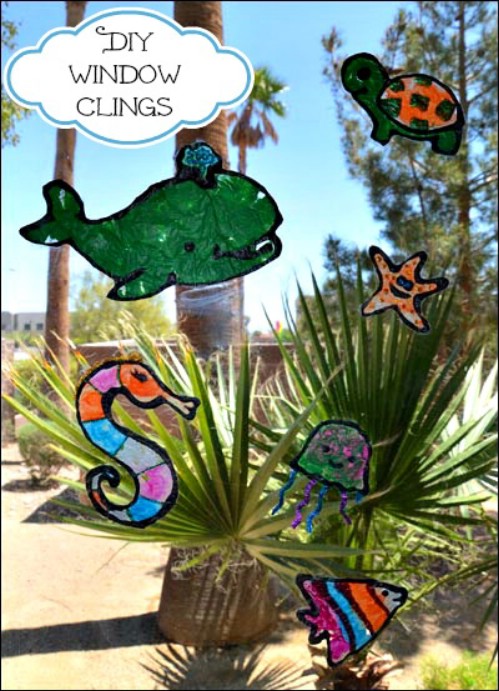
Let the kids decorate the windows with homemade window clings. These are so easy to make and they are really inexpensive. Once they’re finished, kids will have a great time decorating all the windows in your house or they stick really nicely to bathroom mirrors. You need white glue, paint or food coloring, paint brushes and some wax paper to create the cling templates. You can print off any number of images to use for making the clings and they can decorate them with glitter glue pens, googly eyes, sequins or any number of other crafty supplies.
DIY Instructions and Project Credit - Gummylump
Kids DIY Wind Chime
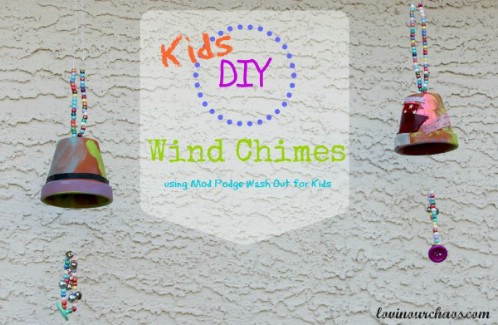
Wind chimes are wonderful to hear and younger children are completely enthralled by them. You can help your little ones to create their own wind chimes that they will love listening to when the wind permits. You will need a small (or whatever size you prefer) terra cotta planter, some cord for hanging the chimes, bells, buttons and beads for making the chimes and a few supplies for decorating as well as mod podge and paint. Glue sticks are helpful in keeping everything in place and kids can decorate their wind chimes however they want.
DIY Instructions and Project Credit - Lovinourchaos
Mod Podge Yo-Yo
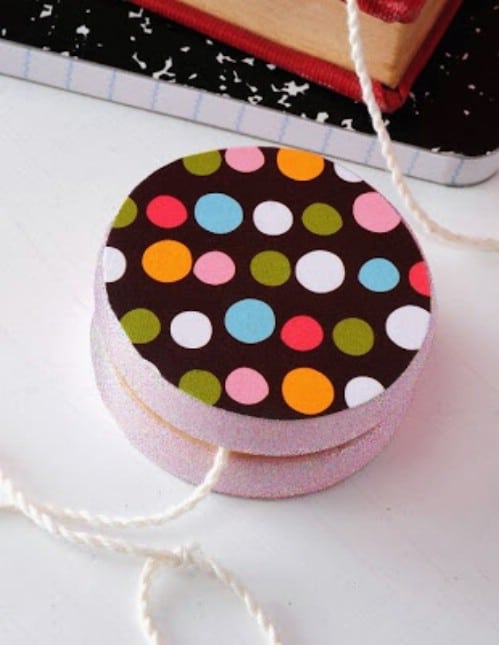
Wooden yo-yos can be turned into customized toys when you add a little imagination and some mod podge. You can use scrapbook paper, wallpaper or just about any other type of paper to cover the yo-yo and then let your little ones decorate however they want. Incidentally, once they are finished they will have loads of fun playing with their yo-yos. Note that younger children may not be the best candidates for this project, particularly when it comes to swinging the yo-yos around but it’s a great choice for preteens and teens who just need something to do to pass the time.
DIY Instructions and Project Credit - Modpodgerocksblog
Shaving Cream Marbled Rainbows
Shaving cream, some liquid watercolors and paper will give the kids a great start to a craft that they will love. You will need to spread some shaving cream (the foamy kind) in a tray or a pan and smooth it just a bit to begin. The kids can then just add blobs of color wherever they want it either with eye droppers or paint brushes. Take a stick and swirl the colors together and then place a piece of paper on top. The kids can help you to hold the paper in place for a few minutes. When you lift it up, you have a wonderful painting that you can frame and hang.
DIY Instructions and Project Credit - Thechocolatemuffintree
Bubble Prints
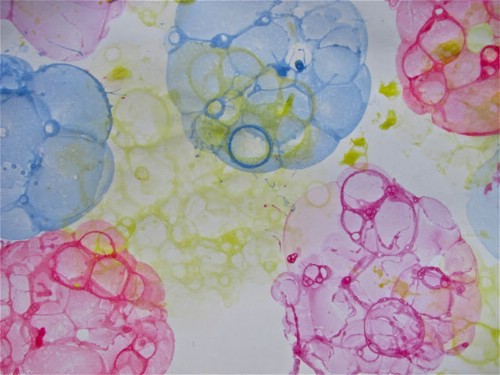
This is an excellent project for days when you can get outside and it’s great even for younger toddlers. You will need colored bubbles or you can make your own with some tempera paint, dishwashing liquid and water. Pour different colors into plastic disposable cups and add a straw to each cup. The kids simply blow the bubbles onto paper or cardstock and when they pop they will create beautiful pictures. You can hang those pictures on the fridge, frame them or use them to create cards or other items for future use.
DIY Instructions and Project Credit - Thechocolatemuffintree





George Garcia
Lovely article, it is helpful for parents running out of ideas in keeping their kids busy. Aside from giving your children a time for fun and learning at the same time, you can also develop a sense of resourcefulness with the use of readily available materials or some materials meant to be in trash.